Welcome to Our Website!

HTC ReZound Smartphone

Today, yep on New Year's Eve, we finally broke down and ordered a Smartphone. As you can observe by the title it is an HTC ReZound. We looked over all the phones available and read the Reviews. They all complained about the battery usage so that was kind of a mute point. However, the features offered -and- the ones we were interested in seemed best served by this phone. We haven't had any experience with this -or- any other Smartphone. Hopefully, it won't cost us an arm and a leg to learn things. The phone is on back-order and we won't see it till some time between Jan 19th and Feb 6th, 2012. Guess everybody read the same reviews we did. Verizon announced it's availability 14 Nov 11 -but- it was officially released, by HTC, on 3 Nov 11.

So, we decided to start our WebPage on it anyway and learn as much as we can about it before we receive it. Then as we find things we can record them here for ourselves and anyone else that is interested. Which will result in some chaos for a while. We will get it organized -but- getting the info first -and sharing it- is more important to us at the moment. Info... Speaking of which, we try to give credit to all, in the things we find. However, sometimes we forget for one reason or another. IF you find something here that you feel you should get credit for, but haven't, please send us an E-Mail and we will correct the error. So far we are liking this phone... a lot.
Names referring to the phone: vigor(rezound) ADR6425LVW Verizon.com


  Hurray!!! It arrived early by UPS January 5th, 2012/6:15pm!!   

HTC ReZound Device Layout:
HTC Rezound Device Layout
1. 3.5mm headset jack
2. earpiece - and the
   proximity sensor which is just above the    check mark start
3. touch screen
4. Menu button
5. usb connector
6. Home button
7. microphone
8. Search button
9. Back button
10. led notification - and the
     light sensor is here too
11. front camera
12. Power/Lock button


IF you get one of the Native HTC ReZound screen protectors you will see notches in the areas at the top of the phone where the two sensors are located. IF you get some other type of protection you will possibly block the sensors. -Or- possibly at least make it difficult for them to work.
For your convenience:   Verizon Glossary   -  WiKi ReZound   -  Android Common Terms  

Warning
The instructions -and- information in this guide are intended for use with the HTC ReZound. Applying these instructions on another device or model may, and probably will, produce undesired outcomes.

 August 1st, 2015/12:24am  Well, I found this  SpecOut   site in my many searches for information. Looked interesting so I am putting a reference to it here. However, DO NOT believe that the Rezound can handle Android 5.1... cause as of this date ... it can't.

ARRGGHHH!!! --- Oooops, it broke!!

Well, here it is, a little over 7 months, and it broke! Yep. Had it on charge and the wife called. Picked it up and nothing but her picture... which is still all I get. Pretty -but- the phone is not useful. The "Pull Ring" at the bottom is just a decoration... now. Pulling on it does nothing. Can not get off that first page.

Went to the Verizon Store -and- contrary to what we have heard, they were very friendly and helpful. In less than 20 minutes they looked at our phone, agreed that it was broke, and then ordered another. It will be at our residence the next day. We are to keep the broken phone till the new one arrives and then send the broken one back.

Now then, we have read on the Net that they do not necessarily send 'new' phones. We have a strong chance of getting a - Certified Like-New Replacement (CLNR) device... which consists of:

  • A complete 100+ point checklist to ensure every area measures up to our standards of excellence
  • Visual cosmetic inspection
  • Advanced functional, manual and electronic inspections
  • Latest software and hardware upgrades
Now this part we do NOT like:

If your current device is under warranty and experiences electrical or mechanical malfunction due to manufacturing defect, you will receive a Certified Like-New Replacement (a like unit -or- one of comparable quality).

We do NOT want one of comparable quality... we want our HTC ReZound.

Ok. Next day we got our New Phone. Wasn't really new but loooked and acted like it. It was one of those CLNR's. Contrary to some, we have had good customer experience with Verizon.

 July 10th, 2013 / 11:37am  Writing up today concerning our latest breakage. Whilst at work, 3 days ago, we tried to make a phone call and the screen went crazy. After work, and over the next couple of days, we tried to 'fix' it. However, it was another 'Electronic', or 'Hardware' Problem and we had to 'exchange' it. The replacement arrived today about half an hour ago.


 September 9th, 2013 / 2:30pm  Another phone. The last CLNR phone was 'not' good from the start. The physical buttons were not sticking up far enough for 'comfortable' use. This latest CLNR is not much better, in fact, it may be worse. However, the reason for needing a replacement phone... the proximity sensor was failing... works ok on this phone. So, we will put up with the buttons for now. Hopefully, the next time... IF there is a next time... we will get one with better buttons. Not to sure how much longer they are going to offer "replacements" for this phone since it has reached and exceeded its EOL.


 March 11th, 2014 / 12:33pm  Another phone. Another CLNR. Finally, got tired of physical buttons on the previous phone. They seemed to be getting worse. Went back to the store and complained. They agreed and ordered another CLNR, which I received today. The buttons are better -but- still not as good as my very first one, which was Brand New. I "tried" to put my 'last' screen saver on and failed miserably. Went back to the store and, naturally, they did not have any. However, they could order some -and- they will put it on. Waiting for the screens. Using the one I put on for now. Got to have some protection -even if- it is bubbled!!

Now you might be asking... "Why doesn't he just get a new phone??". They haven't come out with one that I like... yet. HTC is comming out with a new version of the HTC One (M8) on March 25th. The previews of it have been interesting.


HTC Rezound hard reset using the phone buttons

Performing a hard reset will remove ALL data including the Google account, system data, application data, application settings and downloaded applications. Only perform this reset if absolutely necessary.
(Only reason this is here is... we tried the Hard Reset in order to fix the above problem. But it didn't.)
If you can't turn on your phone or access the phone settings, you can still perform a factory reset by using the buttons on the phone.
  1. Remove the battery (Please see OnOff), wait for a few seconds, then reinsert the battery to turn off your phone.
  2. While holding down the volume down key, press the Power / End key.
    note When the HBOOT screen appears, release the keys.
  3. Press the volume down key to select Factory Reset then press the power key (upper-right corner).
    note This boot process takes several moments, reference the progress bar located in the upper-right. If the device hangs or freezes, remove / replace the battery, refer to Inserting / removing the battery for assistance.
  4. To setup the device, refer to Initial Activation & Setup.


Verizon Wireless Early Termination Fee

If you purchase a discounted phone with a two-year contract and then cancel after the 14-day return period, Verizon will charge a pro-rated Early Termination Fee based on your phone/device type.
For my HTC ReZound Smartphone which was purchased after November 14, 2009, Verizon charges $350 minus $10 for each full month of your Service Commitment that you complete.

  New Phones - 1 Brand New - 3 CLNR's

We write up a lot of things -cause- we are forgetful. Sometimes we even forget that we have written something up! But once again we are going to write up a little bit about our "third" ReZound. Oooops, now on our fourth!! The third one had a bad proximity sensor. We put up with it for a while and finally had to ask for another new one... well another CLNR.

  • 1st: December 31st, 2011 - Phone purchased... Brand New.
  • 2nd: August 14th, 2012 - First Certified Like New Replacement.
  • 3rd: July 10th, 2013 - Second Certified Like New Replacement.
  • 4th: September 9th, 2013 - Third Certified Like New Replacement.
  • 5th: Febuary 6th, 2016, 6:52PM - Purchased a 'used' one so that I can keep my regular phone active and unmolested by my Android OS changes and testing. Should have done this long ago -but- they were still expensive. Got this used one for $36.00 + $6.80 shipping. Apollo Beach, Florida, United States. My number 4 is still going.
         

 September 2013  We had lots of praise for the previous 'Problem encounters' -but- this one was not as congenial. The technician was NOT as friendly as the previous personel -and- they did not appear to be as organized. The people were different... either cause the others have left our just the day and time. At any rate the 'Tech' tried to pull a fast one on me. After explaining the problem... and showing him... he took the phone and 'played' around with it a little and then handed it back to me after making a call to it and the screen was still showing. He then said, "How's that??" and in my astonishment I said "How did you do that??". I was in total bewilderment cause I have checked ALL the settings and even scoured the Web for information on setting and calibrating the proximity settings. What he had done was "Set the Display to NEVER turn off!!" That ... that was totally unacceptable. So, he begrudgingly set things up for me to get another phone... another CLNR one. It also was -not- an over-nighter. Took two days. -But- that was ok. We checked the proximity sensor as soon as we got it and it -appears- to be ok.

Now then, let me say this about that. Verizon, at least the store we deal with, was vey cordial and co-operative in the replacements. Both were over night operations. No hasel, the phones were obviously malfunctioning and the 'problems' were both hardware related. They just called in for the replacements. Whole procedure took about 20 mins both times.

We now have our second replacement(3rd Phone) and need to set it up. However, this time, because of things we have learned on the first two, we want to back up the "Stock ROM". This one came with ICS and hboot 2.28 and the 2.23 Radio's. So, we are somewhat ahead of what all of our Web Pages are about. Upgrading to that level. And because most of the ones out on the Web are not of the same level, we want to preserve, backup everything so that we can restore it to this condition IF neccessary in the future.

 First:   Ok, we want a "Stock" save and backup -but- in order to do it we need to get "UN-Locked" and "root'd". Seems that those two are required for almost anything of importance. Well, you need 'root' permissions in Linux to make changes to the Operating System -and- guess what?? Android is Linux. So our "Backup" will be UN-Locked and root'd?? Let you know on that later -but- logically it makes sense.
Oh Darn!! This is a new phone. Well, it is a different one. We gota get another "Unlock_code.bin"!! BUT first get rid of the 'old' one cause it is no longer any good.
RutRoh... another 'new' phone... another "Unlock_code.bin".

  1. Menu -> Settings -> Power ... UN-check Fastboot Box
  2. Menu -> Settings -> Developer options ... Check the USB debugging Box
  3. Power down FULLY.
  4. Follow the instructions here: Unlocking
  5. Now IF you did not continue on, and do the 'root'ing... go here: Rooting
  6. Root Checker by Free Android Tools: gives an easy and quick way to check if your phone is 'Rooted'.
        THIS APPLICATION DOES NOT ROOT YOUR DEVICE!!!
    This app gives you the root information -and- build information. Some good System info. That is primarily why we like it. Also like to show off. Tap the icon, it says you're root'd!! or not. On Play Store
  7.   July 11th, 2013 2:45pm  We are UN-locked and root'd ... again!

 Second:   Alllllrighty now... we want to save our current Stock ROM. -But- it looks like we want to do it through TWRP which is NOT installed yet. The .img file that we got would not work in 'fastboot'. So, we have to install another 'app'. This one is called  GooManager . Through it we can install TWRP. We have done it before. -But- you have to be 'root'd' to do it. GooManager is obtained through PlayStore.
Now then, properly used, these two apps, and the PC, will eliminate a lot of button operations.
 Side Note:  Installing TWRP via GooManager offered us a pleasant surprise. We got TWRP version 2.6 instead of 2.5.

Now in order to install TWRP -after- obtaining GooManager, we go to the screen that has the GooManager icon and tap it. Then whilst in GooManager ... now pay attention here... we are going to tap the Menu, or Settings, Button on the Phone. then inside that we are going to tap "Install OpenRecoveryScript". This will install TWRP. ReStart -or- ReBoot your phone. Just because.

Now we can back up our "Stock ROM".

  1. Go to the screen with GooManager and Tap on it.
  2. In the menu presented Tap on "Reboot recovery". Tap on Yes for the confirm.
  3. After confirming that you want to do this, you will be presented with the TWRP selections.
  4. We select 'Backup' by tapping on it.
  5. Inside Backup you are given a list of the partitions. Boot, data and system are automagically selected. IF you desrire any others you will have to select them yourself.
  6. Below this list are three choices -and- one of them is where to put your backups. It selects the "internal card" by default. IF you want the external card, tap on the storage line and you will be presented with a choice screen. Tap on the radio button of your choice. Then hit OK.
  7. Now, back to the backup screen, you slide the button on the bottom to enact the backup.
  8. Wait till it finishes and then reboot.
  9. Highly suggested that this backup be copied to another medium. Your PC??

 Third:   S-Off. Have not done that... yet. It was a pain the last time -but- we don't believe that 'all' the tricks we want to try are available in S-On. So we will do it again.

 Fourth:   Either install the apps you want to play with -or- go directly to CM10.1. Great info: Rooting This 4th phone has a similar problem as the 3rd one. The 'Physical Buttons'. The don't stick up high enough for proper operation. In fact the 'only' one of these phones that had a good button height was the very first one. A "Brand New" one.
ReZound QHD (Accelerometer / Proximity Sensor / Ambient Light Sensor)


  From other reviewers

This section is brought about by laziness for one -and- wanting to keep what some others have said for another. They could say what we wanted to say... but couldn't -and- have some history on these Smartphone that we didn't know in the first place. These will only be excerpts with references to their page for the full story. Thanks to those we have "borrowed" from. Oh, and we may have changed -or- added some text because of what we have experienced. This is our First Smartphone and we are learning something everyday. It gets 'funner' by the minute.


Special Review on  engadget . We really liked the ScreenShots.


HTC ReZound Vs Galaxy Nexus Vs Droid RAZR Triple compare at: geek.com


HTC ReZound Review at: Android Community
DROID RAZR Review at: Android Community

 The Verge   Every few months -- a year at most -- we see a feature or spec introduced on a phone that represents a new standard, a baseline that future phones in the high end have no option but to match. If you go back a few years, you can build a list: the front-facing camera, the gigahertz processor, HD video capture, the WVGA display, the dual-core processor -- all line items that set a new bar. They're not always important line items, of course -- we could do without front-facing cameras, I suspect -- but regardless, these kinds of things force manufacturers to up their games and move forward.

Today, that must-have feature is now the 720p display. It wasn't more than a year ago that WVGA resolution was perfectly acceptable on a $200-plus smartphone, and qHD had just barely started to replace it over the course of 2011. It's pretty remarkable to think that you've got close to a million pixels on a display that measures under 5 inches across.

HTC ReZound Verizon is the very first of an onslaught of 720p phones to hit the US market. It's the first phone to launch with a true high-def display in the US. 342ppi. And if you find fault with this display, it's because you're specifically looking for it, not because you're running into limitations in the course of using the phone normally.


Warning
The instructions -and- information in this guide are intended for use with the HTC ReZound. Applying these instructions on another device or model may, and probably will, produce undesired outcomes.

  Applications & Permissions

Original text by Chris Moor on Talk Android. We made changes to fit the ReZound on ICS. Also Permissions and Security from Jerry Hildenbrand on AndroidCentral.
Permissions

Now then, credit to the original authors and links to their pages is out of the way. Copied portions will be placed in here 'with' modifications to fit the ReZound. Notice the date... we have had this Smartphone since January 5th, 2012 -and- we are just now getting around to installing one -or- more applications. Actually, a week or two ago we installed our first and it was FREE. What brings this section about is desiring to install an App that costs money. It is a one time charge -but- it still costs money. -AND- that can be a problem. Apps for Android devices come primarily through Google's Play Store. Was Android Market -but- now it is Play Store. In order to obtain an App that costs money, you MUST use Google Wallet. In order to use Google Wallet you must sign up with one of your Credit Cards. Now then, a person's name and the CC number SHOULD be all that is needed. However, when we tried to make our FIRST purchase they replied back that they could not confirm our identity and wanted a copy of our Water Bill and a copy of our Drivers License -- faxed to them!! No way! That was NOT required for our PayPal account and if that is what is required for this Google Wallet -- then we will either find another place to obtain the App -or- do without it. This thing is supposed to only be a phone anyway. dumblook We did!! The Amazon Appstore.


The primary way, as well as the most common way, to install an Android application is directly through the Android Marketplace Google Play Store   Amazon Appstore. The Appstore is basically a centralized repository of applications that have been developed for Android. Most are free, but some cost money.


Installing Android Applications

In order to install an Android application onto the device in question, proceed with the following steps:

  1. Tap on the Google Play Store Amazon Appstore icon.
  2. Here, any option from Applications to Games or Search may be accessed. Utilize these tools to find the desired application. Use the Search to find a specific one or simply browse until the first appealing one comes up on the list.
  3. Each application should come with its own rating and description. Evaluate carefully.
  4. Simply Tap on the application to view more details and click the Install button towards the top of the screen.(It will either say 'Install' -or- have a dollar figure in it.)
  5. The next screen describes what it will require to work. Simply agree to the terms and it is installed.
  6. And of course we have an install from your PC:
      adb install <path_to_apk>  

Uninstalling Android Applications

Sometimes an application just needs to go. Whether a better one has been found or an application has simply worn out its welcome, it must be uninstalled. Uninstalling is as simple as it was to install it.

  1. Tap the 'Menu Button' at the bottom.
  2. Tap on Settings in the Menu List.
  3. Scroll down to 'Apps' and Tap on it.
  4. A list of installed applications will appear.
  5. Select the one to be uninstalled and simply click Uninstall.

With that, the application is uninstalled.

Viewing App Permissions

Apps require access to certain systems within your device. When you install an application, you will be notified of all of the permissions required to run that application. Please read and consider the permissions carefully. See below for a list of permissions and what it means for the application:

  • Cost Money: Used for permissions that can be used to make the user spend money without their direct involvement.
  • Development Tools: Group of permissions that are related to development features.
  • Hardware Controls: Used for permissions that provide direct access to the hardware on the device.
  • Your Location: Used for permissions that allow access to the user's current location.
  • Messages: Used for permissions that allows an application to send messages on behalf of the user or intercept messages being received by the user.
  • Network Communications: Used for permissions that provides access to networking services.
  • Personal Info: Used for permissions that provide access to the user's private data, such as contacts, calendar events, e-mail messages, etc.
  • Phone Calls: Used for permissions that is associated with accessing and modifying telephony state: intercepting outgoing calls, reading and modifying the phone state.
  • Storage: Group of permissions that are related to SD card access.
  • System Tools: Group of permissions that are related to system APIs (Application Programming Interface).
Amazon Android Permissions Explained
Application Permissions: (Help me understand what permissions mean)
  • Get information about the currently or recently running tasks: a thumbnail representation of the tasks, what activities are running in it, etc.
  • Write to external storage.
  • Write SMS messages.
  • Access information about Wi-Fi networks.
  • Monitor incoming SMS messages, to record or perform processing on them.
  • Access coarse (e.g., Cell-ID, WiFi) location.
  • READ_USER_DICTIONARY
  • Read the user's contacts data.
  • Initiate a phone call without going through the Dialer user interface for the user to confirm the call being placed.
  • Access the list of accounts in the Accounts Service.
  • Read only access to phone state.
  • Read SMS messages.
  • Access fine (e.g., GPS) location.
  • WRITE_USER_DICTIONARY
  • Access information about networks.
  • Record audio.
  • PowerManager WakeLocks to keep processor from sleeping or screen from dimming.
  • Call into AccountAuthenticators.
  • Send SMS messages.
  • Modify global audio settings.
  • Disable the keyguard.
  • Open network sockets.
  • Connect to paired Bluetooth devices.
  • Read or write the system settings.
  • Access extra location provider commands.
  • Access the vibration feature.
  • Discover and pair Bluetooth devices.


  Scott on Mobile Bloom

As the Title states, this verbiage originally came from Scott on Mobile Bloom. We liked his description of our phone, so we "borrowed" his words and added some and removed some. Goto his page if you would like to see the original.

The ReZound arrived on the Verizon Wireless 4G LTE network as the first phone in the United States with Beats Audio. The handset is still exclusive to the Verizon Wireless 4G LTE platform, and the full range Beats Audio sound system is delivered through an integrated pair of iBeats ear buds that ship with the handset. The red and black earbuds were made specifically for the Beats Audio software, and allow for easy hands-free calling with a built-in microphone. They also contain an in-line remote that allows you to rewind, advance or pause music when answering a voice call.

Rounding out the multimedia package is a built-in music player that supports all major file formats, as well as a pre-installed YouTube video player. An SRS(Sound Retrieval System) WOW HD surround enhancement system is on board as well as a preset equalizer. The HTC Rezound 4G Android smartphone has been promised an over the air operating system transfer to the Android 4.0 Ice Cream Sandwich (ICS) OS sometime from mid-June to mid-July, but that has not yet transpired. The handset runs Android 2.3 Gingerbread out-of-the-box, and the HTC Sense v3.5 UI Android overlay supports capacitive, multitouch gestures to navigate the phone. As far as we are concerned... it works great. I'm sure there are some wonderful enhancements within ICS -but- we are happy with the current setup. IF and when ICS comes, we are hoping that it doesn't break anything.
(ICS Over-The-Air updates started on August 2nd, 2012)

The display runs 4.30 inches, and that super LCD screen delivers an extremely high pixel density of 342 pixels per inch, resulting in an overall display resolution of 720 x 1,280 pixels. Light and proximity sensors are built in and automatically adjust for the proper brightness, while helping to conserve battery life. The hardware package on board the Rezound includes a Qualcomm MSM8660 Snapdragon microchip package, with a dual core 1.5 GHz Scorpion central processor at its core. Also on board is an Adreno 220 chip that handles all graphics processing, 16 GB of built-in storage and 1.0 GB of RAM system memory. The HTC ReZound 4G also comes equipped with a microSD slot that supports microSDHC cards, up to 32 GB in size.

Now then, we again must say that we are extreemly happy with this phone. We put off and put off, buying one of these "Computer" Phones and we are glad we did. Now that we have finally purchased one, we are very, no extreemly, glad that we waited. This phone is fabulous and fast.

The high resolution camera combo on board the HTC ReZound is reminiscent of the Galaxy S II camera combos, with a rear facing 8.0 megapixel camcorder and front facing 2.0 megapixel chat cam. That rear device contains an LED flash, and offers autofocus, white balance, geo-tagging and special effects package, recording video at 1,080P HD resolution. The front facing chat cam also offers video call support, and the HTC ReZound 4G delivers Google integration in the form of Google Search, Google Maps, Gmail and Google Talk applications.

 Top Smartphones for Verizon Wireless - Dec 2012

  1. Samsung Galaxy Nexus
  2. Motorola Droid Razr Maxx
  3. HTC ReZound 4G


Warning
The instructions -and- information in this guide are intended for use with the HTC ReZound. Applying these instructions on another device or model may, and probably will, produce undesired outcomes.

  Where to Start???

It can be, and is, difficult to talk about something that you don't even have... yet. Most of the Info presented at this time will be from others. Just repeated here for our benifit and yours IF you need it. Refinements will be made once we have the device. Consequently, because of these "random findings" the page will probably be, and is, a little disorganized. Don't know about you but we don't like jumping all over the Net from one site to another to get the info desired. So, we have copied from other sites and it is -all- here on this page. Consequently again, we have put in "Jump Points". Just check the menu at the top.
(Naturally, of course, images and PDF's are in/on their own pages.)
Well now, as mentioned above... we got it... early. Amazon and Verizon New Years present. I like doing business with both of them.
Later: Actually, we believe that we should be grateful to, and thanking, HTC. They evidently ramped up their production enough to get a lot of these phones out. Thanks HTC.

 User Guide: 05 Jan 12/7:42am   Wow! Wow!! This little phone has more capabilities than our first couple of computers -and- it is in strong competition with our current one!! Well, not really on that last one -but- it does one heck of a lot for a little 5.08x2.58x0.54 inch device. This is the first time we have researched a Smartphone this deeply. Didn't realize just how far we have come in our technologies. We think this is going to be fun!!

Now then, because of the pictures and explanations, we reference this User Guide a lot. So be sure that you can read it.

Turning it On and Off

Don't know why but this seems to always be buried deep in the Instructions instead of right up front. So, to be different, we will put it right up front. Like everything else, it is really simple "once you learn how". This is primarily for individuals who, like us, purchased their phone outside of a store. ie; over the Internet.

   Battery Removal/Insert

Assuming this is a brand new phone, you must first install the SIM card and the Battery. You must remove the back cover in order to accomplish these feats.   At the bottom end, on the back,  the end that has the Red iBeats symbol, you will find a small groove or notch. You hook your finger in this and pull up. The cover has curved edges that hook into the sides of the phone. New,... these should not be fragile and will withstand your pulling up on them causing them to spread out and finally release the upper part of the phone. Fortunately, this operation will not have to be performed often... unless your Batteries fail fast. DO NOT USE A BUTTER KNIFE OR ANY OTHER TOOLS. THEY WILL DESTROY THE PLASTIC. I have weak finger nails and was still able to get enough skin in the little crevasse to remove the back cover.
However, we have found that a "Fender Thin" Guitar Pick will work nicely with no harm to the phone.
Page 18 - 20 in the attached User Guide.

Once the back is off you can place your call to your provider in order to get your SIM card installed and your phone activated. We are saying this now cause you MUST co-ordinate these actions with your provider. We had installed our SIM card before calling and ended up having to remove the card and re-install it to start the operation from the beginning. Just an FYI.

 Swipe, Tap, Hold and Drag  Again, right up front, we want to explain a concept that might not be familiar to all. This is something that you MUST understand in order to use this phone (and some others like it). We're sure you have seen videos or commercials on TV of individuals waving their hands across the screens of a Cell Phone or another device and magically changing the screen. This is called Swiping -or- Sliding. With this phone you can impress your friends (and yourself) by rapidly lightly Swiping your hand across your Home Screen and watching it spin. -Or- you can do it slower and just see the Page or Screen that is behind it or next in line.

This, as we're sure you have found out by now, is a Touch Sensitive Screen. A lot, if not most, of the operations are performed by simply Tapping on a particular section of the screen or on an Icon on the screen. Other operations will require you to swipe -or- slide your finger across the screen to scroll up or down or left or right. Others still, require that you place your finger on a section of the screen or an object on the screen and press and hold to drag the item to another section of the screen. IF you have never used anything like this, we think that you will find it fun. You might think on it for a second or two before continuing. Just a thought...
More information is on Page 28 in the attached User Guide.

Now we want to mention something that we have found very, very useful. A 'capcitive stylus'. These come in a variety of colors and can be purchased on the Net. We recomend DHgate. They have regular full size pen type -and- they have some micro 3.5mm styluses that fit into your headphone jack. They come in handy if you don't have, or didn't bring, a full pen size stylus.

 Power ON  This is fairly simple. Simply pick up the phone and press and hold the Power/Lock button on top of the phone. Once you see some activity, release the button. IF this is your First time you will get messages about activating your SIM card. Otherwise you will see a default HTC screen with the Time, Date, 4 Icons and the Unlocking Ring. Again, this description is assuming that this is a brand new phone. The phone is Locked. In order to Unlock it you place your finger in the Half Ring at the bottom and Drag it towards the top.

 Power OFF  This one is more critical. Why? Cause you want to be definitely sure that the Power is OFF BEFORE removing the back. This is NOT just a push of a button. IF the screen is dark, press the Power/Lock button on top of the phone to light it up. Flip or slide the Half Ring at the bottom towards the top. This will bring up the default Home Page. Now press and hold the Power/Lock button on top of the phone until you get an Options Menu with one of the items being a Power Off button. Press, or Tap, the Power Off button in this menu and you should see your phone signing off. It will say "HTC quietly brilliant". The screen should then go dark and the phone will be Off.
More information is on Page 27 in the attached User Guide.

 Power Off - Two States  What?? Well, with this phone there are two states of Power Off. Fast Boot and Non-Fast Boot. Go into Settings, select Power and then at the bottom you have the choice on Fast Boot. Check it -or- Not. When checked, the phone does NOT completely shut down. It goes into a "Hibernation" state. This will, naturally, allow faster boots. If you leave it unchecked, then the phone will fully power down.

How to use it as a phone

Since its main purpose is to communicate with others we figure the first thing to do is figure out how to use it as a phone. -But- the really first thing to do is Activate it.

 Activation:  This like all cell phones must be Activated with and by your Service Provider. In our case Verizon. Now this was technically an Upgrade... a BIG one. Our previous phone did NOT have a SIM (Subscriber Idenity Module) card, so there was no information to transfer. Not sure ... yet, on how to transfer the contact list from my 'old' phone to the 'new' one. Should be doable. (It was... we let the people at the Verizon store do it... per wife's suggestion.)

We called the specified Verizon number for Activation, and the call was answered by a very pleasant American English speaking young lady named Casandra up in Seatle, Washington. She was very, very helpful and understanding. After a couple of hic-ups, which were my fault because I lacked the familiarity, she straightened things out and we got transfered - setup. Our 'new' phone now has our 'old' number... and it works. The LG Wave is now retired. Just hope that this new expensive one turns out as good. That little Wave became a real important 'camera'. You see, a person now-a-days almost always has their Cell Phone with them. Those times when we used to say "Wish I had a Camera" are now gone. Cause most of us do... in our Cell Phones.

 Making a Call  Well, the first thing necessary is to turn it on -or- if it is already on, get it active. It is just sitting there with this dark black screen staring at me. You 'light it up' by pushing the Power/Lock button at the top. Rut-roh!! Whilst taking a shower we got a call from one of our customers. How do we know?? Well, we disconnected from the charging and was going to make a call. How-some-ever, there was an indication on the front of the phone that we got a call. Can't tell you, yet, how we found out who it was... cause we don't remember... but we did. Unfortunately, the very first call we made was NOT successful. We could hear them but they could not hear us. They hung up and we had to call back via the Land Line!! Hmmmm... gota learn this phone.
Later: Ok. It wasn't the phone. Evidently I wasn't talking loud enough or something, cause he was in the shop. Anyway, the 'new' phone is ok. Other calls were made and the other parties could hear us fine. Just a fluke on our 'first' call.

 The Call  Now then, making a call is fairly simple. First you press the 'Power/Lock' button at the top to Light Up the screen. On the "Standard" setup there will be a phone symbol in the lower left hand side. You can press and hold and drag this to the half ring at the bottom and release it -or- you can pull the ring up and then tap the phone showing on your home page. Either way it will get you to the phone Dialing Pad. Again using simplicity, just dial the number desired via the numeric pad and press Call. You can also Select from your People (Contact List IF you have one), Select from your Groups -or- examine your Call History and select one of those numbers. When the call is finished just press 'End Call'.

 The Verge   We had experienced some dropping out whilst talking to the wife. This was out in the front yard while she was in her car sitting at a light, half way across Phoenix. Chris Ziegler on the referenced site mentioned a similar incident. He suspected some over-aggressive noise cancellation. But he, and I, would rather be mostly audible with the occasional dropout than be lost in a sea of white noise. The phone has a dedicated secondary mic positioned along the left edge, and it appeared to have an impact here. This secondary mic is part of the noise cancellation. (which is supposed to be fixed in the Jan 27th, 2012 Update.)

Proximity Settings

 August 2nd, 2013/5:22am  This phone is now over a year and a half old. We have tried using CM10.1 with good and bad results. Actually, mostly good. The one item that we experienced with both ICS and the 'new' JB is screen black outs... especially when making calls. This got really bad with our new JB install. So we investigated. As it turns out, JB has a setting for it. ICS does not. You need to get the following app... which can be obtained of Play Store. Unfortunately, it does not come with directions. So, as usual, we searched the Net and found this information. Still having a hard time getting solid info the the 'lower' setting but the 'high' setting works just like it is said below. Original at: XDA-Developers

Default [APP] HTC Rezound Proximity Sensor Calibrator

*** YOU MUST BE ROOTED TO USE THIS APP ****

This app will recalibrate a worn or dirty proximity sensor. If your screen does not turn on after a call, then your prox sensor either needs to be recalibrated or is burnt out.


Usage:

  1. Open the app. If your screen does not turn on after a call, it should report the word "NEAR."
  2. Increase PS2_CANC (High Threshold) until it reports "FAR." Go one or two values past where it first changes.
  3. Cover and uncover your proximity sensor and verify that it reports NEAR and FAR correctly.
  4. If you want the values to be set on boot check the box.
  5. Post the values that work best for you along with the ROM you're using in this thread. Hopefully we can use them to find better default values.
If any combination of low threshold and high threshold does not make your proximity sensor function as it should, then it is most likely burnt out and you need to warranty your phone.

 Note:  Think this should be called a 'Proximity/Touch' sensor. Im my KitKat adventures I was having trouble with the 'auto service' operations. Either the keypad wouldn't come up or the screen would go black when the service answered. It took me to long to realize this cause... and I have a good excuse... it worked ok in ICS. Evidentally, the defaults are different. Problem I have now is... it doesn't save the settings. On a reboot they go back to the 'old' settings.


Get it at:
https://play.google.com/store/apps/d...nsorCalibrator


This app was inspired by DHD proximity sensor calibrator by leppie:
http://forum.xda-developers.com/showthread.php?t=951858

Source:
https://github.com/Chad0989/Rezound-...sor-Calibrator
and Proximity Sensor Finder
and Android Sensor Box  - -  This last one is where I learned, accidentally,  that you can install an app
-TO- your phone -FROM- your PC -EVEN IF- the phone is powered OFF!! I didn't even know that the first part was possible, -but- the second was extremely surprising.

World Phone

Well, forum member i rule123, who's based in the UK, accidentally ordered one for Christmas, under the impression that it was a world phone - which many promptly pointed out not to be the case. However, that didn't stop him from trying, and after receiving his ReZound and equipped with a SIM card from T-Mobile UK, he went ahead and switched off LTE, only to find a menu with options for "Global mode", "GSM only, "WCDMA only" and so on.

  Contacts - People - Phone List

This is important enough to get its own section. As stated above, (if not it should be) the truly main purpose of this device is to ... tah, dah, tah, taaaahhhh... make phone calls. Now then, all of our "Modern" Cell Phones (even the cheap ones) have some memory set aside to store our frequently used -or not- phone numbers. The areas have been given, or are referred by, different names. The main concept is ... you have a list of phone numbers with you at all times, IF you have your phone.

So? Well, don't know about you -but- we have well over 100 phone numbers stored on our phone. These came from our "old" Wave phone at the time of purchase. The Verizon people at the store copied them over... which was nice. Now we would like to save our phone list so that we can do some things to our phone without loosing them. We investigated how to do this and found that the instructions were wrong!! It was not a real biggy -but- for the unsuspecting it could be. It is stated that you can "Import and Export" your numbers from your phone to the SD card. Well, it doesn't. It exports them to the internal memory. Also IF you have your phone RAM connected to your 'Puter, it will NOT find the SD card. -And- you won't be able to perform the Export.

Now all the above concerning the Phone List is on a Standard ReZound using the Android GingerBread version. The main reason we investigated saving our numbers is so that we can try to move up to Android 4 ICS.

Saving the Cons ...

Back Up Contacts - Backup Assistant - HTC Rezound™

NoteTo use Backup Assistant to transfer information, both devices must be compatible with the application and the 10-digit mobile number must remain the same. The original phone must be active and capable of placing phone calls.

  1. From the Home screen, select All apps.
  2. Select Settings.
  3. Select Accounts & sync.
  4. Select Backup Assistant Plus.
  5. Select Contact settings.
  6. Select Sync now.

Restore Contacts - Backup Assistant - HTC Rezound™

NoteWhen restoring the address book, Backup Assistant compares and merges any contact information on the new mobile number with the stored information on the Backup Assistant website. If there is conflict between the new device and the website, the device data is assumed to be more current and will override the data on the website.

  1. From the Home screen, select All apps.
  2. Select Settings.
  3. Select Accounts & sync.
  4. Select Backup Assistant Plus.
  5. Select Contacts Settings.
  6. If prompted, ensure I agree to the license agreement is checked then select Next.
  7. Enter the 4-8 digit PIN then select Next.
    NoteIf the PIN is incorrectly entered 3 times, the account will be locked for 15 minutes.
    NoteIf the PIN is forgotten, select Forgot PIN then follow the on-screen instructions.
  8. Select OK.

In researching for ways to do this, -and- experimenting on our own, we found this site: AirDroid. It contains a way that does NOT require Windows. For that matter it doesn't require -any- particular OS. Just have to have WiFi and a Browser ... 'almost' any Browser.

 Quote from Author  You can use AirDroid to send/receive SMS (text messages, if supported by the device), install/uninstall apps, transfer files between Android device and computer/tablet, and manage contacts, photos, music, videos, and ringtones, etc., all in a web browser. Install AirDroid on your Android device and open your favorite web browser to experience it yourself.

We have hi-lighted one feature cause that is the main one we are interested in. The rest are 'luxuries' added... for now.

First thing to do is to get the 'App' installed on our Android Phone. Now how do we do that???


  Protecting and Carrying

 Screen Protectors  They make an anti-glare screen protector film that is precisely cut to fit your HTC ReZound Smartphone screen. There is a claim that it is easy to apply and bubble free. That is only true IF you live in -or- have access to a clean room. The screen must be absolutely, positively, unabashedly free from any dust, including microscopic particles. Get the feeling we had troubles?? You are correct. Went back to the store and even though they did not 'replace' the one that we put on the phone, they took one of our others and applied it with NO bubbles. A can of air was used along with some small pieces of scotch tape rolled up. These were used to somehow remove the dust particles that appeared and made a bubble. We didn't get to see the whole operation -but- it appears that he lifted up the protector and rolled the tape in the area of the bubble. At any rate it is now bubble free and looks great. At least have a can of air and use it before you place the protector on your phone. IF you have any bubbles you can try the tape -or- just go back to the store and have them do it.

We really think that this should be one of the First accessories that you install on your phone. Some protection whilst using the case described below.

 Carrying it.  Now then, one of the reasons we delayed so long in getting an Intelligent Phone is:... Where and How do you carry them?? These large 4 inch screens(well they were at the time), plus or minus, are fragile. My son dropped and broke his shortly after he got it. He 'had' an HTC Incredible. Fortunately, he had obtained the insurance on it, like we did. Using your shirt pocket is not safe cause of when you bend over. Sssllliiiippp... and out of the pocket and onto the floor. Don't think your pants pockets are safe either. What happens when you sit down and it is still in your pocket?? Then we have the carrying case. Vertical or Horizontal??

From general observance, we know this is something that was never even thought about by some of the current owners. They just wanted the phone. Ve, however, are looking at der vays. From experience with our LG Wave phone we really did not like the Vertical Pouch. Almost dropped it to many times -and- worse of all did drop it once. However, the type of corrective case for our LG Wave will not apply here. The LG Wave is of the Flip Phone varity. The body of the LG Wave is stylish but slippery. The final case slipped over the two parts and snapped together. Looked ok and felt better in handling. A belt hook on the back was sufficient to properly and safely carry the phone. Don't really think this will apply to the New Smartphone.

Again, this is a big screen just asking to get hit and broken. Where do you carry it whilst working?? Shopping carts are just the correct height to slam into a belt mounted phone. It happened to one of our friends. He could still use his phone... for a while... but it had big cracks in it. We already mentioned the concern with the shirt pockets -but- we wear shirts with button pockets. Especially, the ones for work, where it would be most important to keep the phone up and safe. So that may be one of the answers. Wear shirts with button pockets.

In some of our research we have found descriptions of the phone body and case being quite comfortable. Maybe a case won't be needed.? The contours and extra ridges on the back may be enough to keep it in our hands... and save money. -But- I doubt it.

HTC ReZound Rubberized Shell Holster Combo - Black

We finally got a case. It was part of a Bundle which contained the Screen Protector mentioned above, the Case and a Car Charger. It was $49.97 at the local Verizon Store. Now it just so happened that the one the clerk picked up was for the Extended Battery version. We had been kickig around the idea of getting the Extended Battery due to the reports and reviews so, we had to think. Do we go ahead and get the Extended Case or just go with the Normal one??? Then the clerk helped us make up our mind. The Extended Batteries just happened to be on sale for Half Price - $29.99!! We got the Bundle and the Extended Battery. (which we still have not installed) Well, that comment was then. We installed it a few days after making that comment. Now it is Aug 6th, 2015 and we are getting a new extended battery. See:  Battery Ref   How-some-ever, the new back plate that came with the new battery will not allow the snap on protective case to fit properly. -But- the 'old' extended battery back plate will fit over the new battery -and- allow the snap on case to fit. Why care??? Cause the snap on case has a kickstand built-in... and we like to use it.

 The Case  Case for your HTC ReZoundSmartphone, offering dual protection. It includes a snap on protective case, along with a swivel belt clip holster. This one was designed to fit the HTC ReZound with the OEM Extended Battery and door. The case is designed specifically for the HTC ReZound therefore allowing easy access to all of your phones keys and ports... quick and easy.

The shell case features a built-in kickstand for handsfree stand up positioning and viewing. The holster clip swivels and has a sturdy locking mechanism to keep your phone in place. Remove your phone in and out of the holster without having to remove the case. The neat thing about it is, the screen faces in, to keep your HTC ReZound screen protected from bumps, drops, scratches, and everyday wear.
View YouTube Demo for more details.

Using the Case... takes a litte getting used to. We had a Flip Phone with a belt clip that we slipped on and off when needed. Now this one slides in and out...-and- it will only go in one way! Face in. NO Face out. Now in 'playing' with the case before putting the phone in, we thought that you could only slide it into the Holster from one side. That does not seem to be the case. However, because of the cut outs for the various features on the phone... we do believe you will always want it to slide in one way. Here in the beginning we are going to use an Extended Battery Case with a Normal Battery setup. Why?? Cause!! Really, we want to see how long the Normal Battery lasts versus the Extended Battery so we can justify our Purchase... to the wife.

Oh, one thing about this shell portion of the case. It is a 'snap' to put on and a 'bitch' to get off!! -And- worse of all our 'Love Handles' get in the way!! This new phone is wider than our old one. Well, we have been meaning to start exercising.
Refer: Amazon

Luxmo Brown Marble Horizontal Leather Carrying Case

Well, it was actually March 3rd, 2014 that I placed this case on my phone.


Top View.
           
Open View.
           
Back View.

Now then, the above "Thumbnails" are supposed to expand to larger images as you mouse over them. For some reason, it doesn't work here in this file. IF you click on the Brown Marble Case reference below, it will present a small web page that does work. For now I am going to leave it this way.

 July 16th, 2015/7:44am   Yeah, like everything else on this page/site we are out of order. We actually got the case we are now discussing on March 3rd, 2014. One of the reasons for this entry is... I need to get a new one -and- the little write-up I did never got referenced in any of my pages. Well, it is now:
       Brown Marble Case  
This has been a really good case. Lasted for almost a year and a half. Rest of my comments are on the Case Page.


 August 4th, 2015  Well, things change, and sometimes NOT for the better. I could NOT get the above brown case again. Went thru a couple of tries... wrong one first and then when I got the correct one it would NOT fit my phone. They had changed how they manufactured it and it was obvious cost cutting was involved. Unfortunately, their cost cutting produced an inferior product. The little symbol on the front went from metal to an imprint on the leather. But worst of all the case was narrower -AND- the magnets in the flap were weaker. It would NOT close and hold. This resulted in returns and then I went to a local vendor, Cellairis, in a kiosk at one of our local malls, ArrowHead and purchased a Reiko black case.
Can also be purchased at:  Amazon.com  

Style Name: HP115B

  • Product Dimensions: 5.5 x 0.5 x 2.9 inches
  • Shipping Weight: 1.6 ounces (View shipping rates and policies)
  • Domestic Shipping: Item can be shipped within U.S.
  • International Shipping: This item can be shipped to select countries outside of the U.S. Learn More
  • ASIN: B00KVLYUUY
  • Item model number: HP115B-SAMS4PLBK
                 

  Gmail

 How to delete a secondary GMAIL account  

  • Home Page
  • Tap Menu Button
  • Tap Settings
  • Scroll down to and tap Accounts & Sync
  • In the listed entries, tap on the account you wish to remove
  • Tap Remove Account.


  Texting and other things

Texting... an interesting concept. However, it is something that we are not really into that much. After all, phones were developed and designed so we could "talk" to each other. -But- I guess this younger generation has a fascination with it. -And- we will agree, there are times when a Text Message is very handy... so you won't have to take notes. We might change our mind as things progress, but for now, you are on your own. Unless we find something in our travels for information and then we will relay it here.

 Swype Keyboard -or- Swiftkey 3 - Sep 4th, 2012/6:13am  Found something... Last today, we had a "Labor Day" picnic. One of our friends also has a Smartphone. -And- as we were 'showing off' our phones he presented us with a Swype keyboard. This looked extremely interesting. Even though we don't text much, we still use the keyboard for other things and have not been happy with the current settings. So, to the Net and we find the "Swype Beta Project".
Refer: Swype Beta

Now in our searches we have seen both praise and detriment towards this app when used on an HTC ReZound So beware. On top of that... it is Beta Software. Which means it is still in developement and -may- have problems... download this beta software at your own risk! Hmmmmmm... appears that we may be behind the times. Looks like there might be both, an Official and a Beta. Refer: Top 10 KB's Compared

Swiftkey X, which is now Swiftkey 3, came up in our searches and with high praise. Both of these have been talked about a lot.


  The Camera

Now then, here we get to one of the biggest reasons we chose this particular Smartphone... the Camera. The quality of the pictures were praised in almost every review we read. Our first picture was of my Fire Red Blazer. However, it wasn't intuitively obvious as to how to see the resulting picture. Leastwise, not at that time, so we have gone a couple of days without seeing the caption. Just now when we are finally concentrating on the Camera we see that it is fairly obvious.

 Taking a Picture  Once again, IF the screen is dark press and release the Power/Lock button at the top. One of the Four Icons at the bottom of the default Active Screen is a Camera. However, the screen is locked. In order to use the Camera you press and hold the Camera Icon and drag it to the Half Ring at the bottom of the screen and release it. This will activate your Camera. You will see what is in front of you, and the Camera, fill the screen on the Phone. Move it around and you will see it adjusting for the light and focus. Four white corners of a square appear and disappear in approximately the center of the screen. This is your focal point. You are to place all, or at least part of, the desired object inside this square. You can watch the Camera attempt to focus on that object. The white corners turn green when it has achieved focus. Pressing the Shutter Icon in the middle at the bottom of the screen will take the picture.

 Viewing a Picture  In order to see the Pictures you have taken, you simply Tap on the Gallery Icon in the upper Left corner of the Camera Screen. If you have a lot of pictures you can scroll through them and Tap on the ones that you want to see Full Screen.

There are tons of things you can do with this Phone Camera. However, the one thing it does not have is... speed. I consider myself an Amature Photographer. Knowing a little mare than the average Joe but still lacking in lots of photo know-how. Unfortunately, do to the costs our photography efforts could not be expanded and continued. So, some things have been forgotten, but we get by. Besides the LG Wave we have had expeience with an HP digital camera. None of them were speedy. On most movement shots you had to 'lead' the object and snap the shutter before it got to the area of the picture. Didn't have that problem with our SLR camera. Course it is film. Only way we get didgital from it is to have the pictures placed on a DVD when developed. -But- otherwise this Camera appears to be great.
More information starts on Page 116 in the attached User Guide.

 Wow! Wow!!  We went to the closing ceremonies for the Glendale(Arizona) Glitters last evening and naturally we took the phone. It was spectacular and this phone camera took great pictures. This was our first major shoot with the camera and mistakes were made -but- for the most part things were fabulous... -and- we learned some things. ( pics will be posted soon)

focus, holding steady, zoom, lighting, no flash vs auto vs on, positioning, orientation, shutter button sensitivity, carrying, camera stays on, just normal no special effects, battery, no camera case strap
We want to say more about these -but- not at this time. Just notes to remind us. And discuss the lack of a two-stage hardware shutter button.

an app called Scan reads QR codes using the ReZound's camera.


Warning
The instructions -and- information in this guide are intended for use with the HTC ReZound. Applying these instructions on another device or model may, and probably will, produce undesired outcomes.

  BlueTooth - Plantronics Voyager Pro+ & HD

Ok, we decided to activate the Bluetooth since that was the main reason we needed a new phone in the first place. It would, and still does connect, to the LG Wave -but- it wouldn't stay connected. Primarily IF we moved it from our shirt pocket to our belt. It would either disconnect immediately or shortly thereafter.


 Plantronics Pro Comparisons    Wave Bluetooth  

 March 30th, 2012/12:57pm  Another injection... Well, the reason for the HD (High Definition) addition to this is... cause... we got a new Bluetooth Headset. The previous one, that became a trouble on our Wave phone -and- was resposible for our new HTC ReZound Smartphone purchase... died. Well, not exactly, -but- almost. People were having a hard time understanding me. The talk, my talk, kept going in and out. In addition to, hopefully, being more understandable, this newer one is supposed to have some neat new features that will work with our new Smartphone. So, we'll see when we get it.

Key Product Features of the HD
Plantronics MyHeadset app that gives you tips, tricks and tools for Android.
Smart Sensor feature will route calls to the headset when it is worn.

Product Description

Plantronics has announced the Voyager PRO HD Bluetooth headset, the latest in its high-end line of wireless headsets. The Voyager PRO HD's claim to fame is its Smart Sensor Technology that lets it know when a user is wearing it, and then it can route phone calls appropriately.

The Voyager PRO HD's Smart Sensor feature will route calls to the headset when it is worn on a user's ear, or route them to the phone itself when the headset is not worn, all automatically. It will also lock the headset when it is not worn to prevent accidental calls, and incoming phone calls can be answered by just placing the PRO HD on an ear - no button pressing required. Removing the headset while streaming audio or music will automatically pause whatever is playing. The Voyager PRO HD also has voice alerts for for remaining talk time, connection status, battery-level,pairing mode, and mute.

As with previous Voyager headsets, the PRO HD has noise cancellation and three levels of wind noise reduction. It is compatible with Plantronics Vocalyst Voice and Text Services that allow users to send and listen to emails and text messages, check the weather, or post updates to Facebook or Twitter without using their hands.

Plantronics MyHeadset app that gives you tips, tricks and tools for Android-based phone


Now we have our new phone and it should just hook right up and be dandy. Nope!! We went to Settings-->Wireless & Networks and checked Bluetooth. Then we went into Bluetooth Settings and Tapped Scan for devices. It did not find our Bluetooth headset. So, as usual, the last resort is to read the destructions and/or search the Net.
Page 307 in the attached User Guide.

Hmmmm... need to make the headset discoverable. We thought it was just by turning it on -but- that was kind of silly thinking. IF that was the case, we would get connected to everybody!! Gota read the Plantronics headset destructions. We did and copied the section from our 'old' phone description to here. Beats jumpin' around on WebPages. Besides, in our forgetfulness we forgot... ya gota pair these things.

Anyways, to 'pair' your Voyager Pro+ headset with your phone we have two ways, -or- more depending on the phone:
  1. Start with the headset powered off.
    (See Note below;)
  2. Press and hold the power button for about 5-6 seconds until the light on the headset starts flashing an alternating red- blue.
  3. Release the power button and set the headset aside.
    (It will remain flashing...approximately 10 minutes.)
  4. On your cell phone, go to the Bluetooth menu and search for (or add) a device.
  5. The cell phone should find the headset. The Voyager Pro will appear as "ProPlantronics" in your list of devices.
  6. If prompted for a passkey, enter 0000 (four zeros). Note: Do not be alarmed if your phone does not prompt you for a passkey, because many phones do not.

ICS - Pair your phone with a Bluetooth device

You must pair your phone with a device before you can connect to it. Once you pair your phone with a device, they stay paired unless you unpair them.

If the device you want to pair with isn't in the list, ensure that it's turned on and set to be discoverable. See the documentation that came with your device to learn how to make it discoverable.

  1. Under Settings > Wireless & networks, make sure Bluetooth is turned on.
  2. Touch Bluetooth. Your phone scans for and displays the IDs of all available Bluetooth devices in range.
  3. If your mobile device stops scanning before your Bluetooth device is ready, touch Search for devices.
  4. Touch the ID of the Bluetooth device in the list to pair with it.

    Follow the instructions to complete the pairing. If you're prompted to enter a passcode, try entering 0000 or 1234 (the most common passcodes), or consult the documentation that came with the device.

    If the pairing is successful, your phone connects to the device.

ICS - Configure or unpair a Bluetooth device

Some Bluetooth devices have multiple profiles. Profiles can includes the ability to transmit your conversations, play music in stereo, or transfer files or other data. You can select which profiles you want to use with your phone. You can also change the name of the Bluetooth device as it appears on your phone.

  1. Under Settings > Wireless & networks, make sure Bluetooth is turned on.
  2. In the Bluetooth settings, touch the Quick Settings icon beside the connected Bluetooth device you want to configure.

    A screen opens that allows you to change the device's name, unpair it, or select profiles. touch the Back button when you're finished.

Refer: Connect Bluetooth Devices

 Note: Power On/Off   We live in a fast paced society and most of the time we can't wait. For the On/Off of this Headset you must be patient and wait for the proper light flashes. When Powering On - Press and hold the Power button UNTIL the light flashes Blue, then Release it. When Powering Off - Press and hold the Power button UNTIL the light flashes Red. ( Now flashes in both of these cases means it, the light, comes on and then goes off... once!)

Smart Sensor Technology

Smart Sensors detect whether or not you are the wearing the headset. Sensors are located in the headset body and speaker housing, as illustrated below:

Image of the Voyager Pro HD's smart sensor locations

Smart Sensors enable you to:

  • Answer a call simply by putting on your headset.
  • Pause streaming media by removing the headset, and resume your media by putting your headset back on.
  • Transfer call audio back and forth between the phone and headset. To do so, if you are not wearing your headset and you receive a call on your mobile phone, the audio routes to the phone. Put on the headset to transfer the audio to the headset. If you are already wearing your headset and there is an incoming call, the audio will be routed to the headset. Take off the headset to transfer the audio to the phone.

So smart, it manages your calls

The Plantronics Voyager PRO HD with smart sensor technology redefines hands-free convenience. This headset is so smart, that by simply placing it on your ear, it automatically answers your phone or transfers calls back and forth between your phone and headset. Voyager PRO HD takes you beyond the headset, with our free MyHeadsetTM app that gives you tips, tricks and tools for AndroidTM smartphones. Combined with HD streaming audio plus natural sound and superior comfort and you've got the smartest headset for smartphones.

  • Revolutionary smart sensor technology automatically answers calls when you put on your headset
  • Smart sensor technology knows whether to send calls to your mobile phone or your headset
  • Streams music, podcasts, GPS directions and other audio
  • Pauses streaming audio for calls or when the headset is taken off
  • Voice alerts announce talk time, volume, connection and more
  • Eliminates accidental dialing by locking call button when headset is not worn
  • Experience brilliant, HD streaming audio plus natural, clear calls
  • Headset battery meter automatically shows onscreen for iPhone® and iPad®
  • Plantronics MyHeadsetTM app enables a battery headset meter on AndroidTM 3.0 tablets, and Android 4.0 phones and tablets

.


Ok. So we are connected to our Plantronics headset and made our first call to the wife. It works. In fact it works great. We left the phone on our desk and went out on the front porch... no problem. Went out to the street and got the message "Phone Disconnected". Then we walked back up to the porch and got the message "Phone 1 connected". So, the problems were with our 'old' phone and NOT the Bluetooth.

 Bluetooth Power & Battery  Now then, one of the items that is claimed to use up our Battery is this Bluetooth. So, the only time it should be enabled is when we have that thing stuck in our ear. On is indicated by a Bluetooth Symbol () at the top of the screen. -But- when you want it Off or On you must go through a number screens in order to control it. However, we did notice a mention of a Bluetooth Widget on the Home Screen to control it. Hmmmmm... don't see one. Looks like we have to add one. This will be a Shortcut. A Bluetooth Widget will be placed on your Home Screen that you can Tap to get to the Bluetooth Page. Then simply Tap the Bluetooth to check or un-check it. This two step procedure is probably better than a single press on a Widget. The touch screen is sensitive and we might accidently turn it off in the middle of a conversation... if it was to easy.

  Voice Dialing

Cyberon

Troubles, troubles, troubles. We found an 'app' that we think will fit our needs and desires for the 'Voice thing' -but- could not get Google Wallet set up correctly with our card. It is the Card we are using with PayPal -with- NO Problems. Think it has something to do with the name -but- we have to wait and see. Therefore, the 'Voice Dialing' will be delayed.

Ok. Google wants us to 'fax' a copy of our Water Bill and a copy of our Driver's license to them in order to approve our application. That is rediculous and we will NOT do it. Therefore, till we can find another way to pay for these apps that cost, we will do without.

 Uncle!! December 15th, 2012 /8:26am  Ok. Google wins. The story concerning 'what' follows, and we are not gona repeat it. Suffice it to say that we sent Google the requested information. We demand a drivers license for individuals making Credit Card purchases at Wal-Mart so we guess this is no different. 'Ceptin they want a Utility Bill -or- Bank Statement copy in addition. Ok, we'll do it.


   Found another:   the Amazon Appstore    and another:   the AndroidPIT

 VLingo - October 25th, 2012/8:44am  Allllrighty now... We tried this once before when we first got our phone -but- we didn't understand things well enough -and- we didn't give it enough time -or- study.

Vlingo Adds Support for the HTC Rezound: Just a quick note to let everyone know that Vlingo has added support for the HTC Rezound from Verizon Wireless. Holidays of 2011. Vlingo is a Virtual Assistant that turns your words into action by combining voice to text technology, natural language processing, and Vlingo's Intent Engine to understand the user's intent and take the appropriate action. Simply speak to your phone to connect with the people, businesses and activities that are important to you.

 Cyberon = October 25th, 2012/8:46am  We really wanted to try this one -because- it claimed to have voice tags:
Voice tag - User can record a voice tag for selected contacts to enhance "Voice Commander" usability and accuracy. A trailing lip icon represents voice tag built.
-But- haven't found it offered anywhere except through Google Play and we can't use them. Ah, but we finally did: AndroidPIT

Android
Overview: Cyberon Voice Commander is a voice dialing and command-and-control application.
"Full refund can be made within 24 hours after purchase. To request a refund, please send your order number to info@cyberon.com.tw"

Cyberon Voice Commander is a voice dialing and command-and-control application that allows users to:
-Make phone calls
-Look up contact info
-Launch programs
and more.

Features:
*Speaker-Independent, no training is required.
*Hands-free(for Android 2.2 and above) and eyes-free.
*High accuracy.

Additional information:
For enabling the BT handsfree voice dialing function, please note to check the items below:
1. Make sure that the platform of your phone is Android 2.2 (Froyo) or above, and your headset supports     Bluetooth handsfree profile.
2. Don't install the application on SD. Cyberon Voice Commander doesn't support APP2SD so far.
3. Restart your phone after installing Cyberon Voice Commander.
4. Re-pair BT headset and phone after installing Cyberon Voice Commander, if they have been paired.

Allllllrighty now... persistance pays off!! We contacted the author of this app and inquired as to where else it could be purchased. We got an answer... go to: AndroidPIT
Refer: Cyberon

 Oh Darn!!   Nothing, absolutely nothing is ever easy anymore. The site that was recomended has the Cyberon Voice Commander app, -and- it takes PayPay. -But- it was NOT easy to figure out how to download the app and get it installed. First you need to get their "AppStore" installed on your phone. And that was a hunt. Turned out we had to click on the big site name at the top. Then getting the app down was another hassel. -But- after finally getting it down the worst happened!! We couldn't use it!! It claimed that the License was NOT valid or we didn't have an Internet Connection. This was reported and we are still waiting for the results.
October 26th, 2012 / 8:52pm
Later: Well, well, guess what the reason was/is. The license check is controlled by Google!! We bought, and paid, for this through another company -and- PayPal -but- Google is still ruling the roost. We have made more complaints but still have not heard... yet.
November 2nd, 2012 / 1:59pm

Warning
The instructions -and- information in this guide are intended for use with the HTC ReZound. Applying these instructions on another device or model may, and probably will, produce undesired outcomes.


Installing Applications With Android SDK

It is possible to install APK files without utilizing the Android Market, although the process is more difficult and complex. To avoid the Android Market, you need to use Android SDK.

  1. Download and install the Google Android SDK program and the Android USB drivers... on your Computer. The download links are as follows:
    http://code.google.com/android/intro/installing.html
    http://dl.google.com/android/android_usb_windows.zip
    Developer USB
  2. You need to modify your Smartphone Android's settings to allow the installation of applications from other sources. Under "Settings," select "Security" and then check the box labled "Unknown Sources."
  3. This last step is easy. Open Command Prompt and type the following: adb install <1>/<2>.apk
    However, when you type the command, replace <1> with the path to your APK file and replace <2> with the name of the APK file.
  4. You're done! Your application is now ready for your use and enjoyment.


  ReZound Apps

Refer: ReZound Apps and HTC ReZound Apps

 January 15th, 2014/4:22am  Yeah, a little slow in getting around to this, -but- better late than never, so they say. We have copied the list, created by others, of apps that are on this phone. Plus info on how to disable a bunch of them. This can be found at: A list of Rez Apps Of course IF you install your own ROM then you don't have to worry about them... or do you??

The following list of apps are ones that I am using -or- at least tried -or- will and just haven't gotten around to re-installing them. Started playing with "ROM Flashing" at version 10 of CyanogenMod. This has caused many 'Re-Loads' of the apps. I like to do "Fresh/Clean Installs". -And- as you will see there are some duplicates cause of the order in which they were found. (I have tried to make the list somewhat alphabetical.)

And of course we have an install from your PC:
  adb install <path_to_apk>

  A.I.type Keyboard Plus - Cost and I paid $3.99.

A.I.type Keyboard is another one of those "prediction" type Keyboards for the CellSmartphone. It has had good and bad reviews -but- don't they all?? Biggest complaint is about security. In order to obtain -and- learn its predictions it uses data in the "Cloud". What?? The Cloud... the Internet. Cloud computing is the big thing now-a-days. Even my favorite Linux, SuSE, is getting into the Cloud stuff.

The worries and complaints come from paranoids getting their passwords -and/or- Credit Card numbers stolen. Well, it is stated by the developer that those fields are protected. -But- IF you send that info in a message it is not. -But- then "most" of the other entry types don't protect that info either. Now IF you are really paranoid you can get a full encryption app and then take forever to process anything. To us, it would just seem better to NOT send any "sensitive" information over the cell phone -and- IF you do have a special app for that. Otherwise, we don't believe that there is anything to worry about with this app over any other Keyboard entry app.

     Permissions  
  • Network communication:
    FULL NETWORK ACCESS
    Allows the app to create network sockets and use custom network protocols. The browser and other applications provide means to send data to the internet, so this permission is not required to send data to the internet.
  • Hardware controls:
    CONTROL VIBRATOR
    Allows the app to control the vibrator.
How to Personalize A.I.type Keyboard

 November 19th, 2015/4:26am  Well, we started running hot -and- loosing our battery power fast. Battery Doctor to the rescue and we found that this KB app, for some reason, was consuming the power. Just so happens that there is an UpDate for this app that we have not yet applied. Will today and IF it does not fix it... we will have to find another KB app -or- just use the default. To bad, I really like this KB app.
Note: Well it should. One of the listed "fixes" is a "Battery Surge in some devices" Correction. .. -BUT- it did not correct the problem. I turned it off. Had to go through the settings in order to do that. Uninstalled it.

 November 24th, 2015/8:12am   Well the "Free" version doesn't seem to use up my battery. It is version 4.2 and the version that is a problem is the one that I paid for, version 4.5. That will be verified today.
Later: Appears to be the case.

 May 16th, 2016/9:35pm   Trying again, this time with Version 7. Still appears to be a battery consumer. Just can't figure out why/what is going on when the keyboard is NOT even being used!! I have contacted them again. Waiting for an answer.


Refer: Play Store -- Free trial -or- $3.99 purchase

  Any Soft Keyboard - Free

Any Soft Keyboard is an on screen keyboard with multiple languages support.
To activate: In Settings->Languages->tick AnySoftKeyboard
To set as default: Long press a text field, and select "Input method"

Main features:
* Multi languages keyboard support via external packages
* Completion dictionaries for multiple languages
* Also completes your typed words from you contacts names (in Android 2.0+)!
* Multitouch support
* Extension keyboard (swipe your finger all the way up out of the keyboard)
* Voice Input support (Android 2.2+)
* Gesture support:
** Swipe left or right to switch layouts
** Swipe up to shift
** Swipe down to close the keyboard
* Theme support (comes with 3 skins)
* Build-in user dictionary words editor
* And many more features!


Installing and enabling

Open Android Market, and look-up "AnySoftKeyboard".

Click "Install". Note that this application requires some permissions: this keyboard can use the phone's vibration functionality and can read and write to your user-dictionary.

  • You can get AnySoftKeyboard from several other sites too

After Any Soft Keyboard has been downloaded and installed, go to your phone's settings, and select "Language & keyboard" (or "Locale&text" in Android 1.5).

Copied from: Softkey WiKi
     Permissions  
  • Your personal information:
    READ TERMS YOU ADDED TO THE DICTIONARY:
    Allows the app to read all words, names and phrases that the user may have stored in the user dictionary.
    READ YOUR CONTACTS:
    Allows the app to read data about your contacts stored on your tablet, including the frequency with which you've called, emailed, or communicated in other ways with specific individuals. This permission allows apps to save your contact data, and malicious apps may share contact data without your knowledge. Allows the app to read data about your contacts stored on your phone, including the frequency with which you've called, emailed, or communicated in other ways with specific individuals. This permission allows apps to save your contact data, and malicious apps may share contact data without your knowledge.
  • Storage:
    MODIFY OR DELETE THE CONTENTS OF YOUR USB STORAGE MODIFY OR DELETE THE CONTENTS OF YOUR SD CARD
    Allows the app to write to the USB storage. Allows the app to write to the SD card.
  • Hardware controls:
    CONTROL VIBRATOR
    Allows the app to control the vibrator.
  • Your personal information:
    ADD WORDS TO USER-DEFINED DICTIONARY
    Allows the app to write new words into the user dictionary.
  • Default: TEST ACCESS TO PROTECTED STORAGE TEST ACCESS TO PROTECTED STORAGE
    Allows the app to test a permission for USB storage that will be available on future devices. Allows the app to test a permission for the SD card that will be available on future devices.


Refer: Play Store -- Free

  Appstore Amazon Ver 4.0.634.0_463400000 - Free

During the first time period that I owned this phone I wanted to make calls by voice command and the 'default' didn't seem to work. So I looked for another. Found one on Google Playstore and tried to purchase it. Had problems with what Google wanted for verification -and- well that is another story. Anyway, I tried this and others only to find out they were all eventually linked to the same place!! Anywho, I finally had to give Google the info and just be done with it. But this is how you set up an Amazon account IF you want one.

     Permissions  
  • Network communication:
    full internet access
  • Your personal information:
    read sensitive log data
  • Your accounts:
    act as an account authenticator, manage the accounts list, use the authentication credenttials of an account
  • Storage:
    modify/delete SD card contents
  • Phone calls:
    read phone state and identity
  • System tools:
    prevent phone from sleeping, retrieve running applications
  • Default:
    com.amazon.kindle.cms.CMS_ACCESS
  • Network communication:
    view network state, view Wi-Fi state
  • System tools:
    automatically start at boot
  • Your accounts:
    discover known accounts
Refer: Amazon Appstore


  App Center - AndroidBIT Ver 1.7.11 - Free

We found this after our skirmish with Google Play Store. They offered PayPal as an option for paying and we are still in good standings with PayPal. Like Google, they offer this application to download and install the apps from their site.

     Permissions  
  • Your location:
    coarse (network-based) locatin
  • Network communication:
    full internet access
  • Phone calls:
    read phone state and identity
  • Network communication:
    view network state
  • System tools:
    automatically start at boot
Refer: AndroidPIT App Center


  App List Backup Pro - Cost and I paid $1.00.

Saves the list of installed apps so you can re-download them from Google Play Store later (on the same or another device). This way apps still show up in Downloads and receive updates (unlike with other backup apps like MyBackup Pro).

The idea is NOT to back up non-Play-Store apps or to save you from re-downloading apps, so please don't rate negatively due to that.

This is the paid version of the app; it doesn't have any ads and does NOT require Internet permissions. There's also a free version available that has ads in it, but other than that is the same exact app.

Refer: App List Backup Pro - $1.00 Purchase.


  aSpotCat Ver 2.2 - Free

Which apps use services (like SMS) that cost your money?

Which apps use GPS to determine where you are and consume additional battery power?

aSpotCat lists installed apps by permission to help you find and uninstall the malicious apps.
It's the best permission manager for your Android device.

No Notification Ads - we don't use any notification ads.

     Permissions  
  • Network communication:
    full internet access
  • Network communication:
    Google Play billing service, view network state
Refer: aSpotCat


  Avast Battery Saver

Used the Avast anti-virus program in the PC world and for the most part was happy with it. Now I want to try their battery saver and see IF it is anymore understandable than Battery Doctor. So far... the answer is YES.

 December 13th, 2015/4:10a  Happier and happier that I found this app. It has extended my battery time. Even with ai.type.keyboard and Gravity Screen installed -and- running. Don't know why... yet, but the ai.type.keyboard app is the biggest user of my battery.

     Permissions  
  • Device & app history:
    * retrieve running apps
  • Location:
    * approximate location (network-based)
    * precise location (GPS and network-based)
  • Phone:
    * read phone status and identity
  • Photos/Media/Files:
    * read the contents of your USB storage
    * modify or delete the contents of your USB storage
  • Storage:
    * read the contents of your USB storage
    * modify or delete the contents of your USB storage
  • Wi-Fi connection information:
    * view Wi-Fi connections
  • Device ID & call information:
    * read phone status and identity
  • Other:
    * bind to an accessibility service
    * update component usage statistics
    * control vibration
    * run at startup
    * toggle sync on and off
    * access Bluetooth settings
    * change network connectivity
    * prevent device from sleeping
    * view network connections
    * draw over other apps
    * measure app storage space
    * pair with Bluetooth devices
    * read battery statistics
    * modify system settings
    * read sync settings
    * full network access
    * connect and disconnect from Wi-Fi
  • :
Refer:  Avast Battery Saver   and  Avast FAQ  


  Avast Clean up

Remove leftover files and unused apps with a simple tap, for a faster, more powerful phone. Avast Cleanup optimizes your phone's performance and boosts its speed by removing unused junk from your mobile.

     Permissions  
  • Your personal information:
  • Network communication:
  • Storage:
  • Phone calls:
  • Hardware controls:
  • Services that cost you money:
  • System tools:
  • Network communication:
  • System tools:
  • Your accounts:
  • Device & app history:
  • :
Refer:  Avast Clean Up  


  Battery Doctor

Well I've used this app longer than the date shows. I think it has been almost a year now. I get absent minded and forget to put in dates.

     Permissions  
  • Your personal information:
  • Network communication:
  • Storage:
    * modify or delete the contents of your USB storage
    * read the contents of your USB storage
    * read the contents of your USB storage
  • Phone calls:
    * read phone status and identity
  • Hardware controls:
  • Services that cost you money:
  • System tools:
  • Network communication:
    * view Wi-Fi connections
  • System tools:
  • Your accounts:
  • Device & app history:
    * read sensitive log data
    * retrieve running apps
  • :
Refer:  Battery Doctor PlayStore  


  Cyberon Voice Commander Ver 3.2 - Cost $5.99 and I paid $.99.

We found this months ago (as noted by the date in the heading) -but- do to a hassle with Google, described previously, we didn't get it right away. Suffice it to say that Google won.

 December 24th, 2012  Well, maybe it was good that we had this "minor disagreement" with Google. Here for Christmas, Dec 24th & 25th they are offering this app for only $0.99!! It notmally sells for $5.99. So, that means in the long run we won?? Been playing around with this and it worked -- for what we desired -- the first time. We had to work from 4:00pm to 8:30pm -- on Christmas Eve!! After work -- and from our truck -- we called our wife who was already at our "anual Christmas" party to tell her we got off a little early. This was the same person that we had tried to call using the Google Voice that comes with the phone. Google voice was calling Darlene's Restaurant, Darlene Dressshop and others that we can't remember. Anywho, the point is that it didn't just look in our address book and call our wife. However, this Voice Commander did it right off the first time we tried!!

 December 26th, 2012  It's Christmas and play time is limited... well, personal playtime on computer stuff. Anyway, we have been trying to make a totally hands free call. Well, not "totally". You do have to push a button -but- as mentioned else where, we have a Plantronics Pro Bluetooth. We were trying to push the button on our Bluetooth and get a response -but- it was not working. The we remembered... part of the Voice Commander instructions said, "Turn the device OFF after installation.". We had not done that. So, we turned OFF the headset, shutdown our phone, removed the battery -and- waited 5 minutes. Put the battery back in, turned on the phone and then turned on the Bluetooth. A long press on the "hot" button of the Plantronics Pro Bluetooth got us a response -- "Say a command". Hurray!! The phone can stay in the case and our hands on the wheel and we can make a call!! At least to the wife... which is the important one anyway. The old shutdown and restart syndrom.

Cyberon Voice Commander is a voice dialing and command-and-control application that allows users to:
  -Make phone calls
  -Look up contact info
  -Launch program
Now then, as stated above, it works good for making calls. We haven't made a lot -but- it is working so far. It will call up other apps -but- for the Music all it does is get to the Music app. It does not start playing any Music -nor- can we select any songs.

 March 4h, 2014/7:56am  A lot has happened, -and- changed, since we first found, and installed, this app. We have 'learned' to "Flash ROMs" and they have revised this app. We are now using CyanogenMod 11.0 which is KitKat and they, Cyberon, are up to version 3.2. Just got things set up so reports on its perfromance will come later.
Later: Not working properly. I can long press my Bluetooth and give voice commands -but- it talks through my phone speaker and NOT my Bluetooth. Back to the drawing board. Sent them an E-mail -but- have NOT received a reply... yet.

 March 16th, 2014/12:30pm  Shame on me... they responded and I didn't see it. Got to start checking my E-Mails more often. Anywho, they had a 'fix' for the Bluetooth and it worked. I could hold the button on my Plantronics and would here the Voice Commander asking to "Say a Command". I asked it to call my wife - and it did. Then I asked it to "Play Music" - and it did. Then I asked it to "Pause" - and it did. Asked it for the time, and it responded - with the correct time.

     Permissions  
  • Network communication:
    create Bluetooth connections
  • Your personal information:
    read contact data
  • Storage:
    modify/delete SD card contents
  • Phone calls:
    read phone state and identity
  • Hardware controls:
    change your audio settings, record audio
  • Services that cost you money:
    directly call phone numbers
  • System tools:
    disable keylock, prevent phone from sleeping
  • Network communication:
    Google Play license check, view network state
  • Your accounts:
    discover known accounts
  • System tools:
    automatically start at boot

This app is compatible with your
HTC ADR6425LVW.

Refer: Cyberon - Paid $0.99


  Fancy Widgets - cost and I Paid $2.59 it.

There are two installs for this. The 'Basic' and the 'UnLocker'. The later is what costs money.

Personalize your Android home screen with highly customizable clock widgets, weather widgets, home (clock & weather) widgets, forecast widgets, and more with lots of customization options.

Basic features:
- Clock with customizable time and date format
- Current weather condition and 3/4-day weather forecast
- Choice of Google or AccuWeather for weather forecast
- Celsius and Fahrenheit temperature support
- Geo-location for weather or search city by name/zip code
- Configurable refresh interval
- Additional information (e.g., battery level) on the widget
- Customizable widget tap actions
- Automatic sunrise/sunset time calculation
- Moon phase calendar
- Different widget sizes and styles with skin support
- Access to the Fancy Widgets Market and convenient skin management
- Many customization options to make your beautiful widgets

From the FAQ:
Q: Can you make the clock flip, like the HTC Sense widget?
A: This may not be possible at the moment. The current Android widget framework does not support widget animations. HTC has their own widget framework, and their Sense launcher provides special support for widget animations. HTC widgets are actually not standard Android widgets, so they cannot run on non-HTC phones (or even HTC phones running a third-party launcher).

     Permissions  
  • Your personal information:
  • Network communication:
  • Storage:
  • Phone calls:
  • Hardware controls:
  • Services that cost you money:
  • System tools:
  • Network communication:
  • System tools:
  • Your accounts:
  • :
Refer: Fancy Widgets


  File Expert - Manager HD

 June 25th, 2013 / 10:30am  They are working on a totally new update and will release it at the end of June. You can change default UI into three different modes: Light, Dark or Mixed. Also many other new features and enhancements will be added. Please stay tuned for more info.
File Expert is an ultimate app for managing your files on your mobile phones, tablets, personal computers and cloud storage servers.

For Android 4.0+ users please try File Expert HD.

So, we updated and will be using this heavily in our CM10.1 adventures.

Backup a single app by long pressing the app and selecting Backup from the context menu. The default save location is:
    /mnt/sdcard/backup_apps
This can be changed in the settings.

This will allow us to save the apps to our PC via the SD card and/or the USB. The apk is what is saved. To restore them, you just put them back on the SD card and then open the .apk file by tapping on it, and the rest should be automatic. Now when we are messing with our device or installing a new ROM , we will have all our apps backed up so we can reinstall them easily. Especially the "paid for" ones.

     Permissions  
  • Network communication:
    Full Internet Access
    Control Near Field Communication
    create Bluetooth connections
  • Your personal information:
    read sensitive log data
  • Storage:
    modify/delete SD card contents
  • Phone calls:
    read phone state and identity
  • Hardware controls:
    change your audio settings, record audio
  • Services that cost you money:
    directly call phone numbers
  • System tools:
    prevent phone from sleeping
    change network connectivity
    change Wi-Fi state
    Allow Wi-Fi multicast reception
    mount and unmount filesystems
    retrieve running apps
    Bluetooth administration
  • Network communication:
    view network state
    view Wi-Fi state
  • Storage:
    modify/delete internal media storage contents
  • System tools:
    kill background processes
    Force stop other apps
    set wallpaper

 December 15th, 2012  We erased, wiped our phone in order to start clean and the apps, that were previously saved with this utility, were restored using this utility. So, for the moment we are happy with it.

 June 28th, 2013 / 6:43am  -BUT-, (ooooo...that word again) we had some difficulties when we switched over to CM10.1. We also 'UpDated' to the File Expert HD. They appear to have changed how they handle the SDcard in JB 4.2.2. The "4th day UpDate" is comming up tomorrow and we will see how it goes then.

Refer: Google Play File Expert -or- Geek File Expert -and we have The UnOfficial Manual


  Firefox Ver 16.0

Firefox for  Android  is the free web browser that puts the power of the open web in your hands. The official Mozilla Firefox  Android  browser is fast, easy to use, & customizable, with the latest security and privacy features to help you stay safe on the internet.

FAST. Access, browse, and search the web at blazing speeds
SMART. Keep your favorite sites at your fingertips with the new swipe friendly home with smart search
SAFE. Make sure your browsing stays safe & private with extensive security settings, add-ons, and features like Do Not Track

 March 18th,2014 / 8:01am  Claims and Complaints. Firefox claims to have a Super Browser for the Internet via our Smartphones and in the reviews there are complaints. Mainly about the newest version of Firefox for Android. One thing this contains is the ability to Sync the phone Browser with your Desktop Browser. We are gona try that. Refer: Firefox Sync

 March 18th, 2014 / 9:35pm  Not happy with it at all. I was expecting it to be at least somewhat like my Desktop version. IT WAS/IS NOT. Got the same single google screen like I got with the default Browser. Then is was supposed to Sync with my Desktop version -and- IF it did, it was NOT obvious. I could not find my list of bookmarks. It was very disappointing. Just dumped it and went back to the original Browser.

     Permissions  
  • Your location:
    fine (GPS) location
  • Network communication:
    full internet access
  • Your personal information:
    read Browser's history and bookmarks
  • Your accounts:
    act as an account authenticator, manage the accounts list, use the authentication credenttials of an account
  • Storage:
    modify/delete SD card contents
  • Hardware controls:
    take pictures and videos
  • System tools:
    modify global system settings, prevent phone from sleeping, retrieve running applications
  • Network communication:
    view network state
  • Hardware controls:
    control vibrator
  • System tools:
    install shortcuts, read sync settings, read sync statistics, uninstall shortcuts
  • Your accounts:
    discover known accounts


  Gravity Screen - Free or cost $

 HOW IT WORKS:
The app turns the screen off by monitoring the orientation of the device through the gravity sensor. When your phone is pointing downward by its top, below a certain angle, it's likely to be out of use. In this situation the proximity sensor is activated to determine if it is covered. If yes, the screen turns off because probably you placed the phone into your pocket or onto a table.
The screen turns on when you lift up your phone. The phone wakes up if the proximity sensor is uncovered or if it was not covered the app is looking for movements to detect the action.
The Keep Screen On feature based on screen orientation and motion detection as well. If the device is pointing upward and small movements are detected it's probably held in hand and the screen timeout is extended.

     Permissions  
  • Your personal information:
  • Network communication:
    * view network connections
    * full network access
  • Storage:
  • Phone calls:
    * read phone status and identity
  • Hardware controls:
    * control vibration
  • Services that cost you money:
    * In-app purchases
  • System tools:
    * update component usage statistics
    * run at startup
    * disable your screen lock
    * modify system settings
    * prevent device from sleeping
    * draw over other apps
  • Your accounts:
  • Device & app history:
    * retrieve running apps
  • :
Refer:  Gravity Screen - On/Off   and   XDA Home Page  


  HD Widgets - Cost $1.99

The pictures and advertisements were more tantalyzing than the actual operation. Was a little disappointed... at my first use. Will have to use a little more and come back.

UNIVERSAL app made for tablets and phones! No need to purchase again =)

HD Widgets are the next generation of widgets - something fun and amazing designed for today's high resolution touch screens.

HD Widgets includes over 100 beautiful widgets that show current time, current weather, weather forecast, and utility switches. We put a TON of time into designing each widget to look great on every Android screen.

The best part of HD Widgets is how fun and easy it is to use. Everything in the WYSIWYG app is right at your fingertips. make changes and see the results instantly right on your wallpaper background. You can mix and match various clocks (LED, flip clock, and Honeycomb) with backgrounds, layouts, and other options. Simple!

     Permissions  
  • Your personal information:
  • Network communication:
  • Storage:
  • Phone calls:
  • Hardware controls:
  • Services that cost you money:
  • System tools:
  • Network communication:
  • System tools:
  • Your accounts:
  • :
Refer: HD Widgets


  Jelly Bean Extreme - Cost and I Paid $1.99.

  • Custom, Original Design Work
  • Custom Wallpaper
  • 4,200 Custom Images!!
Refer: Jelly Bean Extreme


  Mahjong Ver 1.0.29

Mahjong is a free solitaire matching game which uses a set of Mahjong tiles. The goal of this pyramid game is to match open pairs of identical tiles and remove them from the board, exposing the tiles under them for play. You will be challenged to eliminate all pieces from the board.

     Permissions  
  • Storage:
    modify/delete SD card contents
  • Network communication:
    full network access
  • Phone calls:
    read phone state and identity
  • Network communication:
    view network state

Got this for my wife to play ... don't remember where and I don't


  Mobile avast! Ver 2.0.2750

avast! -- a program we have used extensively on our PC and recommended for installation on our friend's, relative's and customer's PCs. Now we find that they have a version for our Android phone. A review from another can be found here: avast! Mobile Security

Now then, the above mentioned reviewer commented that avast! hasn't found any Viruses on his phone -but- that may change in the not to distant future as these things become more and more popular. There are some evil ones out there just licking their chops for all of us to get a safe and secure nature ... and then... and then... pounce!! So, we will try to head off the culprits -and- test out some of the other features of this Mobile avast!. IF you go over to the avast! site you can also be impressed at the features and what it does.

  9:11am   avast! is now installed.

     Permissions  
  • Your messages:
    edit SMS or MMS, read SMS or MMS, receive MMS, receive SMS
  • Network communication:
    full internet access
  • Your personal information:
    read Browser's history and bookmarks, read contact data, read sensitive log data, write contact data
  • Storage:
    modify/delete SD card contents
  • Services that cost you money:
    directly call phone numbers, send SMS messages
  • Phone calls:
    intercept outgoing calls, read phone state and identity
  • System tools:
    modify global system settings, prevent phone from sleeping, retrieve running applications
  • Default:
    com.dolphin.browser.permission, ACCESS_PROVIDER
  • Network communication:
    receive data fron internet, view network state
  • Hardware controls:
    control vibrator
  • System tools:
    automatically start at boot, kill background processes, measure application storage space


  Next Launcher 3D Shell - $16.99   and   Next Switch Widget - free

Well, we have had this HTC ReZound for over two years and, for various and sundry reasons, have not done a lot with it. We started to, but then lost our System, the Computer System. The "Main" Hard Drive! We spent a "LOT" of time recovering. The problems?? They are all documented in our openSuSE Pages. OK.... nuff said, back to the subject at hand.

Over the course of this time, we learned to install a Custom ROM and UpGrade our ReZound to the latest  Android OS, KitKat. Yes, even though HTC quit on us, some illustrious  Android Developers have created both Jelly Bean and KitKat for our Fabulous ReZounds. At this time we are on a version of CyanogenMod 11.0(KitKat 4.4.2) specifically for our ReZound.

 Next Switch Widget   Included in this section cause... well they are used together.
Actions:
  - Functions: Wifi, Ringer, Brightness, Bluetooth, MobileNetwork, GPS, Auto-sync, Airplane mode, Vibrate,       ScreenTimeout, Lock screen, Ringer volume, Media volume
  - Upward and downward gesture:more switches
  - Tap "more" button:toggle position modification

Now then, we were not really happy with the newer versions. There didn't, no there wasn't, anything really exciting in the newer versions to really, really draw us over. The "Launchers" and the operations weren't all that impressive to us. Now some of the users of this, and the other Smartphones, will probably, no most assuredly, disagree. They use 'ALL' of the features of the phone and the  Android OS. And they claim superior performance. Well, we just didn't see it and kept going back to our 'ICS'. Now with the help of Flyhalf, Neo and _litz over on the XDA Developers Forum, we have gotten more involved... with the newer versions.

 Point #1  Now then, we wanted to dump a lot of the 'Bloatware' that was on our phone. Rather than 'Disabling' and possibly 'Deleting' apps that came on our phone -- and possibly messing something else up -- we decided that we could install one of the newer OS's and then only install the 'apps' that we desired. Whew!! Got all that??

 Point #2  OK, so now we have 'Dumped' ICS and installed KitKat... now what?? One of the 'bekoning' features was/is the "Button Lites" along the bottom of our ReZound. In our 'ICS' version, they were out when they really should have been on. With this new KitKat version they light up when you touch anywhere on the screen. Great.

 Point #3  We built it, KitKat CM11, ourselves and it has our name on it. In the  OS  info.

 Point #4  We could install this Launcher. Yeah, probably could/can on 'ICS' -but.

There are other 'Points' -but- right at this moment we can't think of them all. So, we will get back to talking about our experiences with this 'Launcher'. Which involves "How To Use It". And that is found in 'Another App' called Next Launcher 3D Manuals. OK now, since it is 'Technically' another app, we are going to create another 'Post' for it following this one. More may come here later -but- for now jump to the 'Manuals'.

 After Some Usage - Day 1  As mentioned elsewhere, at first grins it is Captivating and Desirable. However, after playing with it for a while I'm not sure that it is worth $16.99 to me. Yes, the developer(s) put in a lot of work -and- it is probably worth every penny. -But- like the newer Android OS's, it just hasn't 'grabbed' me... yet.

 Calendar!! & Clock - Day 1  I found a Calendar Widget that I like and in 'most' of the previous Launchers, I could NOT set it to a Full page. With this one I can. Similar with the Clock. Wanting to install a Widget on the Main Home Screen that resembles the HTC Clock. It is one of the reasons that I bought the phone in the first place!! Fancy Widgets -or- HD Widgets both seem to fit the bill.

 The icons - Day 2  Ah, freedom at last. You can place the icons anywhere on the screen that you desire. No more of this 4x4 or 4x5 rows and columns of icons. You can arrange them any way you like.


Refer: Next Launcher 3D Review

Info courtesy of: AppBrain

     Concerns  
  • Can access your contacts:
    Apps can access the list of contacts (names, phone numbers, emails)
  • Can access your accounts:
    Apps can discover your accounts and get your email address
  • May cost you money:
    Apps can use SMS services or phone calls which cost you money
  • Has access to your messages:
    Apps are capable of reading your messages (eg email, sms)
     Permissions  
  • Development tools: test access to protected storage
  • Your personal information:
    read your contacts, choose widgets, read call log
  • Services that cost you money:
    directly call phone numbers, send SMS messages
  • Your messages:
    receive text messages (SMS)
  • Network communication:
    full network access, view network connections, Google Play license check, Google Play billing service
  • Your accounts:
    find accounts on the device
  • Storage:
    modify or delete the contents of your USB storage
  • Phone calls:
    read phone status and identity
  • Hardware controls:
    control vibration, record audio
  • System tools:
    retrieve running apps, close other apps, set wallpaper, adjust your wallpaper size, modify system settings, make app always run, read Home settings and shortcuts, write Home settings and shortcuts, access USB storage filesystem, expand/collapse status bar, close other apps, install shortcuts, set preferred apps, prevent phone from sleeping
  • Extra:
    com.htc.launcher.permission.READ_SETTINGS, com.lge.launcher.permission.READ_SETTINGS, com.fede.launcher.permission.READ_SETTINGS, org.adw.launcher.permission.READ_SETTINGS, org.adwfreak.launcher.permission.READ_SETTINGS, org.adw.launcher_donut.permission.READ_SETTINGS, com.go.glwidget.settings.permission.READ_SETTINGS, com.go.glwidget.settings.permission.WRITE_SETTINGS, com.gtp.nextlauncher.trial.PAYMENT_BROADCAST_PERMISSION, android.permission.DEVICE_POWER


  Next Launcher 3D Manuals

These explain how to use the previous app. We are not going to repeat everything in the manuals, only enough to wet your appetite... and ours. We are in the "Trial" period of the Launcher App and we are trying to understand its usage to see IF we really want it. At first grins it is captivating and desirable.

 Home Screen  This, as its name implies, describes the 'Home Scree' and how to manipulatem, or edit, the screen and icons. (8 pages)

 Dock  Tells you how to operate the Dock and how to add icons to it. However, they do not tell you how to remove one. Suspect that it is a hold and drag to the trash can. Will have to test that theory. Yep. That is the way to remove.(2 pages)

 App Drawer  Once again obvious, a description of the App Drawer and how to perform various operations ont it.(5 pages)

 Folder  Describes how to create a Folder on your screen(s) or in the App Drawer.(2 pages)

 Gesture  This explains the results of finger movements on the Screen(s).(5 pages) Refer: Developers

 Widget  We have three kinds. Next, Go and System. The first two are obviously from them and the last one is from everywhere else. There are descriptions on how to add each and how to edit the first two types. The last one will, naturally, depend on the Widget installed.(3 pages)

 Visual  In here is described an Icon Editor, how to do Mode Picks and a description of Effects Settings.(4 pages)

 More  Describes items that don't fit anywhere else.(5 pages)

     Permissions  
  • None Required:


  Next Lock Screen

My CM11 Lock Screen was, for some reason, stuck at 75°. I found it greatly annoting that I had to go to my home screen in order to see the temp. I mean IF it is there it should be correct. So I wasted part of a Saturday looking for a replacement and I found this one... by Microsoft!! It is a lot more involved that I desired -but- it works fine on my 5 year old(almost) phone. I keep finding these things that make me keep my phone. This is the 4th, and will be the last. They do not offer them as replacements anymore. So IF this one breaks I'm out. Well, maybe not... there are people selling them.

Permissions... it's got them all and I don't feel like copying all of them. Leastwise not at this time. Jump over to the PlayStore reference to see.

     Permissions  
  • Device & app History:
    retrieve running apps
  • Identity:
    find accounts on the device
    read your own contact card
  • Network communication:
  • Storage:
  • Phone calls:
  • Hardware controls:
  • Services that cost you money:
  • System tools:
  • Network communication:
  • System tools:
  • Your accounts:
  • :


  Notes taking - Color

Refer: ColorNote Notepad Notes


  Google Play Services Ver 1.0.13

     Permissions  
  • Your personal information:
    read Browser's history and bookmarks, read contact data, read sensitive log data, read your profile data, write Browser's history and bookmarks, write contact data, write to your profile data
  • Services that cost you money:
    directly call phone numbers
  • Your messages:
    read instan messages, write instant messages
  • Your location:
    coarse (network-based) location
  • Network communication:
    full internet access
  • Your accounts:
    act as an account authenticator, contacts data in Google accounts, Google mail, manage the accounts list, use th authentication credentials of an account, YouTube, YouTube usernames
  • Storage:
    modify/delete SD card contents
  • Phone calls:
    read phone state and identity
  • System tools:
    change network connectivity, change Wi-Fi state, make appliction always run, modify global system settings, prevent phone from sleeping, write subscribed feeds, write sync settings
  • Network communication:
    receive data from interent, view network state, view Wi-Fi state
  • Hardware controls:
    control vibrator
  • System tools:
    automatically start at boot, read subscribed feeds, read sync settings, read sync statistics, send sticky broadcast
  • Your accounts:
    discover known accounts, read Google service configuration, view configured accounts
  • :


  Google Play Store Ver 3.9.16

     Permissions  
  • Your messages:
    rceive SMS
  • Network communication:
    control Near Field Communication, full internet access
  • Your accounts:
    act as an account authenticator, manage the accounts list, use the authentication credentials of an account
  • Storage:
    modify/delete SD card contents
  • Phone calls:
    read phone state and identity
  • Services that cost you money:
    send SMS messages
  • System tools:
    change network connectivity, delete all application cache data, prevent phone from sleeping, retrieve running applications
  • Network communication:
    Google Play billing service, receive data from internet, view network state
  • System tools:
    automatically start at boot, install shortcuts
  • Your accounts:
    discover known accounts, read Google service configuration


  Purchased Apps

You can now browse and install your previous application purchases. It shows only applications that you purchased, you don't have to dig through hundreds of free apps anymore.
- Lists your paid apps
- Sorts them by date of purchase or name
- Multiple account support
Permissions GET_ACCOUNTS & USE_CREDENTIALS are needed to log in the Play Store website.

The application scrapes the Google Play Store website, it is susceptible to break if something is changed on the site.

If you have any question or suggestion please don't hesitate to contact me via email.

     Permissions  
  • Your personal information:
  • Network communication:
  • Storage:
  • Phone calls:
  • Hardware controls:
  • Services that cost you money:
  • System tools:
  • Network communication:
  • System tools:
  • Your accounts:
  • :
Refer: Purchased Apps


  RealCalc Ver 1.7.3

     Permissions  
  • Hardware controls:
    control vibrator


  Retouch


  Robotic Guitar

Virtual guitar & synth ? Chord guide ? Tuner ? Metronome
Robotic Guitarist is a virtual guitar for your device. This application will be useful both for those that already play the guitar and learners, and even if you can't play but want to get some fun or experiment with its sounds.

     Permissions  
  • Network communication:
    Allows the app to create network sockets and use custom network protocols. The browser and other applications provide means to send data to the internet, so this permission is not required to send data to the internet.
  • Phone calls:
    read phone state and identity
  • Hardware controls:
    control vibrator
  • Network communication:
    view network connections
    Allows the app to view information about network connections such as which networks exist and are connected.
Refer: Robotic Guitarist on Google


  Root Browser

Root Browser is the ultimate file manager for rooted users. Explore all of Android's file systems and take control of your Android device.
Check out ROM Toolbox which has included this app and added many more features.
For fast and friendly support please email us at jrummy.apps@gmail.com. We will be glad to help answer your questions and troubleshoot with you.

Refer: Root Browser


  Root Checker 1 Ver 1.8

     Permissions  
  • Network communication:
    full internet access
  • Network communication:
    view network state
Refer: Root Checker PlayStore


  Root Checker 2 Ver 1.2

     Permissions  
  • Network communication:
    full internet access
  • Network communication:
    view network state
Refer: Root Checker PlayStore


  Sense 5.5 - cost and I paid it

Paid $1.50


  SIM Card Manager

Refer: SIM Card Manager


  SkyDroid - Golf GPS - cost and I paid it.

Accurate and reliable, SkyDroid - Golf GPS is the perfect Golf GPS Range Finder and Scorecard for your Android phone. Our simple to use design is used world wide helping golfers get their distances and lower their golf scores.
#1 Golf GPS Range Finder app in the Sports Category!

Refer: SkyDroid - Golf GPS, Video and FAQ - $1.99


  Stop Watch and Timer Ver 1.2.7

     Permissions  
  • Storage:
    modify/delete SD card contents
  • Network communication:
    full internet access
  • System tools:
    prevent phone from sleeping
  • Network communication:
    view network state
  • Hardware controls:
    control vibrator


  SwiftKey Keyboard

I really liked the ai.type.keyboard until I discovered that it was the ruination of my battery!! It was listed by "Battery Doctor" and "Avast Battery Saver" as the highest user at 84% or more. Don't know why or what it could be doing that would require this much battery power. I replaced it with this keyboard and my battery consumption went down!

Refer:  SwiftKey Keyboard  


  Titanium Backup

Refer:


  Touch-Writer Gesture Keyboard - cost and I paid it.

Enter a whole new, transformative experience using this amazing new gesture / handwriting recognition based writing method.
#### ENGLISH ONLY #### other languages coming soon.

Touch-Writer glass enables you to write, using gestures. You write upon the 'glass' - a movable, resizable transparent area of the screen, instead of using a keyboard.

Touch-Writer automatically integrates with your browser and all your apps and will appear in lieu of your keyboard.

     Permissions  
  • Network communication:
    FULL NETWORK ACCESS
    Allows the app to create network sockets and use custom network protocols. The browser and other applications provide means to send data to the internet, so this permission is not required to send data to the internet.


Refer: Play Store -- $0.99 purchase

  V Cast

Came with the phone.


Warning
The instructions -and- information in this guide are intended for use with the HTC ReZound. Applying these instructions on another device or model may, and probably will, produce undesired outcomes.

  Controlling the Apps

 List-of-apps   We were thinking of creating a list like this -but-, as you will see, it is 'quite large'. This is another thing that impresses us about this phone. It does so much. It is almost like carrying a 'puter around with you.

How do you disable them?
Settings ---> Apps ---> Pick the App ---> Disable*
*Disable may not show, you may need to click Uninstall Updates first*

Our copy of the list in case the original is gone: A list of Rez Apps


  PC Connection

Well, now we get to one of the reasons we chose this phone. Like our last phone, the LG Wave, we made sure that there would be the possibilty of connecting to our computer and transfering data - both ways. This fact was in the claims of both. However, it appears, at least at this first look, that the interfaces are Windows oriented. Which is usually the case for almost everything. It is, after all, the most used Operating System.

Windows Media Center

Now then, upon plugging into the USB port on our HTC ReZound and then one of the USB ports on our computer we get the "connect sound" with a Welcome to the Found New Hardware Wizard dialog box. This is expecting us to install some software that we did not get??? Hmmmmmmm.... let's look at the attached User Guide. Ok. Page 48.

Linux

Now then, these "statements" came from a support section on a different HTC phone. However, they match the situation that we experienced.

User: Every time I connect my phone to a PC running windows XP the Found New Hardware Wizard launches and it says it Cannot Install This Hardware?
Resp: To mount your phone as a USB drive, after connecting to your PC, open the Notifications Panel (by touching and then dragging the status bar down) on your device, then in the Notifications Panel, touch USB connected and then touch Mount.

User: When I connect my phone to my PC how do I stop the Found New Hardware Wizard from launching on Windows XP?
Resp: When you see the Welcome to the Found New Hardware Wizard on the PC select Yes, this time only > Install the software automatically. When you see the message Cannot Install this Hardware place a check in the Don't prompt me again to install this software box and then Finish.

Now then, in response to the above scenarios is this Q and A:
Q: Does beats audio require any extra software on your home computer to convert or
     transfer music to the phone?
A: No.

 USB Connector  Not happy with this. Most of the time it is NOT a smooth plug-in. It doesn't seem to want to line up. And as fearful as I am with breaking something on this expensive phone... well you get the idea. Also, the fancy connector to the phone is not necessary. You can use one that has the one wide side, with the wide side at the top. Matter of fact that is the type of connector that they show on Page 26 in the User Guide!! -But- I purchased the 'correct' one before finding this out.
The left side has the charge port which looks like a proprietary connector, but it's really an ordinary micro USB connector.

Actually connecting

Interesting things you can find when you have a "Multi-Machine/OS" setup. What we have:

  • HP m7480n Pavilion Computer.
  • Dual Boot Windows XP Media Center / openSuSE 11.4 12.3
  • VMware Inside Linux
  • Windows 2K Inside VMware

 Ubuntu - July xxth, 2013   Well, we finally had to install Ubuntu. Why is that mentioned here?? Because. Really because of the requirments by JuopunutBear / Unlimited IO for S-Off. They discontinued their Windows version -and- are only supporting their Ubuntu version. So, we had to install it. It was a little bit of a struggle -more- because we were in a hurry and annoyed because we had to Install Ubuntu just to get S-Off. -But- in reality we were thinking about trying it anyway. Just being forced to was not nice and sooner than we wanted.

The reason we had to S-Off again?? Phone broke and we got a replacement July 10th, 2013. Reason for the xxth in the paragraph heading is... we don't remember the actual date of the installation. However, it was within a week of the replacement arrival. We 'tried' the Live version of Ubuntu via a DVD and did NOT have any success. So, we used our "Test Partition". Finally got it setup and then performed the Wire Trick. Like the first time... it took a number of tries. Just couldn't get the timing down.

Linux Connect

Allllrighty now, one thing we are starting to learn... PAY ATTENTION TO THE PHONE SCREEN!! Especially when connecting via the USB port. Just plugging into the USB port on the phone and then into the USB port of the computer,,, does not necessarily do anything. IF you watch the phone screen you will see that you get some choices... when you connect. It is only a fleeting moment, as far as we are concerned. Don't understand why it goes away so fast.

Now then, the figure above shows our attempt to get connected to our Linux Platform. The two figures on the Right are screen captures of our phone whilst trying these PC Connections. The first one being the default setting, which is "Charge Only", and the second one shows the screen AFTER we tapped the "Disk Drive" Selection. Again, this is whilst connecting to our Linux Platform. Windows will be discussed further down.

Now one of the interesting things to notice is; there are two connections! HTC Android Phone on the top and 14.8 GB Removable Media on the bottom. The top is, of course, the 16GB of storage that is Permanently in the Phone. The bottom one represents the Removable SD Memory Stick which is also 16GB. Now it has been learned that the 'default' setting for the Camera is to place the pictures taken in the "Removable Storage". Except... when you take a screen shot. Then it places it in the "Permanent Storage".

 Screen Shots   This Camera has a unique capability of taking and saving a "copy" of a screen that you have showing. And so far, we think, for ANY screen. The two images of the "Choose a connection type:" are screen captures from our phone. In fact the image farthest to the right says "screen shot saved to Camera shots" along the bottom. Don't know why it wasn't in the first one -but- timing is everything. (or, so they say) So, how do you do it???

Wellll, in order to take a screen shot you must hold your tongue on the left side of your mouth, stand on one leg and pat your tummy. It almost felt that way whilst trying to get the shots we have here. Actually, you press and hold the Power/Lock button on the top of the phone and then tap, or press the Home key/button at the bottom of the phone. This can get tricky for some of us. IF you are successful you will hear the sound of the camera... unless you for some reason have that turned off. As mentioned elsewhere, but we'll say it again, the screen shots are saved in the phones internal permanent storage.
Refer: Screen Shot FREE in phone feature and engadget Screen Shots

Now then, don't take to long to press the Home key after you are pressing and holding the Power/Lock. Why?? Cause remember??? That is how you turn the phone off! Like we said, it can get tricky.

Windows Connect

Now we move over to our Windows Media Center. With Windows Explorer open, and our USB cable already plugged into the phone, we plug the cable into the PC. The connection sound occurs and we see three, 3, drives added to the list we already see in Windows Explorer. Because of all the Memory Card Slots, two DVD drives, two HDD's and multiple partions, the "new" drives are high on the list:

  •        Desktop                        Laptop
  •     CDROM (N:)                  CDROM (H:)
  •     Removable Disk (O:)     Removable Disk (I:)
  •     Removable Disk (P:)     Removable Disk (J:)
Now the CDROM (N:) appears first which must be something in the Phone. After a couple of secs, the second one, the Removable Disk (O:) appears and the last one, the Removable Disk (P:) doesn't appear until I click on something else. We also get the requests to install software but ignore them.

Now notice we made NO mention of choosing our connection on the phone... so, it is by default sitting there in Charge Mode... and we can NOT connect to transfer anything. Ok, the quick way is to just disconnect the cable and reconnect it. Then when the 'Choice' screen appears make the 'Disk Drive' choice. You can do it via some fancy fingering on the phone menus -but- the disconnect/reconnect is faster and easier.

 Rut, Roh..!!  We missed a step in the above. AFTER you Tap -or- Press the 'Disk Drive' selection you must then Tap -or- Press the 'Home Key'. The drive list will then change to:

  •        Desktop                        Laptop
  •     CDROM (N:)                  CDROM (H:)
  •     Removable Disk (O:)     Removable Disk (I:)
  •     Removable Disk (P:)     Removable Disk (J:)
After completing this step, you can access the 'Drives'. As stated elsewhere, you can answer the 'Wizard' questions with a positive and then ignore it when it says that it can not find the softeware -and- then check the box that says "Don't ask me again.". The next time all you will have to do is push the buttons on the phone.

Well now, that is a Bold Face Lie!! We performed the operations as described and re-booted... with the Phone still connected. After the initial boot steps were satisfied we got an Installation Wizard request to install software!! What happened to the auto ignore??? Ok. So we will properly disconnect the phone and restart again. Good. On boot-up we did not get an Install Wizard. However, when we plugged into the PC USB port we got the Install Wizard again. So, I guess Microsoft doesn't obey their own rules.

  GPS and Weather

Why Is The GPS Indicator Always On?

Why GPS and Weather?? Well, IF you try to, -or- do, enable the Weather Widget on the Home Face of your phone, you will get asked to and informed of the following:

Allow Google's location service to
collect anonymous location data.
Collection will occur even when no
applications are running.

Now this is where we start to get concerned with "our Battery usage". In order to tell you about the Weather it has to know where you are. In order to know where you are it has to use the GPS. In order to use the GPS it must connect with Google. In order to connect to Google it must use Wi-Fi or 4G or 3G - all of which use Battery Power - a lot.

So how many times do you need to know the Weather?? Everytime you look at your phone (so you can show off), or just when you have a Golf match planned. IF it is the later, then there is an app - that is included with this phone - that will give you the Weather Information a lot cheaper. You could even put a short cut on your Home Screen (the main one or one of the others) and that would still be impressive to others -and- save battery. Just another thought.

Satellite GPS requires more power and will have a greater effect on battery life.


Refer: HTC ReZound Smartphone on Droidforums.net

  Wallpaper and Ring tones - and Screen Things

Download the app 'zedge' it has TONS of wallpapers and ringtones and alert sounds.

Found the above comment and then forgot where we found it; and then after searching for it, put references to the info. Not sure about the app... yet, but we will investigate. Another item that is interesting but not pressing.

  RezoundHound on DroidForums This was in response to:
Noticed that the display's brightness never seems to change no matter the amount of light present (with Automatic brightness enabled).
Response: I thought the exact same thing. Then I downloaded Brightness Level. At different times with varying degrees of ambient light, I set the brightness to "Automatic". Each time I manually adjusted the slider to duplicate the brightness level Automatic provided, switching back and forth between manual and automatic until I matched the levels. Each time the matching manual level was a different percent. This proved my theory. The automatic brightness setting is working. However, it adjusts the screen brightness so seamlessly, you don't really notice it's working. This is exactly how it's intended to work. It should look exactly the same under varying light conditions. If you think about it, it has to produce different light outputs in order to accomplish this, since your pupil continuously dilates and constricts.

Wallpapers

Ringtones


  Software and Widgets

Well, this item is listed, advertized and sold as a Cell Phone. However, as noted previously, this thing has more power than my first 3 Computers.

  • My Verizon, Backup Assistant, Visual Voice Mail, Mobile Hotspot, Sync & Connect, Mobile IM, Media Manager, Next Generation Messaging, Amazon Kindle, Media Manager, V CAST Music, V CAST Video, Blockbuster, Need for Speed, NFL, Let's Golf 2, Slacker, Video Surf, VZ Navigator
  • HTML Browser: Adobe Flash Player

Did not sign up for V-Cast but I see up and down loads by it all the time.
Check under: Settings -> Accounts & sync -> V-cast Media Manager. You'll notice that there are three boxes for Media - Music, Pictures, Videos. Uncheck all the boxes.
I also, at this time, unchecked the Background Data. IF I don't get anymore updates then I'll turn it back on.


Refer: Verizon Details

Warning
The instructions -and- information in this guide are intended for use with the HTC ReZound. Applying these instructions on another device or model may, and probably will, produce undesired outcomes.

  Hard Reset

   HTC ReZound hard reset using the phone buttons

If you can't turn on your phone or access the phone settings, you can still perform a factory reset by using the buttons on the phone:

  1. Remove the battery(Please see OnOff), wait for a few seconds, then reinsert the battery to turn off your phone.
  2. Press and hold the VOLUME DOWN button, and then briefly press the POWER button.
  3. Wait for the screen with the three Android images to appear, and then release the VOLUME DOWN button.
  4. Press VOLUME DOWN to select FACTORY RESET, and then press the POWER button.

   Restarting your phone soft reset HTC ReZound

If your phone is running slower than normal, an application is not performing properly, or your phone becomes unresponsive, try restarting your phone and see if that helps solve the problem.

  1. If the display is off, press the POWER button to turn it back on.
  2. Unlock the phone display.
  3. Press and hold the POWER button, and then tap Restart.
  4. When asked to confirm, tap Restart.

If these steps don't work, you can remove and replace the battery(Please see OnOff), and then turn the phone on to restart it.

   HARD RESET Because of ICS Update

We have been experiencing some problems lately with our cell phone. The Bluetooth operations have started getting flaky and just today some of the phone operations started getting flaky. So, we did our usual and perused the Net. Found some interesting conversations at: Android Central. The general consensus was; Do a Factory Reset after installing the OTA ICS Update.

Now then, along those lines, we found a "newer" ICS update also on the Net. However, because we have Un-Locked and Rooted our phone we can not install it. Must have a "Virgin" setup. So, we can kill two birds with on stone???

The ICS update is already on your phone you do not have to download it again. It is now the Factory Reset.


   Resetting your phone

Do a factory reset to return your phone to its original state before the first time you turned it on. If you're passing your phone on to someone else or your phone has a persistent problem that cannot be solved, you can perform a factory reset (also called a hard reset). Factory reset is not a step to be taken lightly. It'll permanently delete all your data and customized settings, and will remove any applications you've downloaded and installed. Be sure to back up any data and files you want to keep before you do a factory reset.

Performing a factory reset via settings
The most convenient way to do a factory reset is via the settings.

  1. From the Home screen, press MENU, and then tap Settings.
  2. Tap SD & phone storage > Factory data reset.
  3. Tap Reset phone, and then tap Erase everything.

ReBooting

Strangely, and simply enough, ReBooting is simply turning the Power OFF. Now that does NOT mean just blank the screen -but- stopping the flow of electrons through the device. This is called a Cold Boot, in computer terms, and is described above in Power OFF.

Another type of ReBoot is called a Warm Boot. This is accomplised by performing the same procedures as the Cold Boot/Power Off... EXCEPT when you are presented with the menu that OFFERS the Power OFF. It also offers a ReStart. This time you will Tap that one. As the message says, it will clear the memory. So, IF you have anything that you want saved, you had better get it saved.

 The Memory - November 7th, 2012  Now then which memory??? will get cleared??? There are three. One GB of System RAM, 16GB of Internal RAM and 16GB of External RAM. From our experience, the memory -or- RAM that they are talking about, in this case, is the 1GB of RAM; the System Memory.


Refer: HTC ReZound hard reset and HTC ReZound Support

  Data Usage

When we signed up for our phone, on December 31st,2012 before midnight, we obtained double your Data plan for the same price. The plan we got was 2GB for $30 per month which became 4GB for $30 per month. We were worried that would not be enough. But according to Verizon, 95% Of their Smartphone Customers Use Less Than 2GB Of Data/Month. This was confirmed by viewing our sons bill and he only used 1.456GB's of Data this past month. He is a heavy user of Texting and some other stuff but I do believe that he doesn't do much with the Video portion.

Anyway, it appears that the 4GB Data plan will be enough. We'll try to remember to update this as we progress with the phone.

 August 1st, 2013/3:12am  Well, here it is, over a year and a half later and we have NOT had any increased memory usage. Course we do not text or do movies but we have used the GPS and the Internet a lot. So we would say that 4GB is more than enough for "normal" usgage. Now whether or not 2GB would be a problem, we just didn't monitor it that close -but- we don't think so... again under 'normal' usage.


Warning
The instructions -and- information in this guide are intended for use with the HTC ReZound. Applying these instructions on another device or model may, and probably will, produce undesired outcomes.

  rooting a ReZound

DO NOT ever attempt to accept an OTA while rooted.
Please refer: Scott's Verbiage

What we have here... is another write-up on 'root'ing. (Said in 'Cool Hand Luke' style.) An HTC ReZound in particular. Why?? Because IF we research and write-up the procedures, steps and requirements we will understand them better and not just do it by rote. Then we will be able to talk intelligently (hopefully) to others about it -and- even help someone else. -And- most important we will have all the info for use at a later time IF we have to do this again... all in one place. Rooting gives some advantages for power users, but for normal, or even intermediate users, you probably don't need to 'root' the phone .. to enjoy it as much as you'd have needed to for previous Smartphones. -BUT- I am the "Computer Guru" of the family -and- therefore, I just have to do it. -BUT- (another one of those..) one thing about being knowlegable is... you know that you must Read, Understand and Follow the proper procedures. Investigation is also good. You find out what, if any, problems there are -or- have been BEFORE you encounter them. DO NOT HURRY into this. Even IF you are young and impatient... hold back. It really isn't all that important that you get this done today. -But- it is important that you get it done correctly.

 Found: December 30th, 2012  This is part of the description of a SuperUser app. Thought that the info was pertinent... so we copied it.
This app cannot be uninstalled if it was installed with your ROM or root. If there is no uninstall option, it's because you placed it in /system/app, not me. It is impossible for an app to be installed in /system/app by the Play store. In fact, the entire /system partition is read only at runtime. The only way for an app to be placed in /system/app is via a rooting process (which usually installs Superuser), or by remounting the system partition as read/write and manually putting it there.
Refer: Superuser


The information presented here is as accurate as we have found. We -nor- any of the sites referenced -or- mentioned will take any responsibility for your mistakes. Yep!! They will be your mistakes... cause to many have used these procedures and been successful.(Yep, even us!) CHECK - LOOK - INVESTIGATE - RESEARCH - READ - BEFORE YOU DO ANYTHING.


 UNLOCK ???  Some say must... others say not necessary. However, IF you want to play with Custom ROMs and such... you MUST UNLOCK. The only reason for enabling 'root' is to get control of your phone. -And- you don't get FULL control unless you unlock the bootloader. So the point is mute. Make your first step an UNLOCK.   Just remember... it will void your warranty.  
Nope, you dont have to be S-0ff to be rooted, only UN-locked.

Refer: Why root??? and root??? and of course   ReZound - All Things Root and Android Revolution


TWRP Touch Recovery On Your HTC Rezound
How To Backup Your Android Device Data
Hasoon2000 All-In-One Toolkit For The HTC Rezound v2.1

And we found the definitive answer to the Lock/Unlock question: (RootzWiki)
Q: Why does unlimited.io say a prerequisite for their s-off is being rooted and unlocked via htcdev?
A: To be able to use adb you must be rooted. In order for that you must be unlocked.

First and foremost, you need to understand what you are doing:
-You are voiding your warranty!
-You can possibly brick (rendered useless; aka expensive paperweight) your phone!
To avoid such:
-Read! Read! Read!
-If stuck, ask! ask! ask! We are all here for you! ReZound Development forums
Proceed... (As mentioned many times before, these pages are mostly for ourselves. They are offered in hopes that they may help someone else. Information may be copied, and repeated, from other WebPages mainly so we don't loose the info. -But- also to get the stuff in one location.)
IF you haven't guessed it by now... this is Windows Oriented. We are setting things up on our Windows 7 Laptop. We had started a Linux setup -but- that got squashed by our Hard Disk Crash. It is mentioned further down and will be revived later.


Required Resources

If you haven't already, please make sure all these items are installed and up to date. We have listed them here at the beginning so that you can get them before they are needed -- in the middle of these operations. Again, this is Windows Oriented -- Linux will come later.
Side note to self: This seems to be the same as the setup for Linux below that we 'lost' in the HD Crash.

Google Android SDK zip:

http://developer.android.com/sdk/index.html
Now watch this... it will select the highest level, like 4.1 even though you only have 4.0.3. So don't leave the defaults UNLESS they are correct, which in this case they weren't. Duuhhh higher levels are supposed to be backwards compatible. 15 Jul 2014

Java Runtime Environment:

http://java.com

HTC Sync (Windows Only):

http://www.htc.com/www/help/
Interesting... the ReZound is NOT listed in the 'supported' phones. Do believe that this phone, like our previous LG Wave, has become a step child. Doesn't matter. Most of the places tell you to NOT run this when Unlocking -or- rooting your phone.
The HTC Drivers are available at:
MyTopfiles and Dev-Host ad others...

Now then, we want to say that -even though this may look easy- it is not... unless you are an expert. Take some time and read over the procedures and the discussions on the Sites Referenced. Don't hurry... read it again! and again IF necessary... till you are sure you understand. We -NOR- any Sites mentioned will take any responsibility for any of your actions. We have all endeavored to make this as correct as possible -BUT- you are on your own. IF you do not feel comfortable with these procedures -but- you still want your phone unlocked and rooted...
then get someone else to do it for you.

  Unlocking HTC ReZound

  Most of this information was obtained from macpro88 and MrSmith317 and scotty85.
  1. Unlock ReZound's Bootloader - Is this necessary?? The Answer
    1.  First 'Unlock' the Bootloader  Make sure your phone has USB Debugging enabled. Go to HTCdev and create your own personal account.
    2. Now visit HTC Dev's Unlock Bootloader site. Sign in, if you are not already. The pages we borrowed this info from said that the ReZound was not listed in the compatible devices -but- it is now.
    3. On the Right, select the ReZound and then click on  Begin Unlock Bootloader .
    4. In response to the question about Continuing, click Yes - Unless you want to abort this whole operation.
    5. Next you are presented with 'CYA' terms -and- check both - Unless you want to abort. IF you don't then click on  Proceed to Unlock Instructions .
    6. In order to get into the bootloader you must remove and reinsert the battery(Please see OnOff). Now that is a pain in the arse. Should be another way. Especially, IF/WHEN you are learning. Taking it apart all the time could lead to some worn edges and, in the case of this one, possible dropping. -OR- in our case, soft finger nails. Fender thin guitar pick comes in real handy here.
      Well we did our usual, searched the Web, -and- have found that is not exactly true:
      Re: [HOW TO] Access HBOOT/FASTBOOT/RECOVERY Menu
      Ehh you don't have to do a battery pull for this....just make sure fastboot isn't checked in the power options. If it is checked the phone doesn't shut down all the way.

      tm1618 on Droid Forums
      ( Menu -> Settings -> Power -> Uncheck Fast boot )
      ( Vol Down Button & Power/Lock Button )
    7. After reinserting the battery, press and hold the Volume Down and then press and hold the Power Button --- at the same time --- to start the device into Bootloader mode.
    8. Use the Volume buttons to move up or down in the menu. Highlight Fastboot and press the Power button.
    9. Next Connect the device to the computer via a USB cable
    10. On your computer create a new folder (For Example: C:\Android) where we will be putting the following 3 files in this new folder:
      • adb.exe (ADB stands for Android Debug Bridge. ADB provides the bridge between your machine and your computer.)
      • AdbWinApi.dll
      • fastboot.exe
      Some clarification here. IF you follow directions you are told to run the SDK Manager and install some tools. Well, it puts them in an \Android\android-sdk-windows\platform-tools dir UNDER Program Files (x86). In order to follow most of the descriptions ... everywhere ... create the "special" dir mentioned above and then move the program files to there.

         Unlocking:

    11. Open up a Command Prompt window on your Computer.
           ( Start > Run > Type CMD, and hit Enter).
    12. Navigate(move) to the "special" folder; by typing "cd C:\Android" in the Command Prompt window and hitting the Enter key.
    13. In the Command Prompt window type: fastboot oem get_identifier_token and hit the Enter key.
    14. You will see a long block of text. Copy and paste this text into the the token field in HTCdev Website window (in the Command Prompt window:
          Right Click > Mark > highlight the block of text > hit Enter key to copy).
      More clarification: This is Step 9 in the HTCdev pages. They have pictures. They show the block of text that you must copy. It starts with:
      <<<< Identifier Token Start >>>> 
           and ends with
      <<<<< Identifier Token End >>>>> 
      You are to include both of those lines and everything in between them.
    15. Paste this string, or block, of text into the token field provided and hit Submit in order to receive your unlock code binary file. You will receive this information in your email... gmail.
    16. You will receive an email with the attachment: Unlock_code.bin. Save this file in the special folder with your fastboot files (C:\Android).
    17. In the Command Prompt type: fastboot flash unlocktoken Unlock_code.bin. On the Phone Screen you will see the following message:
    18. On your phone you will see the above disclaimer. Please read this carefully as this action may void your warranty. Use the Volume buttons to highlight your choice, Yes -or- No, and then press the Power button to make your selection. If you select Yes, your phone will be reset to its' factory default settings, and your bootloader will be unlocked. If you select No, your phone will reboot and no modifications will have been made.
    19. Well, bouncing back and forth between reading, writing and doing got to be to much of a hassel. This was just an outline of what is to be done. IF you follow the Unlock ReZound's Bootloader above you will be ok. We did and we now have an Unlocked Phone.
  2. Question:
    Will unlocked using the method detailed in this thread still result in having to wipe the phone
    (as mentioned on the HTCdev website)?
    Answer:
    Unfortunately yes. The unlock procedure performs a factory reset. No way around it,I'm afraid.
  3. Question:
    Can I root the Resound without S-off?
    Answer:
    Yes, you can root without S-OFF, but you have to unlock the bootloader. No, there is no way to currently root without going through HTC to unlock the bootloader.
  1. Deviate and make sure "USB Debugging" is enabled on your ReZound.
    Menu / Settings / Developer Options and then check the box.
  2. Deviate and install "HTC Driver" on your Computer IF you haven't already.
  3. Check that Java is installed on your Computer. Looks like we have jre6 and jre7.
  4. Eclipse is also needed, on your Computer, -but- we think that is only for writing apps. And we are not installing it at this time... September 25th, 2012 / 10:04am
  5.  Android  is based on Linux and comes locked with only standard user access given to its user.
  6.  Root access   - also known as Superuser access - is the access level on Linux-based devices that lets their users perform administrative tasks including updating the system, installing applications at the core level without using the standard '.apk' installation files, accessing the system partition, modifying protected system files and changing their permissions etc.
  7.  ADB   stands for Android Debug Bridge. It comes as a part of the standard Android SDK. Basically, it provides a terminal-based interface for interacting with your phone's file system. Since Android platform is based on Linux, command-line is the only way to obtain and manipulate root access often required to perform certain advanced operations on your device using root access.
    For a complete list of adb commands, check out the official adb guide here.
  8.  HBoot   is the bootloader and is loaded immediately when your phone is switched on. It is mainly responsible for: (1)checking and (2)initializing the hardware and (3)starting the phone's software. It can also be used for flashing official software releases, as well as a few other things. HBoot can be compared to the BIOS on a computer. www.facebook.com/note.php
    Nandroid backup and restore doesn't touch HBOOT.
    HBOOT is a manufacturer specific term.. generally used by HTC.
    Android Enthusiasts
Refer: Android ROM and rooting dictionary: all the funny words explained and XDA-Developers forum

  Rooting HTC ReZound

  1.  Now 'root' the phone   First, what do we need? We did the 'Unlock' via Windows 7 on our Laptop -and- we DID NOT have HTC Sync installed. Matter of fact, most of the places we have visited concerning 'Unlock' and 'root' have said... "Make sure HTC Sync is NOT running.".
    1. A few tools:
      • A passing familiarity with DOS/Command Prompt/Terminal Emulator
      • Android SDK (Win/Mac/Linux) : LINK **This install may take a while**
      • HTC Drivers (Win): LINK
      The observant will notice that the last two were already installed for the 'Unlock'.
    2. YOU MUST BE UNLOCKED IN ORDER TO ROOT
    3. First you'll need to download a Custom Recovery called AmonRa. Why?? In HTC Android phones, the recovery image is a piece of software that can load a ROM image from the
      SD Card, -or- a PC, and Flash it into the internal ROM. The recovery image is accessed
      from HBoot.
           Here's a link to it: [Recovery] Amon Ra style vigor - xda-developers
      and some info on it...
           How To Install A Custom Recovery To An Android Phone / Device
      A custom recovery lets you perform several advanced operations on your Android device.
      A recovery image is the system level software for your Android device that lets you perform several maintenance and recovery tasks. The stock recovery image is quite limited in what it allows you to do and therefore, flashing a custom recovery image is required to gain full control of your device's administration. A custom recovery image allows you to perform the following tasks:
      • Wipe your phone's data (Factory reset) and cache,
      • Make, restore and manage backups of your phone's operating system and sotware.
      • Mount, unmount and format your phone's internal as well as external storage partitions.
      • Install a custom ROM or application from a zip file to your phone,
      • Wipe Dalvik cache and battery statistics, and
      • Make logs for error reporting and debugging.
    4. Second open a Command Window. (In the following, when you are told to 'Type' or 'Enter' a command it will be in this Command Window.) Move to the proper dir: cd C:\Android
    5. Third copy 'recovery-ra-vigor-3.15-gmn.img' to the C:\Android dir created above. In the Unlock procedure above, we already copied the program files to this dir.
      Also need to download -and install on your SD card- UPDATE-SuperSU-v1.34.zip. This can be found at: XDA Developers Development Forum. We had a lot of trouble getting 'root' on our ReZound. We believe that this particular SuperSU - and doing it as a zip install - is the reason that we were finally successful. Now the last part down where it shows the install of this file may -or- may not, be a little mixed up. -But- at this time, we are NOT gona go over it again to find out all the corrections -if any- that are needed. Scott and the others did a lot of good work on their descriptions -but- they didn't quite work in the order that they presented them. Leastewise NOT for us. From our experiences, and judging what they wrote, we suspect that they finlly got it rooted and came away with the same attitude that we possess at this moment. It's done... it works... and we're moving on!! Clearifications will come later. Again, at this time we are not totally sure which 'fix' finally got us 'rooted'. In the beginnig we were trying to use the 'Temporary root' and finally here in the last we used the 'Permanent root' - which in or Web Searches appeared to be what the successful rooters were using. In addition to the change from Temp to Perm we used this latest SuperSU version. Don't know if it is 'THE' latest, but it is the latest that we used.
    6. Fourth Check the md5 of your recovery image: 'md5sums recovery-ra-vigor-3.15-gmn.img.zip'
      **make sure the resulting md5 matches the one that drellisdee lists for the image that you downloaded. **
      Please notice that the md5 check is, in this case, against the ZIP file and NOT the IMG file.   LINK
    7. Fifth On the ReZound make sure USB Debugging is 'ON'.
      Menu / Settings / Developer Options and then check the box.
    8. Sixth Connect the phone to the PC via the USB in 'Charge Only' mode.
    9.  Seventh  Make sure youre connected by typing:   adb devices
      Should return the serial number. With the phone connected via the USB cable we entered the above command from the Command Window on the PC and we got the serial number plus the word device.
    10.  Eighth  Reboot your phone into HBOOT using:   adb reboot bootloader
      After entering the above command in the Command Window on the PC, our phone re-booted and came up with the white HBoot screen. At the top is says *** TAMPERED *** and
      *** UNLOCKED ***. Further down we have FASTBOOT USB and further down yet we have BOOTLOADER.
    11.  Nineth  Check for connectivity:   fastboot devices
      Should return serial number. We entered the above command in the Command Window on the PC and got th correct results.

      Now here is where it got hairy and a little confusing. In our researching we got pros and cons on whether to 'Temp root' -or- 'Perm root'. Temp started out winning and we were trying it. As continuing to "follow" the procedures spelled out by all these experts (And that is NOT meant to be derogatory, it is just a statement of fact.) continued to fail, we started getting extremely frustrated. We have over 30 years of experience in Computers and Electronics and this little thing has had us baffled!! So, as in many times in the past with our Computer Programming, we just said screw it... went off and did our own thing and got it working. HOWEVER... in our haste we didn't write down what we did and now, as in the past, we aren't sure just what we did in order to accomplish the task!! The Lord I'm sure directed and guided us to the final solution.

      Now then, where the confusion was the heaviest was at the point after one of the following two commands. The screens, and what was on them, were not comming up with what was said. Now, possibly, half of the result of this was because they people writing these up were working with GingerBread and we now have Ice Cream Sandwich. We never tried the 'root' procedure with our GingerBread version. Ooooooo, can't belive I am gona say this... 'noob' fears of Bricking the phone!! There I said it. Hopefully we will be able to get this cleared up in the not to distant future. First need to learn how to "UN-root" and "RE-lock" it. Another challenge.

    12.  Relocking:      from mjh68 on   xdadevelopers  
      Quote:
      Originally Posted by heyis4horses View Post
      I saw that the rezound leaked ics is made for locked devices only, I've used the unlock tool but I haven't rooted. Is there a way to relock? Sent from my rezound using Tapatalk
      Yes, in fastboot in the Command Prompt type:   fastboot oem lock    and it will relock the phone.
      So basically using the same fastboot that you used to unlock .. same Command Prompt just type fastboot oem lock.

    1.  Tenth To temporarily flash recovery:   fastboot boot recovery-ra-vigor-3.15-gmn.img
      * You'll see a (really fast) green status bar on the top right as your PC sends the recovery to your phone. You'll then see the HTC splash screen, then your recovery.
      -or-
       To permanently flash it:   fastboot flash recovery recovery-ra-vigor-3.15-gmn.img
      * You'll see a (really fast) green status bar on the top right as your PC sends the recovery to your phone, then a (really,really fast) red bar as it flashes it. AmonRa is now permanently on your phone when you need it. Be aware that you can no longer accept OTAs, unless you reinstall the stock recovery at some point before the next OTAs are pushed.
      I believe part of the problem is that you are confusing the hboot and fastboot screens. When you boot to the screen that wants you to update, that is hboot.
      • *** TAMPERED ***
      • *** UNLOCKED ***
      • VIGOR PVT SHIP S-ON RL
      • HBOOT-2.25.0000
      • RADIO-1.22.10.0421r/1.22.10.0424r
      • OpenDSP-v13.6.0.7611.00.0104
      • eMMC-boot
      • Apr 12 2012, 16:47:46
      •  
      • HBOOT
      •  
      • <VOL UP> to previous item
      • <VOL DOWN> to next item
      • <POWER> to select item
      •  
      • FASTBOOT
      • RECOVERY
      • FACTORY RESET
      • CLEAR STORAGE
      • SIMLOCK
      • IMAGE CRC
      • *** TAMPERED ***
      • *** UNLOCKED ***
      • VIGOR PVT SHIP S-ON RL
      • HBOOT-2.25.0000
      • RADIO-1.22.10.0421r/1.22.10.0424r
      • OpenDSP-v13.6.0.7611.00.0104
      • eMMC-boot
      • Apr 12 2012, 16:47:46
      •  
      • fastboot
      •  
      • <VOL UP> to previous item
      • <VOL DOWN> to next item
      • <POWER> to select item
      •  
      • BOOTLOADER
      • REBOOT
      • REBOOT BOOTLOADER
      • POWER DOWN
    2. * To get to recovery, push the Power Button to select HBoot ... which... as it turns out... is the BOOTLOADER item in the selections. Once in HBoot wait for the green writing to flash and disappear, then select RECOVERY... and press the Power Button.
      * You'll then see the HTC splash screen, then your Recovery Menu... similar to the following.
    3. Android system recovery
      • Reboot system now
      • USB - MS toggle
      • Backup/Restore
      • Flash zip menu
      • Wipe
      • Partition sdcard
      • Mounts
      • Other
      • Format data system cache Ext4 | Ext3
      • Developer menu
      • Power off


      RA Revamped
      Build : RA-VIGOR-v3.15-getitnowmarketing
      Note on the above. It is what the Phone Screen looks like... EXCEPT our 'image' is not exact. -But- it is similar to the screen you will see.
    4.  Eleventh
      * This will bring you into the Custom Recovery Menu.
      * Use the Volume Up/Down keys to choose the 'Flash zip menu', and press the Power Button to accept.
      * Now choose the option that says 'Install zip from SD card' and click the Power Button. We did and got the following:
      Install of fix su & superuser?
      Press Power to confirm,
      any other key to abort.

      Working ......
      Removing old su
      su install complete
      * Once this is complete choose Return then Reboot system now and press the power button. Your phone will reboot normally.
      Well, not exactly. We got mesages about Android Upgrading and something else but it flash by before we could memorize or write it down. The we got our initial lock screen.
    5. We removed the USB cable from the Phone and Computer.
    6. Twelfth
      Finally - Congratulations we are now rooted. October 3rd, 2012 / 10:35pm
    7. Refer: Scotty's noob Guide
    8. Hasoon2000's All-In-One Toolkit
      if i already have ics on my phone can i use this AIO to go back to GB? my mainver right now is 3.xx.xx etc. would this AIO help me with that?
      Not yet. Use con247's tool to fix the mainver so you can go back to a GB rom.

      Wow this is awesome.. i was thinking about making something like this... what did you use to make the GUI?
      I used KODA to make the GUI.

      Once i flash the amon ra recovery in the bootloader where do i save the super user zip file to and how do i flash that? That is where i seem to be getting hung up on.....not exactly sure where to save that file to and where to access/flash it from.......
      Superuser.zip should be on your SD card. Once in amon ra>flash zip menu>sdcard>superuser.zip
  2. Well it didn't work...!! We're unlocked -but- NOT rooted. September 30th, 2012
    Finally, it works!! UN-rooted on October 3rd, 2012 at 10:35pm!!
  3. Actually, we got Unlocked, S-Off'd and rooted again
    November 29th, 2012 / 10:37pm.
    -AND- Please notice --- No TAMPERED Bar.

    • *** UNLOCKED ***
    • VIGOR PVT SHIP S-OFF RL
    • HBOOT-2.27.0000
    • RADIO-2.22.10.0801r/2.22.10.0803r
    • OpenDSP-v14.6.0.7708.00.0507
    • eMMC-boot
    • Aug 6 2012,19:24:37
  4. root via TWRP

Refer: ReZound All Things Root Guide -and- HTC ReZound Overview
What are Unlocked Smartphones
Leslie Rooting Info ... RAM, ROM, What
Flash Memory ... Read Only Memory ... ROM Image
Android Basics
Unlocking, Rooting, ROM'ing, and FAQ Root, S-Off, Unlock BootLoader of any HTC Device


Warning
The instructions -and- information in this guide are intended for use with the HTC ReZound. Applying these instructions on another device or model may, and probably will, produce undesired outcomes.

  Hasoon2000 rooting


Another rooting??? Yep.

Well, we did the S-Off and then found that we were NOT rooted anymore. So, we decided to try this. Didn't work. Now that maybe because of our recent "recovery" after our S-Off. Think that we used one with hboot 2.27 instead of 2.25.

 Oooops..12:31pm  Well, things can get confused and disoriented. Locked -or- Un-Locked, S-On -or- S-Off, rooted -or- un-rooted, fastboot -or- slowboot... which hboot version?? --- ANNNDD --- what combination of what do we have??? Whew!!! What we were at different times... was... well it was different. We were S-Off -but- we were Locked. The Tampered message is finally gone -but- we are not rooted.

 Nov 29th / At 12:40pm  We are: Unlocked and S-OFF. Was in the bootloader to see that. Powered down from there. Powered back up and connected our USB cable, with USB debugging enabled... Charge only mode. In Hasoon2000 we selected Perm Root and clicked the run button. It claimed to root us but then it came up with an arrow in a green circle and then went to a black screen with a red triangle ... and sits.
Disconnected from the PC... nothing.
Powered Off by removing battery...
Replaced Battery and Pressed the Power Button... phone is starting up. Got back to 'normal' usage format. My root checkers were/are gone.

 Nov 29th / At 6:03pm  Got interrupted ... again!! Will we ever get this thing straight??? Well, guess it was but we are trying to change it and learn. Ok, we are:
   Un-Locked, S-Off'd, have hboot 2.27 -and- we dumped PH98IMG.zip from the SD card.
-But- we are NOT rooted anymore. We have tried this Hasoon2000 and it is NOT working. Possibly cause we made our last recovery AFTER the S-Off with [ICS][2.27][STOCK][8-12]PH98IMG.zip. Which contains:

-rwxrwxrwx 1 root root  6259712 Aug  3 06:23 adsp.img
-rwxrwxrwx 1 root root       74 May  2  2012 android-info.txt
-rwxrwxrwx 1 root root  1047808 Aug  6 08:59 hboot_8x60-lte_2.27.0000_120803_MR2_signedbyaa.nb0
-rwxrwxrwx 1 root root 23950336 Aug  6 07:37 mdm9k.img
-rwxrwxrwx 1 root root   131072 Aug  6 08:59 mdmrcdata_3.01_002.img
-rwxrwxrwx 1 root root 24130560 Aug  6 07:37 radio.img
-rwxrwxrwx 1 root root   131072 Aug  6 08:59 rcdata_1.16.002.img
-rwxrwxrwx 1 root root   606806 Aug  6 08:59 sbl3.img
-rwxrwxrwx 1 root root    74754 Aug  6 08:59 tp_atmel224e_1101.img
-rwxrwxrwx 1 root root    98862 Aug  3 06:23 tz.img

 Nov 29th / At 8:36pm  We have tried to get into Recovery and then tried to install Recovery. Could do neither.

The Red Triangle: You cannot select "recovery" from the hboot menu, as that will take you to either: -a permantly installed custom recovery OR -b the stock recovery(red triangle and !)
From Scott at: Phandroid #6 in the dialog.

Refer: Hasoon2000


  HTC SuperTool V3


HTC SuperTool V3
Will work for most HTC Devices not just the HTC Evo Design 4g!
If it works/doesnt for your HTC device post here and I will add what devices work and don't work!

YOU NEED THE HTC DRIVERS INSTALLED HERE IS LINK!
http://www.mediafire.com/?jfi4bq3udrabw5a

Steps:
Step 1: Make sure drivers are installed!
Step 2: Make sure USB Debugging is enabled
Step 3: Un-Zip
Step 4: Click on the SuperTool.exe
Step 5: Enjoy!

Files are found here!
ACS HTC Super Tool


4.03.605.2 download 4.03.605.2 changelog Scotts ROMs ACS Super Tool v3 Gfree root ICS Forums
ReZound RUUs    Crash Course on ReZound
Some people do not realize that the Super Tool is not a single self-contained file. Every file from the archive is necessary and it must be fully extracted. This is the cause for some of the missing file errors. If your Super Tool's subfolder is missing SuperUser, that is probably the reason it cannot find it.


  What Does Root Give Me?


  1. Full control over your system
  2. Ability to alter system files. You can replace many parts of the "Android Core" with this including:
    • Themes
    • Core apps (maps, calendar, clock etc)
    • Recovery image
    • Bootloader
    • Toolbox (linux binary that lets you execute simple linux commands like "ls") can be replaced with Busybox (slightly better option)
    • Boot images
    • Add linux binaries
  3. Run special apps that need more control over the system
    • SuperUser (lets you approve or deny the use of root access to any program)
    • Task Manager For Root (Lets you kill apps that you otherwise could not kill)
    • Tether apps (like the one found at [android-wifi-tether.googlecode.com])
    • <there are more but I cannot think of any right now>
  4. Backup your system
    • You can make a folder on your sdcard and backup all of your .apk files to your sdcard (helps if an author decides to "upgrade" you to a version that requires you to pay to use the version you just had)
  5. Relocate your (browser/maps/market) cache to your /sdcard
  6. Relocate your installed applications to your /sdcard
  7. Reboot your phone from the terminal app easily (su <enter> reboot <enter>)

What Do I Lose Having Root

  1. The ability to accept OTA updates (well, you can but you would lose root, so its been made so they get denied)
  2. The sense that someone else controls your phone
  3. The need to sit in an Android chat channel asking how to get root
  4. The need for a stupid useless "File Manager" that lets you see filenames but almost nothing else.
  5. The ability to have a knowledgeable conversation with a T-Mobile rep about your phone. (Ask one of them to spell root for you)

The above verbiage concerning what root gives me was "borrowed/swiped/stolen" from the Why Root - Android Wiki page.


Programming and ROMs Section

  Odexed vs. Deodexed

Click image for original text and page.

Placed here at the start of Programming so that you can have the info IF you don't possess the knowledge already. RedmondPie has other pieces of knowledge that you might want to check out.

Explaining Odexed vs. Deodexed Android ROMs

You're bound to have come across the term 'deodexed' if you've ever installed a custom firmware on your device, since almost all ROM developers choose to deodex their offerings. What this means for the average user, however, is a different story. To understand the concept, you'll first need to grasp what odex files are, and why are the present in the OS in the first place.

Android (being based on Linux) uses application packages, or APKs, as they're normally called, to tell the operating system what app to load and execute. If you're at all familiar with Android, you'll know that the OS works on the basis of partitions, out of which those apps that are contained in the /system partition are system apps (and cannot be changed or modified without having root level access, since they're a part of the OS itself), while those contained within the /data partition are user apps and can be freely modified. The /system partition is the first one to load when the operating system boots up, hence giving priority to the apps contained within. It is with these apps that odex and deodex deal with.

What Are The Two Possibilities

Coming back to Android applications, there are two possible routes to follow, based on the fact that each app is comprised of an APK and a cache part that tells the Android Dalvik Virtual Machine (VM) what components does the app come with.

  • The cache for each APK is contained separately in a .odex file, which loads into the virtual machine at the time of boot, thus speeding up boot times. (Odexed)
  • The cache for each APK is contained within the APK itself as a classes.dex file, making the boot times slower as Dalvik VM is built up. (Deodexed)

Now, ideally, most OEMs choose to opt for the first route, for two major reasons. First, it makes modifying the system apps more difficult (thus making the OS more stable and secure), and two, faster load times for the OS itself, since the cache is built as part of the virtual machine itself. Confused? Allow me to explain.

Clearing Up the Confusion

In normal cases, where an Android firmware is odexed, the .odex files for each /system APK (which are stored outside of the APKs themselves) are written into the Dalvik Virtual Machine when the OS boots up. Since these .odex files contain preliminary load information about each system app, the OS knows what to expect when it's booting up, and consequently, loads all these apps faster. Ultimately, for the user, it means that boot times are significantly sped up, and you can put your device to use much sooner.

As opposed to the above, in a deodexed (custom) ROM, there is no cache information within the Dalvik Virtual Machine at the time of boot, so when the system status up, it only gets to know which apps to load once the /system partition APKs are actively accessed. This, in effect, will result in a much longer boot time, since each APK will be processed one by one, and you will be able to use your device long after you've powered it up.

Deodex is Slower, Then Why Bother?

In real life, that's not the case. With deodexed ROMs, only the first ever boot after clearing Dalvik cache is slower, and all subsequent ones will be the same as any odexed ROM. This is owing to the fact that during the first boot, all cache information is written to the virtual machine anyway, and hence, it will behave as any other firmware (until you clear the Dalvik cache once again).

Why ROM developers do it is because of the modification possibilities that it entails, especially theming. Since in a deodexed scenario, all the application code is contained within one single APK, the developer can simply modify the APKs values to apply any custom look and feel to the app itself, without breaking any functionality. This also opens up possibilities for changing different parameters of the app without affecting how others will operate. Since a dodexed package has no external dependencies, it gives more freedom to modify what they wish. On the other hand, with an odexed ROM, theming is absolutely impossible, since the .odex part of the application will always be in conflict.

The Bottom Line

It all boils down to this: while an odexed firmware is faster and more secure, a deodexed one gives more modification freedom, and is the only way possible to change the look and feel of system apps. In actual terms, deodexed ROMs are only slower in the first ever boot, after which they are the same speed as the former ones. Also, deodex doesn't entail any serious security risks to your device, either, and you can rest assured that the millions of users opting for these aren't suffering.

Refer: What is Odex and Deodex ROM?


  The Kernel

Another from: Scott modding your s-on,unlocked device first and foremost,remember this:
**an htcdev unlocked phone CANNOT write to the /boot partition FROM its /recovery partition.**
what this means is that,unlike your s-off evo 4g,thunderbolt,inc 1,or just about any other htc device you may have messed with,the rom that you flash from a recovery that is permantly installed on your phone cannot install the boot image. since the boot image houses the kernel, the roms kernel is not being installed along with the rest of the rom.
this means that if your rom requires a different kernel than what is on your phone,it will not boot. it will hang indefinately at the splash screen.

flash the kernel manually. it can be done with the command fastboot flash boot or it can be done by placing the boot image inside a PH98IMG file and flashing it in hboot.


  RUU versus ROM

  1.  What is an RUU?   ROM Upgrade Utility. Its a complete package, containing the ROM, radio, kernel, Hboot, and utility to install it, typically via a Windows PC. Most usually refers to a package from the manufacturer. Although I've seen some developers here use RUU to deploy certain things (rooted Gingerbread to Honeycomb update on the HTC Flyer, for one). But on the One X, the RUU are all manufacturer's packages.
  2.  What is a ROM?   Originally: Read Only Memory... The Android OS firmware. Generic term, ROM can refer to stock or official firmware from the manufacturer, or work by independent developers such as those on XDA (commonly called "custom ROMs").
  3.  What is a BASE?  
  4.  Flashing   Flashing Guide - Android
Refer: XDA Forum


Warning
The instructions -and- information in this guide are intended for use with the HTC ReZound. Applying these instructions on another device or model may, and probably will, produce undesired outcomes.

  AOKP JB 4.1.2

Refer: AOKP Android 4.1.2 Jelly Bean on HTC Rezound-Installation Guide

Here is what you have to look forward to:

  • *JellyBean!
  • *TRUE AOSP (Android Open Source Project)
  • *rooted
  • *init.d tweaks for battery and performance
  • *Working Camera both front an rear facing
  • *Working WiFi and native Wireless Tethering
  • *Working Bluetooth (for music only currently)
  • *Working frequency and Governor Control
  • *Working 3G/4Glte toggles
  • *SEVERAL Build.prop tweaks for optimized battery performance, internet speed, and system speed.
  • *Rom Control for even more customization!

DOES NOT WORK
Bluetooth Calling
Video recording, HD Video, Some streaming video like Netflx,
 Gtalk or Skype video chat random system lag issues if any

How to Install AOKP Android 4.1.2 Jelly Bean ROM on HTC Rezound

  1. Connect your HTC Rezound to PC using USB cable.
  2. Copy all downloaded zip files to the SD card of your phone. Important: Don't extract any file.
  3. Disconnect USB and then turn off your phone.
  4. Boot into recovery by pressing and holding Volume down and the Power buttons together until the device boots into recovery. Once in the bootloader wait a few seconds for checks to complete and then select recovery. The device will then boots into CWM recovery.
  5. Perform a Nandroid backup of your existing ROM that you can restore later if this new ROM not work or you want to go back. To perform a backup, select Backup and Restore, then on the next screen, select Backup again. Go back to main recovery menu after backup is complete.
  6. Then perform data wiping task. To do so, select wipe data/factory reset, then select Yes on next screen to confirm your action. Wait few minutes till the data wipe is completed.
  7. Select install zip from sdcard, then select choose zip from sdcard. Now, locate the aokp_vigor_unofficial_Jan-03-13.zip file that you copied earlier in Step 2 and select it by pressing Power button. Confirm installation by selecting Yes - Install _____.zip on the next screen. The ROM installation will begin.
  8. Once the ROM installation process end, repeat the step 7 but choose gapps-jb-20121011-signed.zip instead of ROM zip to install the Google apps package.
  9. When installation is completed, go back to the main recovery menu and select reboot system now to reboot the smartphone and boot up into customized AOKP Jelly Bean ROM. The first boot will take time, so be patient!
  10. Returning to Previous ROM: To go back to your previous ROM, boot into recovery, select backup and restore then restore your previous ROM by selecting it from the list.


Refer: HTC Rezound Jelly Bean (Android 4.1.2)

  AOKP-Neo 1.8 Linaro    on the ReZound

Ice Cream Sandwich 4.0.4 powered AOKP custom ROM firmware.
***DO NOT FLASH GAPPS! They are baked in now. Clean flash required. Just flash the rom and Done.

Android Open Kang Project

Feature List

  • Android 4.0.4 -- ITL41F
  • Unsecure boot.img (stock AOSP kernel)
  • Superuser & Busybox preinstalled
  • Deodexed
  • 180 Degree rotation
  • Built in performance/init.d configuration (Thanks Kejar & company)
  • CM Launcher/ Power Menu
  • CM Brightness slider
  • Custom color for anything in RC
  • Clock Color/Location: Right, Center, Disable
  • Battery Icon/ Color Picker: CircleMod, Bar, Text Only, Icon Only, Icon+Text or None
  • Battery Bar in Status Bar or Nav Bar, Bar Thickness, Charging animation
  • Nav Bar Transparency
  • Nav Bar Button Reorder: Back-Home-Search-Menu
  • Nav Bar Color Picker
  • Nav Bar Button Glow Duration: Off, Fast, Slow
  • Nav Bar: Long press to Search button
  • Nav Bar Hide on Lockscreen
  • Toggles in Pull Down Menu: Auto rotate, Bluetooth, GPS, Wi-Fi, Aiplane mode, Vibrate, Silent, Sync, Data, 4G, Tethering, Torch, Brightness
  • LCD Density (Careful with this)
  • Menu Button location: Right, Left, both, Remove
  • Menu Button Visability: Always show, Always show Invisible Icons
  • Lockscreen Style: Quad, Octo, Stock
  • Lockscreen SMS customizable shortcut
  • Lockscreen Horizontal Option
  • Performance Menu: (Use With Caution) Max/ Min CPU, Scaling Governor
  • Unlock Sceen with Legacy Menu Icon
  • Volume Key to Wake Screen
  • Volume Key to Skip Tracks
  • Long-press back button to kill process
  • Disable CRT off animation
  • LED pulse settings (time on/off)
  • ICS ringtones/notification sounds
  • Customize carrier text to whatever.
  • Power Menu options: Boot to recovery/ Boot loader, Reboot, Screenshot
  • Facebook contact sync integration (must wipe to get this)
  • Disable Boot animation
  • Keyboard: Volume keys act as a cursor while typing -- disable in keyboard options
  • Long press home for recent apps (thanks brucekey)
Thanks to brainfire for writing this up... the original. This is updated.


 Flashing   FOR BEST PERFORMANCE, FLASH WITH AMON RA RECOVERY.
Download Here: AOKP-Neo 1.8 Linaro
It was uploaded Dec 14, 2012 | 04:12AM
Install AOKP Custom ROM on HTC Rezound and Update to ICS 4.0.4


Refer: Android Geeks
Power Manager
Counter Strike

  Newts_One_XxX_RLS_6.0.1_odex_signed

File Name:  Newts_One_XxX_RLS_6.0.1_odex_signed.zip
File Size:  631.6 Mb
Uploaded:   2012-11-17 04:27:33
Downloaded: 935 times (excluding mobile) We were 936.
File Name:  One_XxX_Patch_6.0.2.zip
File Size:  6.6 Mb
Uploaded:   2012-12-06 02:02:33
Downloaded: 108 times (excluding mobile) We were 109.
Flashable Boot IMG thanks to prdog
File Name:  Flashable Boot Image One XXX 6X.zip
The file was uploaded with the spaces in the file name.
You will have to right click on it, then select 'Save Link As...'
Refer: Newts OnE XxX RLS 6.0.2
     Hold on... we have Newts JB-hybid for the ReZound
and some kind of MikMik Setup.

This rom is something that i put together for you guys while you wait on a full JB rom... It is a mix of ICS, JB and sense 4.5. There are many features of jelly bean that i added and for the time being other than those features the rom has a stock look. i will be adding things like apm and such with updates so stay posted


FEATURES

* Based on Endeavor RUU 3.00.771.2 & EVO Lte 3.15.615.16
* ICS/JB
* Sense 4.5
* Odex
* Rooted
* Busybox
* Init.d support
* Zipaligned
* Unsecure stock kernel 3.0.16
* (GLOBAL) GSM & CDMA support
* Lypota Camera
* EQS
* 13 Music Equalizers
* My Battery tweaks
* All images optimized
* Sdcard Read ahead
* Lots of Jelly bean apps


Patch v2.0.1

Fixed weather sizes
Fixed calander
Fixed Keyboard issues
Fixed SystemUI eqs strings
Fixed some graphical issues


V2.0.0

Skined like stock DNA
Resized and modified all DNA wallpapers
Added Suite Tools
Modified Mms for vzw
Added Vvm
Added Quciklaunch and trans clock
Adjusted Rosie to 60fps
Added audio effects widget
Fixed dialer size
Added sense 4.5 skins
Removed 3 dot menu

Main update was making the rom more stable and adding suite tools which took alot of time... once you flash it you will see


V1.0.2

Rebuilt all apks
Optimized all images
Zipaligned with newest sdk
Fixed issues with Force Closing
Modified all JB apps to work right
added Menu and lanscape to rosie
added advance power menu
Fixed all apns for vzw

Small update had to be done to make it stable once i see where we are now ill start adding more features


ROM


PATCH'S


If you are S-on like me, then you have to extract the boot.img file from the ROM zip package and flash it via the command "fastboot flash boot boot.img"

ICS-MTP
Funky-Kernel
ReZound JB Hyper

ReZound Developers
UPDATE !!!!
Some fixes to the bugs updated.
"app associations" is back under settings

Edited and tested it I had 2 spots in my build.prop that where "ro.da1.enable" false set both to true and also ro.da1.method set to true "app associations" is back under settings. I set firefox as my default and it works A+.
__________________________________________________
NOT A BUG but some users don't like xloud
To get rid of xloud do. Tested Works
Rename or delete libxloudwrapper.so from /system/lib/soundfx
__________________________________________________

To remove the 3 ... menu do this Tested Works

Edit build.prop and add this line qemu.hw.mainkeys=1

__________________________________________________

Bugs that I did not find ways of fixing yet.

Default web browser is still not working when you select pull down select boxs it will crash.

Kernels

In looking to "Upgrade/Update" our ReZound we found this. It was sorta recomended by Scotty so we grabbed it.

It has ICS 4.0.4 and Sense 4.1

Attention!!!
My script is setup to wipe everything so make a backup of anything on internal sd you dont want to lose
I am not responsible for any loss or damage to your phone if you flash this rom


Installation instructions for rom
-download rom
-copy to sd
-reboot to recovery
-wipe data, system, and dalvik
-Flash rom

**Installation of boot.img**
-download boot.img
-copy to pc to your fastboot directory
-cd to the directory
-type these commands
-"fastboot flash boot boot.img"

also there are other ways to flash the bootimg its up to you how you do it

reboot and enjoy


when you get booted you need to go into settings and turn off animations or it will freeze up

The installation instructions -just- didn't hit us right. More files were being offered than were mentioned -or- they were and we just didn't understand. So we started looking and found this in the Forums. Seemed right up our alley and answered a lot of our questions. The 'member' is lukester01. His story was just like something that we would have written. Mainly cause we had a similar scenario in our 'Unlocking', 'rooting' and S-Offing. These are his words... IF we mix in our own they will be a different color.
Refer: Info_on_MikMik

[Quote]
Well I took the leap after finally getting my OTA update and seeing that the updated rezound was nothing special. The camera wasn't upgraded in any way and it was SO LAGGY as to by really lame.

I'll go through what I did, so others can learn. Also, if you experts could let me know if I did have to do the PH98IMG thing.

I liked the blue version of Newts ROM and it seemed like the Sense 4 camera was worth getting. I was a little confused on the process even after reading multiple tutorials, so things didn't go smoothly, but I eventually hit the right path and it worked. I assumed that if I had ICS firmware (the OTA one) that I would not need to do the PH98IMG.ZIP thing (I was wrong?). So I skipped that step and went straight to unlocking from HTCDev.com, and then flashing the recovery with "fastboot recovery _______". After that I made a NAND backup. I then did a WIPE ALL from within the recovery screen.

Then I allied the ROM from within the recovery console after booting to the hboot screen. The phone however 'was stuck at the boot screen'. I then realized my mistake, that I DID have to flash the PH98IMG by adding it to the sd card. Unfortunately now the phone would not boot, so I had no way of getting something to the sd card (well no way I knew of). So I recoverd the NAND backup. Rebooted, put the PH98IMG on the sd card and attempted to reboot and apply via hboot. BUT it would not apply the PH98IMG. I had to be in a 'locked state' for the phone to ask if I wanted to apply it!!!! So I relocked the phone via "fastboot oem relock" command. Then I was able to get PH98IMG to update. So now I thought I was ready to go. WRONG. Recovery had been erased somehow, so I could not apply the new ROM. So I reflashed recovery. Well tried. The phone needed to be unlocked again. So unlocked again. Used fastboot to reflash the recovery. Then applied the ROM again. It was still hung up at the boot screen! I was sweating now, what was wrong?, the tutorials had nothing on this. I had read somewhere about flashing boot.img. So I used "fastboot boot boot.img" (the boot.img I extracted from Newts ROM zip). I rebooted the phone and it was working!!

I love the ROM! It is much faster than the OTA. The Sense 4 camera is great. I did not have to disable face recognition. I have had the camera crash after doing a very long continuous shot. Also using the picture take while taking video freezes it. Over all though fairly stable. The zoom is a bit wonky. Sometimes works, sometimes doesn't. I will often swipe my finger back and forth a couple times on the zoom bar to get it zoomed in. The continuous shot thing is great. It seems to have instant image capture as well. The continuous shooting however is not as quick as using the action burst scene mode that the stock camera has (not sure if the stock camera action burst is full resolution though). This camera even lets me get to the delete photo option with just one touch of the screen.

The mirror app does not work in this ROM though. Battery life seems on par with the stock ReZound. Force 2D hardware rendering is on by default. I turned that off as I have read that options will cause issues. The Wifi Tether works great. Bluetooth will sometimes for some reason get confused on what the media output is supposed to be. If I am listening to music in the car via the phone 3.5mm out jack and have my bluetooth ear piece for calls, sometime it will not properly take the voice input from the bluetooth (the person cannot hear me), and will play output meant for the bluetooth over the phone audio jack (from my Motospeak app that dictates SMS messages). What is weird is, that it is inconsistent. Sometimes works properly sometimes not. I love that I could make the navigation bar at the bottom transparent with the One XxX tools. The Mail is way better in Sense 4. Sense 4 really is so much better in every way than 3.6.

Outstanding work, and thanks to everyone who made this possible. Looking forward to future updates. One question on updates though. When I apply an update will I have to start over again and reload apps and resetup all my icons,etc.?
[End Quote]


  New ICS Update?? -AND S-Off

DO NOT ever attempt to accept an OTA while rooted.
Please refer: Scott's Verbiage

   From: Jerry Hildenbrand on Android Central and the download on Android Police   

This will not work if you used the HTC Bootloader unlock tool. Your device must be fully stock with a locked bootloader or you must have S-Off.

Installing the RUU will wipe your data.
  • After downloading the file, rename it to "PH98IMG.zip" (no quotes)
  • Place the renamed file onto the root of the SD Card
  • Power down your device
  • Reboot into the bootloader by holding VOL DOWN + Power
  • The flashing process should begin automatically

Let the device reboot, and you're done. Yay!

There's another OTA package for the HTC Rezound out in the wilds of the Internet, and quite frankly nobody knows what's going on with it. We (and likely everyone else) have reached out to Verizon, who hasn't yet responded with news of anything new, so we have to roll with Internet wisdom on this one. Scary, I know.

We do know that the update has a new radio, new recovery, new kernel, and updates in the firmware itself. What we don't know is what the update brings new to the table, or what it might have fixed. Some users are less-than-happy with the ICS update from earlier in the month, so there very well could be some bug and stability fixes. There's also the global roaming capability that Verizon has promised for this summer, so maybe it's there along with the new radios -- there is a setting in the options for Preferred Network to be Global now.

We won't know for sure until Verizon posts the changes, or enough people get the update to verify the suspicions. That's where you come in -- if you've received the OTA (or flashed it manually via directions at XDA), sing out in the Rezound forums. Help get this one figured out!

   End Android Central   

The S-Off Portion

Refer: Guide to Rezound: How to achieve S-Off

Now we felt this important enough to give it some space of its own... even though it is included in this
"ICS Update" section.

   November 12th, 2012     We read the Unlimited IO pages converning JuopunutBear and searched the Web. Unlimited says that it will not work with 64-bit... and we quote:
We only support Windows 7 32bit or Ubuntu 12.04 (and newer) 32bit, you
may use a LiveCD if you have the wrong OS installed natively. Win XP 32bit might
work for you but we do not support it as we did not test on it.
Windows 8 (64 or 32), 64bit Windows, 64bit Ubuntu, Ubuntu versions lower than
12.04, Virtual Machines and Mac's will NOT work - we will not help you if you
break your device!
And on the Web at xda-developers we find:
Will this work with 64-bit windows? In Unlimited.IO, they say that this only works with windows 7 32-bit and ubuntu 12 32-bit... But you didn't say anything about that here... I'm a bit comfused... 64-bit win7 isable to run 32-bit software, so what's the problem???
     With an answer of:
Yes it works with Win7 x64
So... we are gona byte the Bullet and try it with our Windows 7 64-bit Laptop... later.
Fortunately this only has to be done once. UNLESS you for some reason turn 'S' back on.
-OR-
You get a new phone!!
Please read this over --- more than once --- before trying it.

We lied!! 15 Nov 12 Partially, cause of our extreme cautiousness (coward!!) and partially cause we got involved in other things... like fixing customers computers. -And- researching all this. The wire 'poke' bothered us at first, -but- now it is that we have a 64-bit Windows 7 system, --and-- they, the owners, guiders, authors of JuopunutBear say that it will NOT work in a 64-bit Windows.


You might want to Skip down to the Rut-Roh BEFORE you start this... just a suggestion.

S-Off Step by Step... with Hasoon2000, JuopunutBear and Google Docs.

The following is a "checklist" that we created from the various places we visited concerning this operation. The reference at the top of this section is what we used the most for this checklist creation. You might want to copy and paste this list to an Editor and then print it out. Afterwards you can check each item off as it is accomplished -or- at least check off each item just -BEFORE- you do anything. You can get straight on these procedures anyway that you want. We just embeded it into our mind by re-writing the whole thing. Hopefully, presenting another approach that will help someone else. Why all the concern?? Well, besides the cost, $600 plus or minus, there would be the lack of a phone IF we goofed -or- jumped into something before we are ready. Just being our usual cautious...(cowardly).

Prerequisites for Phone; At this time 26 Nov 2012:

  1. Must be on a Stock RUU - Gingerbread -or- Ice Cream Sandwich
  2. Must be HTCDev unlocked
  3. Must be rooted
  4. Must have USB Debugging enabled.
  5. Must have Fastboot enabled... box is checked
  6. Must have 50% or more of a charge on the battery.
  7. Should have SD card backed up... -OR- you could replace it with a spare...
    YOU MAY LOSE DATA OTHERWISE.

Prerequisites for PC:

  1. Windows 7 - Yes!! 64-bit works, we just did it.
  2. HTC drivers installed
    Disable -or- UNINSTALL HTC Sync and any other phone Software on your Computer.
  3. Anti-virus software disabled
  4. Download Hasoon2000's All-In-One S-Off Toolkit.
    This is an 'rar' file which is a Roshal Archive Compressed file.
  5. Extract Hasoon2000's S-Off toolkit.
    Do NOT rename anything. Like always, there are a number of ways you can open this file. The first is to just click on it and see IF you have a program that will open it. If not then go on the Web and get IZarc -or- WinRAR -or- another program that will suit your needs. Be sure to get the appropriate bit size, 64-bit -or- 32-bit.

The Steps

  1. You need a suitable wire. Some instructions say use an 8-inch insulated wire. Others will say you can use a large coated paper clip. Just remember... you are going to be touching electrical parts of your phone. These should be insulated from everything else -AND- static electricity. Suggest doing this in a NON-carpeted area.
  2. Read ALL of these steps before trying.
  3. Remove about 5mm of coating from both tips of the insulated wire -or- the coated paper clip, after straightening it out.
  4. Read ALL of these steps before trying.
  5. AFTER Power Off, Remove the back cover from your ReZound.
    You need access to Pin 1 and a Ground.
  6. Power on your ReZound.
    Just a normal Power On.
  7. Plug your rezound into your PC.
    This is the USB cord from your PC to the Device.
    **********************************************************
    Now here is where we start to differ... mainly cause we had ALREADY installed the HTC Drivers -and- the SDK Kit when were UN-Locking and rooting.
    **********************************************************
  8. Many assumptions are made here. It is assumed that you have Administrator rights -or- you know the Administrator Password.
    NOTE: If you are doing this while logged in as standard user instead of an administrator, then you will need to provide the administrator's password before the program will run as administrator.
  9. You are told to 'right click' on the .exe file, which in this case was/is S-Off.exe and select "Run as Administrator". Not sure why 'Admin Rights' are needed -other than- this utility can be used to set up the "HTC Drivers"; which are mods to the system. Well, further investigation showed that JuopunutBear wants them too. So, we will just go along with the crowd for now... and investigate later.
  10. Right click the S-Off.exe file in the extracted folder and select
    Run as Administrator.
  11. Watch the Video for the Wire Trick... IF it is still available.
    YouTube ReZound
  12. Study this picture:
    ReZound Back Cover Off
    When doing the wire trick, you will hold one side of the wire firmly in PIN 1 and use the other end of the wire to tap GND twice, with 1.75 seconds between taps. (tap, 1001, 1, tap)
  13. You might practice this a little -BEFORE- doing it.
  14. Read ALL of these steps before trying.
  15. When you feel confident... continue.
  16. IF you have a timing help... start it.
  17. In the Hasoon Toolkit window, select the JuopunutBear that corresponds to the Android version on your phone.
  18. After selecting - Click the Run Button. A Command Prompt window will appear.
  19. Wait for a Message saying: Do wire-trick now!
    1. DO NOT RUSH. You have at least a few seconds before you need to begin the wire-trick after being prompted to do it.
    2. Connect one end of the wire to PIN 1 and hold it there
    3. When your timing file clicks, IF you have one, tap the other end of the wire to GND
      DO NOT HOLD THE WIRE ON GND... IT'S A TAP AND RELEASE
    4. Tap the same end of the wire to GND again after 1.5secs -or- your next timing beat.
    5. Remove the wire from your ReZound.
  20. When command window finishes, close it.
  21. If you did it right, the command window will tell you it's done. Otherwise, it will tell you it didn't work, and you should exit Hansoon2000's toolkit and start over.
  22. Disconnect the ReZound from the Computer.
  23. Turn it OFF and Remove the Battery.
  24. Replace the Battery.
  25. Do the special Power On combo to boot-up into the bootloader/hboot.
  26. At the top it should say S-OFF.
  27. We're done!!

Warning
The instructions -and- information in this guide are intended for use with the HTC ReZound. Applying these instructions on another device or model may, and probably will, produce undesired outcomes.

 Rut Roh!! November 27th, 2012 / 9:12pm   No we are NOT!!... We are not done. Got the Black Screen Green Arrow of Death!! (Hey, Windows has a Blue Screen of Death.) Well, not quite death but warmed over nothing. What happened??? Well, it was this way -or- to the best of our rememberance -which- is not the greatest anymore. We will probably be referring to this individual more as time progresses -but- at this time he inadvertantly helped us out. He and Scott will probably be the most referenced: CharliesTheMan and Scotty.

So what was it?? Well, the scenario of events went like this:

  1. First a message from Charlie (and probably many other experts):
    This is not a process to attempt when you're pressed for time, stressed out or anxious, or distracted. The process will probably take 5 to 10 minutes. But if you're needing to make a flight in 20 minutes, or expecting a life or death phone call in an hour, don't start on this process. Wait until you have a few hours and are rested and relaxed. We started it a couple of hours before work -and- that was a mistake. Especially for a first timer!!
  2. Now we followed the directions to the tee. We even, as you can see above, re-wrote them -and- changed some verbiage to suit our needs. -But- (that word again) there are just some things that they don't tell you, either cause they "forgot" -or- they just didn't think of them -or- they didn't think that they were that important to begin with. It is extreemly difficult, nearly impossible, for these amazing, wonderful people to think of, and cover, every situation "blindly", so to speak, over the Net... in a maner that EVERYONE can, and will, understand.
  3. Ok, AFTER we completed the process and happily saw our S-Off, AFTER many tries,(our timing was horrific) we pulled the plug(the USB) and ReBooted the phone. ARRRRGGGG!!! A Black Screen with a Green   JuopunutBear Arrow  ... and it stayed there!
  4. Fumbled around in a hurry, cause we had to go to work. And really accomplished nothing. We had placed a 'spare' 2GB card in before doing the S-Off procedure. Thought it was the problem and tried to read it in our PC. Could not! The PC wanted to format it. At this time we said NO.
  5. After work, with more time. Let's see... something about PH98IMG??? Ok, we searched the Net, like we always do when in trouble -and- read about other's troubles -and- cures, or at least some relief. That is when we found CharlieTheMan. From the blurb he had, plus other info gathered, we figured out that:
    1. We needed to format our 2GB SD Card... on the PC at FAT32. Yes it works. You may need an adapter in which to place your micro SD so that you can then place it in an SD slot on your PC. IF you don't have one then you will need to venture out to your local 'puter store and get the necessary materials. One of which could be a blank micro SD card. (-But- it is, or can be, fun to re-format it yourself.)
    2. Now you need to get a PH98IMG.zip. This appears to be the name used to install things via the bootloader on a ReZound. You rename the item to PH98IMG.zip and then place it on/in the root portion of your external -or- internal SD Card... depending on what you are doing.
      It appears that HTC uses a PxxxIMG naming convention.

      Flash via HBOOT Names
      Smartphone   RUU IMG file
      HTC ReZound = PH98IMG.zip
      HTC Incredible 2 = PG32IMG.zip
      HTC SENSATION XE/LE = PG58IMG.zip
      HTC Desire CDMA (Bravo C) = PH99IMG.zip
      HTC Thunderbolt = PG05IMG.zip
      HTC Evo = PC36IMG.zip
      HTC Amaze = PH85IMG.zip
      Desire S = PG88IMG.zip
      HTC One X = PJ46IMG.zip
      RootzWiki contains some PH images. And this is the HTC RUU directory.
      Now then, we possibly got carried away with the above names -but- we just had to learn/see why they used the names that they did. They are hard coded and unique to the individual phones. It appears that the code just looks for a zip file with this name in the SD card root during hboot time and unzips it. Then it takes the appropriate action depending on what the file is. --- More later AFTER some more investigaton. Ah!! Those names are based on their model numbers!!! Makes sense.

    3. Now what's that got to do with this? Again, words of wisdom from CharlieTheMan inadvertently helped us.
      Second Tip/Solution - If you attempt the S-Off and don't achieve s off, you will have a black screen with green arrow. To go back to booted into your Rom, simply use a card reader or another device to drop the PH98IMG.zip onto an sd card, reboot to hboot by turning off and power +vol down, and say yes to update, then reboot into your Rom.
      Now, the reason we say inadvertently is, we DID achieve S-Off -but- we got the black screen with the green arrow. We had tried other things which we will not go into. Suffice it to say that by following his advice to go back was the fix.
      • Power Off the ReZound before you remove the back. Don't forget a "Fender Thin" guitar pick can be used to help remove the back. That's for those of us with "weak" fingernails.
      • Remove the Battery and then remove the SD Card.
      • Re-format the SD card -or- obtain a blank one.
      • Place the SD Card in the SD slot on your 'puter.
      • Get a copy of the Gingerbread -or- ICS ROM zip file that suits your needs. RootzWiki would be a good place to look.
      • Re-name the file to PH98IMG.zip
      • Copy it to the SD card. IF you just reformated the card -or- you obtained a blank one, it will be in the proper location on the SD card. At the top or root.
      • Remove the SD Card from the PC.
      • Put the SD Card back in the ReZound.
      • Replace the Battery.
      • Optional: Depending on how careful you are, you can put the Back Cover on -or- not. The reason we say it is Optional is... IF you do not hold the buttons properly, you will have to remove the back cover again in order to remove the battery again. This part can be a vicious cycle. -And- the other part... being careful. The insides of your phone are exposed.
      • AFTER the Battery is back in, Press -and- hold the Volume Down control and then Press and hold the Power button. This will start your bootloader -or- hboot.
      • Follow directions and say 'Yes' to the update.
      • When it ReBoots you will have a working S-Off'd phone.
      • Power Down your phone and remove the SD Card with PH98IMG.zip on it. Replace it with your 'Normal' everyday card. IF you do not have another card and this card will be your 'normal' one, please erase it. DO NOT leave PH98IMG.zip on your card.
      • Put the phone all back together, turn it on and... enjoy it.


A Reference: Scott's ROMs
HTC Rezound (vigor)
   HBOOT 2.11 and below = Gingerbread
   HBOOT 2.21 and above = Ice Cream Sandwich
So it is possible to S-Off with the latest RUU (and hboot 2.7) even though the hboot is not listed.
Refer: How-To S-Off by Unlimited IO.

Conversation from XDA-Developers Forum

   Originally Posted by khw1959 View Post

Greetings gentlemen, I have switched from my Dinc to this HTC ReZound With the Dinc I was a CrackFlasher but this ReZound has me stymied. I spent a week of reading and researching here and I took the plunge today trying to get s-off. I have failed. My background is I was a Missile Technician on subs for 30 years so I have following procedures down pat. Tried this tool and cannot get past step 3 for obtaining a token. Device is on and attached to the pc (win7 64) but it cannot find it. Am I missing other steps needed prior to running this all in one tool?

   Originally Posted by hasoon2000 View Post

I can forget to reply. I have many threads so I forget easily. Turn on USB debugging.
Sent From My HTC Amaze 4G Via Someone's Room

   Originally Posted by khw1959 View Post

That was the fix....duh on me

So, we have a conversation in which one individual used JuopunutBear on a Win7 64-bit System -but- it was through Hasoon2000 All-In-One Kit. -And- he was successful -- ON an HTC ReZound


Now we have a BIG question... Just what does S-Off give us. The following was taken from the Web and slightly edited by us.

   From: 2fast4u88 & Rxpert83 on Android Forums   
S-off will technically unlock all the partitions on the phone. This means you can flash the radio, downgrade firmware, flash boot.img's within ROMs without an issue and a few other aspects. As it sets now, with just the unlock, you can't touch the radio partition. However, you can update the radio running a newer RUU.

If S-Off was had, you could flash what ever radio you would like, new or old. Same way with the firmware. In order to flash back to an older RUU, you need to do some hackery. Where with S-Off it would just flash and be on it's way.

S-Off has nothing in common with unlocking the SIM slot for GSM carriers. That would be supercid as many call it. You can have S-Off and still not have an unlocked SIM.

Basically, S-Off turns the securities of the phone off so that things that are not signed by HTC can be flashed through the boot loader.

   From: Scott on Android Forums   
In a nutshell: It gives you access to all partitions. You can change everything, not just boot/system/recovery, like our current setup.(S-On/UnLocked)

Lots of folks like to change splash images and radios,wich you cannot do with our current unlocked S-On arrangement.

You can also go backwards in build numbers, and run older ruus. So if you were S-Off, and flashed the leaked ICS RUU and didn't like it, no biggie. You can revert back to gingerbread radios, hboot, software, etc. By simply running an older, GB RUU. You can even go back to original shipping firmware.

Because you can flash literally anything, you do have a bigger responsbility to be informed about what your doing, what you're flashing, and why. Double and triple check the integrity of anything you flash by verifying md5 sums, as flashing a bad bootloader or radio will leave you with an unrecoverable, hard bricked device.

It will also let "boot" be written from recovery, making the seperate kernel flashes we do now un-neccessary (as soon as devs build their ROMs to flash the kernel from recovery)

It is my opnion, that S-Off is better, as long as caution is used in flashing, as it gives you more options to recover a soft brick. You can easily install an eng hboot(wich will offer extra fastboot commands), install a recovery, or run an older RUU.

S-On or S-Off is describing the status of the radio secure flag. Basically its "Security On" or "Security Off". Since it is housed in a location seperate of all other partitions, you will stay Security Off no matter what hboots or RUUs are flashed, until you purposely change it.

Oh... almost forgot

Big thing most folks are excited about(I dont really care, as I have no MFG warranty) is the fact that an S-Off phone can change the relocked status back to shipping status of locked and then the security turned back on, thus fooling HTC/VZW that any unlocking trickery has occured, and preserving your manufacturer warranty if you need it

Last and not least, if none of these things appeal to you, nothing wrong with staying UnLocked S-On. It does add a degree of safety, as the S-On hboot will only flash newer, HTC signed files, making it nearly impossible to brick by flashing bad firmware.

Hope that helps


A Reference: Scott's ROMs

 OK. Now how do we do it??  This is a somewhat modified version of someone else's S-Off experience. We chose it because it appeared to follow all the procedures with some extras. We are also looking elsewhere and will be adding some of our own comments... and removing some of theirs... etc;

   From: Howard on Android Forums   

jBear's website is:     unlimited.io   (no www. )
There are downloads for GB,and for ICS, so just make sure you use the correct download.

Here are Howard's, my and other's pointers:
  1. Use a spare SD card. The jBear process will end up wiping it. When you are all done that SD card will need to be totally reformatted. It takes quite some time to format an SD card, so I did it in my PC.
    From: Skorpios1027 same site.
    Excellent advice, I used an old 2GB sdcard and formatted it prior to starting the process. When it was all said and done though, my sdcard was blank, but did not need reformatting, YMMV.
    We also had an 'old' 2GB SD card and was wondering IF it would be enough. So, we see that it is/was by the above comment and others we have seen on the Web.
  2. Find the kernel boot.img file for the current GB, ICS Leak, or ROM that you are currently using. You also need to know the adb/fastboot commands to flash that kernel file. The jBear process replaces your kernel and reboots to this jBear kernel. If you are not successful at doing S-OFF and want to stop trying and put your phone into a usable state, you will need to flash your saved kernel file. No kernel file equals you can't use your phone.
  3. Make a nandroid backup of your entire system (check all boxes in Ramon RA recovery). You might need it - as I certainly did.
  4. You download the sBear zip file for your firmware (GB or leaked ICS) and copy the files from the zip file to the directory on your PC where you have the adb/fastboot files stored. (Of course you should have a working adb/fastboot system with the htc drivers installed).
  5. Boot up your phone normally, connect phone to PC as charge-only with usb debugging ON, and then run the jBear exe file on your PC. You don't know how much time I wasted trying to run the jBear exe file and getting errors while the phone was in bootloader/fastboot mode. The video on the jBear website shows starting off in hboot/bootloader - probably to show the before picture, but I thought I was supposed to start at that state. Also, the video just shows the starting state and ending state of the bootloader screen and does not show even a single step that one takes to perform the jbear S-OFF process.
  6. When the jBear exe file tells you to do the wire trick, keep trying to do the wire trick until the software stops asking you to do it. I used a large insulated paper clip with the insulation stripped off a bit on each end. It is important to keep the paper clip straight in the pin#1 hole to make good electrical contact. You need to touch the other end of the paper clip briefly to the ground pin and then do it again after waiting 1.75 seconds. So this takes alot of trying.
    From: Skorpios1027 same site.
    If you get the message still sober, all you should need to do to try again is exit the ControlBear.exe and rerun it, do not reboot your phone.
  7. We are on ICS, and the jBear program installed the ENG hboot. The bootloader screen looks different than other peoples' screen. This is because they were on the ICS leak and received a different hboot program from hBear. My screen said "ENG S-OFF" and did not say Juoblahblah can'st spell it. So, I naturally got help and repeatedly reflashed the hboot file, but never got the same screen as the other successful S-OFF people - this was another waste of my time due to incomplete directions.
In general the entire HTC user family is gratefull for this capability. It will probably provide us with valuable capabilities. For example, I have read S-OFF should allow us to RUU backwards to previous versions of official HTC/Verizon released operating systems.


  Partitions

Table copied/stolen from:   http://elinux.org/Android_Fastboot As stated before... we are gathering information and applying it to our ReZound where it fits -and- modifying it if necessary. However, we do not always get things modified right away. This being one section we are working on. So, double check...

ADP1/G1 Flash partitions

Flash partitions on the ADP1

Partition name Device Size Contents/Notes
splash1 <none> 307200 bytes splash screen image.
misc /dev/mtd/mtd0 262k misc - has apparently some flags used for controlling device mode
recovery /dev/mtd/mtd1 5.2M kernel, initrd with rootfs (for alternate boot)
boot /dev/mtd/mtd2 2.6M kernel, initrd with rootfs (for default boot)
system /dev/mtd/mtd3 70M yaffs2 file system, mounted read-only at /system - has the bulk of the Android system, including system libraries, Dalvik and pre-installed applications.
cache /dev/mtd/mtd4 70M yaffs2 file system, mounted at /cache - only used on G1 for over-the-air updates. This partition can be used to store temporary data.
userdata /dev/mtd/mtd5 78M yaffs2 file system, mounted at /data - contains user-installed applications and data, including customization data

Mount Points Available For HTC Rezound

fstab -or- Partitions from: forum.xda-developers

looks like Google changes things, just to change. recovery.fstab went from needing to list from

# mount point fstype device [device2]

to

#<src> <mnt_point> <type> <mnt_flags and options>

so for example from this:

Code:
# mount point	fstype		device			[device2]

/recovery	emmc		/dev/block/mmcblk0p23
/boot		emmc		/dev/block/mmcblk0p22
/cache          ext4            /dev/block/mmcblk0p36
/data           ext4            /dev/block/mmcblk0p35
/sd-ext         ext4            /dev/block/mmcblk1p2
/sdcard		vfat		/dev/block/mmcblk1p1
/system         ext4            /dev/block/mmcblk0p29
/misc           emmc            /dev/block/mmcblk0p24
/internal_sdcard vfat           /dev/block/mmcblk0p38
to

Code:
# Android fstab file.
#<src>					<mnt_point>	<type>	<mnt_flags and options>
# The filesystem that contains the filesystem checker binary (typically /system) cannot
# specify MF_CHECK, and must come before any filesystems that do specify MF_CHECK
# data partition must be located at the bottom for supporting device encryption

/dev/block/mmcblk0p23      /recovery  	              emmc
/dev/block/mmcblk0p22	   /boot		      emmc	
/dev/block/mmcblk0p36	   /cache		      ext4
/dev/block/mmcblk0p35	   /data		      ext4
/dev/block/mmcblk1p2	   /sd-ext		      ext4
/dev/block/mmcblk1p1	   /sdcard		      vfat
/dev/block/mmcblk0p29	   /system		      ext4
/dev/block/mmcblk0p24	   /misc  		      emmc
/dev/block/mmcblk0p38	   /internal_sd	              vfat
I'd be nice if they could leave the stuff that works alone, but that's why they get paid the big bucks.


  rooted Now What??

Refer:   xdadevelopers     -and-     xdadevelopers root Guide     -and-     HTC ReZound Section  

Allllrighty now. We have placed a reference to one of the more important sites right at the top of this because.... because they have lots and lots of info, pointers -and- most importantly... HELP. Matter of fact we have borrowed, swiped -or- stolen a lot of info from them. We do believe that it is ok - as long as we reference them... which we did. IF you can not find what you want here... please jump over to there. As said in other places on our site, the biggest reason that we "borrow" the info from other sites is so that we don't loose it -- IF they decide to change it or leave before we need it again. Lame excuse??? ... maybe.

 Busy Box / 1:28pm  BusyBox combines tiny versions of many common UNIX utilities into a single small executable. The BusyBox that we got off of the "Google Play" was ONLY an installer. So don't click on it expecting something to be usable. You will need to access it in order to install BusyBox -BUT- in order to use the commands you need to do something else. What??? Don't know... yet.
One interesting aspect was/is that you can get a version that will install on your PC Linux Box and then --- practice on it before you ruin -or- brick your phone. Think that the PC System is more forgiving than the Phone System. Download a prebuilt binary version from http://busybox.net/downloads/binaries/latest/ and save it under the name "busybox". (busybox-x86_64.bin)
Refer: Google Play description -or- Busy Box Home


  Android & ICS & root

This section, and the next two, are totally a mess and will probably remain that way for a while. Finding info first - organizing later.

 December 30th, 2012 / 5:15pm  Source code for android can be found at: Source Android

Refer: Android 4.0 Highlights
Why Updates take so long.
<!-- ===================================================================== -->     RUU: 1)radio unit upgrade 2)rom upgrade utility. Not Sure which.?.?
    RUU---ROM UPDATE UTILITY <-- OK. This is the "Official" definition.
<!-- ===================================================================== -->

Please make sure your battery is fully charged, and you are receiving a strong Verizon Wireless or Wi-Fi signal before beginning your software update.
Refer: Support

Got notice last night that ICS was available. This morning said OK for the install. It powered down and then came back up doing some preliminaries. Then it shutdown and fired back up. Looked just like it did before. Then after a short delay we got a message that it was ready for the Software Update. And that it would take about 6 mins.
Start 6:50am... Well, it wasn't doing anything so we went to Settings, Check New and it said that an Update was available. So we pressed OK again.

   Source: Verizon Wireless
   Name: ReZound 3.14.605.12 710RD
   Status: Update Successful
   Code: 200
   Date: 08/05/12
   Time: 06:51 AM
   Description: This Android 4.0 
   (Ice Cream Sandwich) software 
   upgrade has many enhancements for
   your HTC Rezound. See 
   www.verizonwireless.com/Rezoundsupport
   for details
   
Pressed OK and.... message went away. Pressed the back arrow, got settings. Pressed the back arroe again... go our home screen. Everything looks the same...Except there is an download icon at the top. When we drag it down it shows a message "Updating Firmware" Then we get a message sound and it says Updae Successful. Then we get another message.
   Warning: Cannot Make or Receive
   Call, Including 911 Calls,During
   Update
   Info
   Source: Verizn Wireless
   Name: Rezound 3.14.605.12 710RD
   Update time: 24 Min(s)
   Size: 299.0 MB
   Description: This Android 4.0 
   (Ice Cream Sandwich) software 
   upgrade has many enhancements for
   your HTC Rezound. See 
   www.verizonwireless.com/Rezoundsupport
   for details
   
Pressed OK and.... it is Powering off again. Then it starts back up and says it is Updating Software from Verizon Wireless.
Android is upgrading... Updating Apps... Updating Contacts... loading.... Got another Software Update message. Same as the one above. Pressed OK... nothing except my home screen which has the same background -but- the bottom is different -and- it looks like there is an icon -or- widget hiding behind the bottom launch bar... Ooooops... just realized that is the screen indicator. Looks different on a straight bar. We liked the curved one better. This new OS had better be worth it. Looks like we will be able to remove some Widgets from our Home Screen. They are duplicated down on this New Launch Bar.
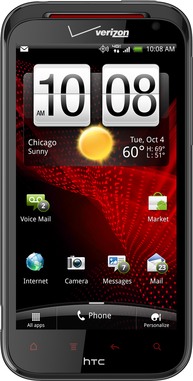
HTC and Verizon, on Thursday, August 2nd, the day AFTER my Birthday, announced Ice Cream Sandwich update for its ReZound handset. The Taiwanese phone maker assured the ICS update almost eight months back for the device. After months of wait and anticipation, the company has finally decided to roll an over-the-air(OTA) Android 4.0.3 Ice Cream Sandwich update along with Sense 3.6 for the ReZound smartphone.

ReZound currently is running Gingerbread OS.

New ICS Features on HTC ReZound

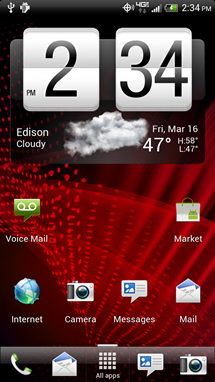
Launch Bar: With the ICS update, the home screen will have a new customizable Launch Bar to drag apps, shortcuts and folders in or out of the Launch Bar for access from any home screen.

Swipe Notification: With simple swipe of your finger, now you will be accessing or dismissing your notifications even when your device is locked.

Face Unlock: You no more need to type keyword to unlock your phone. Face recognition will help you unlock your ReZound phone easily.

Improved Voice Input: ICS introduces advanced and robust Voice Input technology. Now you can just hold down the Search Key to use this feature for dictating emails and texts, navigating to an address and much more.

Along with these features, ICS also brings multitask functioning with Recent Apps Feature, lets the user create folders easily and browse the web free of cookies or history tracking with incognito mode.

Some Additional Features

Ice Cream Sandwich provides some additional features for the HTC ReZound smartphone. The HTC phone will have an upgraded V CAST Media Manager which is now updated to Backup Assistant Plus with an enhanced user experience. HTC has also resolved the time zone issues and proper Timezone will display within the Clock Widget.

In addition, the HTC device has been enabled with the Wireless Alerting System. The maker of the phone has also added Cisco AnyConnect support to improve VPN functionality. Moreover, ReZound will now have improved data connectivity for a better user experience, improved device stability and improved Mobile Hotspot connectivity.

Meanwhile, Sprint has announced Android 4.0 ICS updat for the HTC EVO 3D and EVO Design 4G which will start rolling out this week.

Please make sure your battery is fully charged, and you are receiving a strong Verizon Wireless or Wi-Fi signal before beginning your software update.

Android 4.0 Update Frequently Asked Questions

ICS

We copied pieces of this Web Page here to ours so that we don't loose it. IF you want the full story please jump over to: TechSpot

Phones with ICS updates "coming soon"

Not all phone manufacturers are offering specific details as to when each of their devices are getting upgraded to Android 4.0. Motorola is only listing them by quarter, while HTC recently provided a two-month release window, and Sony is being a little more specific with the next round of updates starting this week and continuing throughout June into the third quarter. Samsung is not giving out any dates whatsoever.

HTC
Smartphone model Timeframe Device release date
Sensation XL May-June May 19, 2011
EVO 4G+ May-June June 2011
ReZound June-July November 14, 2011
EVO 3D June-July June 24, 2011
EVO Design 4G June-July October 23, 2011
Desire S June-July March 8, 2011
Incredible S June-July February 26, 2011
Rhyme June-July September 29, 2011
Thunderbolt July-August March 17, 2011
Desire HD July-August October 20, 2010
DROID Incredible 2 TBD April 28, 2011

HTC notes that due to localization, testing, and partner approvals, updates do not roll out to all devices at the same time. For devices on a wide variety of carriers and in many countries, rollouts can take up to 45 days from the initial update to reach everyone. You can manually check for updates by going to Settings>About>Software Updates if you are not prompted to update automatically.

The upgrade to Android 4.0 will include Sense 3.6, not Sense 4, since some aspects of Sense 4 require dedicated hardware, which is not available on all devices.

Why all the fuss about having the latest version?

If there's one lesson to learn here is that you should buy a phone that makes you happy today, not one that promises new features with an update that may or may not appear. Granted, that's a valid advice for any consumer electronic purchase, but Android serves as the perfect example for it.

That said, it's not unreasonable to want your one-year-old phone to be able to get the latest software update, especially when you know it's technically capable of running it. There are many new features to be gained in the transition from Gingerbread to Ice Cream Sandwich. Here are a few of the most noteworthy:

  • UI Improvements: Android 4.0 is based on a new look and feel, the Holo theme, which offers a more consistent experience throughout the OS and makes it easier for users to find those common buttons and actions. There's also a new "Roboto" font that's easier on the eye and has a more modern feel.

  • Multitasking, Widgets, and Folders: There's a new Recent Apps button that lets users jump from one task to another, and a side-swiping gesture to get rid of apps you're no longer using. Users can also resize widgets to their liking and drag and drop icons on top of each other to create folders.

  • Contacts and sharing: ICS ditches the old Android 2.3 contact list for one that shows richer profile information, including large profile picture, phone numbers, addresses, and a button for connecting on integrated social networks. There's also a new NFC peer-to-peer sharing feature that allows users with NFC-capable devices to share apps, contacts, music, videos by touching one phone to another.

  • Improved speed and full hardware acceleration: Tests have shown significant performance improvements in Android 4.0 when it comes to handling graphics and using the web browser.

  • Data usage manager: Android 4.0 allows users to monitor total data usage by network type and application, as well as set limits on those data-hungry apps so you don't incur in expensive overage fees.

  • Various other new features and enhancements: You can access the camera and notifications without unlocking your device first, there's a new face-unlock feature, Wi-Fi direct support to share files between compatible devices, improvements to the camera and video apps, and more.

Lastly, it's also worth noting that the lack of timely updates exacerbates Android's fragmentation problem, which makes it that much harder for developers to QA apps. If you've ever wondered why you run into bugs and other unexplained behaviors on Android but not on iOS, well, fragmentation probably played a part on it.

It's perfectly normal. Google releases Android with a HAL for one specific SoC, a TI OMAP nobody uses in the case of ICS. Phone builders do not get access to ICS during the development process. That means that as soon as ICS is out for the Nexus devices, all other manufacturers first have to build a completely new HAL and kernel. Then fix their own software. Then fix all third party software they have to include. Then push it out for certification (which takes about a month), then push it out to carriers and regional offices for regional testing and adjustments, and THEN they can release it.

6 months is long, but it's quite normal it always takes about 3-4 months.

Why do Apple and Microsoft not have these issues? Because they have very strict hardware control. Apple makes all their hardware themselves, and all Windows Phones run on the same SoCs with the same HAL. Because the update is then released globally it looks like it's fast, but both Apple and Microsoft have to do the same internal and external testing and certifications before they can push an update.

Google does seem willing to improve it, and they've said they will give manufacturers more time to adjust. Add to that that Android 2.3 to Android 4 is a HUGE step on system level and you have nothing but perfectly valid reasons why the update takes a while.

It's not even that big a deal really. Sure the interface looks slightly better, and sure the hardware acceleration does 'something' in some apps, but it all doesn't matter that much. My Xperia S is running 2.3.7 now, it's extremely fast, extremely stable, and it runs every app I found without issues. The stability and compatibility of ICS still aren't on Gingerbread-level you know.

A Quick Android 4.0 Ice Cream Sandwich Feature Rundown

Borrowed/Stolen from TechCrunch:: Our plan is to edit this to apply to our ReZound.

  • Roboto: Goodbye Droid Sans, a new typeface called Roboto is here to rule the roost.
  • Landscape Controls: We knew that the Galaxy Nexus opted to move the classic Android buttons onto the screen, but they smartly disappear when viewing video or in widescreen mode.
  • Flexible Widgets: Ice Cream Sandwich’s stock widgets are resizable and more robust than previous versions. They also now occupy their own separate space in the app drawer.
  • Folders: Dragging apps and contacts on top of each other create re-arrangeable folders a la iOS.
  • Favorites Tray: Users can stow their favorite apps, links, and folders into a new Favorites tray for quick and easy access.
  • Taking Screenshots: This one has been a long time coming. Hold down the power button and the volume down button to snap a screenshot.
  • Notifications: Hefty revamp here, as the contents are much more customizable. Music controls have been integrated, and notifications are also easily dismissed with a quick swipe left or right.
  • Improved Copy & Paste: Copying and pasting content is made much easier, as you can now move around entire blocks of text. Very useful.
  • Face Unlock: One of the most ambitious is Ice Cream Sandwich’s new Face Unlock feature, which allows users to unlock their handsets just by looking into the front-facing camera.
  • Enhanced Talk-to-Text: Voice input seems much smarter this time around, as it’s more accurate, requires less time, and even accounts for pauses.
  • Browser: The stock browser now sports tabs, and it maxes out at 16. Web pages can now also be saved offline for later perusal, and users can directly request the desktop version of a site.
  • Gmail: Gmail now supports two-line previews, and sports a new context-sensitive action bar at the bottom of the screen. Gesture support allows you to swipe left and right between emails.
  • People App: A new spin on the contact list. The phone’s owner has their own profile, and people’s contact details are sourced from Google+, Facebook, Twitter, etc. Users can define favorite contacts, and individual people can be placed on the homescreen or in folders for quick access.
  • Calendar: Features a redesigned UI and includes pinch-to-zoom to vary the level of detail on a calendar page.
  • Data Usage: Users can now drill down into their data usage over a certain period of time, including the ability to see which apps are the biggest data hogs and the ability to limit data usage to a certain threshold.
  • Camera: There’s a lot to love here. It features image stabilization, improved autofocus, and integration with other apps for sending photos or instant upload to Google+. Oh, and who could forget built-in face detection, panorama and time lapse modes, and on-the-fly photo retouching and enhancements.
  • Android Beam: An secure NFC-powered sharing platform that lets users share nearly any kind of content, save for applications (in that case, a link to the Market is sent instead)

A question and response on GSM

When is the update to roam globally on gsm networks coming?

Allow me to answer that oh so very important question:

Once the ReZound (as well as the Motorola Droid 4) receives ICS 4.0 (or, whatever the update version will be), respectively, the device(s) will be Global Capable upon completion of said installation and the device once again is registers in "the switch".

However, you will be confined to Verizon for Global service if your device has been active on a Verizon line for less than six months. Once the device has met the six-month minimum you can, then call the Global Tech Department and request a "carrier unlock" so that your device can be used internationally with a local or regional prepaid service provider; your Verizon line should also be in good standing for the same six-month period before Verizon will grant a carrier unlock.

Dalvik (Software)
Android software development
Writing native Android applications
Android Community & ICS Android 4


Quick note/disclaimer: as always, you are ultimately responsible for any root-related activities on your phone.

You should understand not only the benefits of rooting, but also any possible consequences (voided warranty, boot-loops, bricking, etc.) that might occur as a result of your root-related actions.

TRCompu.com / AndroidForums.com / Phandroid.com, its owner, and staff are not liable for any root actions you might undertake as a result of information used from this site or their sites.

Reading, researching, understanding, and carefully following the published steps and instructions can go a long way towards helping to make your rooting efforts a successful one.


Borrowed from: Android Forums
Android is built upon the Linux operating system, where there is a concept of an administrator user aka "root" that has full permissions to the system. When you "root" a phone, you are enabling access to the root user so you can call on that user to access protected functionality.

As a regular user, you can request "superuser" access, which is another way of saying that you want root privileges. In a traditional Linux OS, if you log in as root, you can actually create multiple superusers, like a team of administrators, with either complete power, or some subset of power. But for the purpose of Android phones, the only superuser is root, and root always has full access to the system.

To request superuser access, you would use a shell command called "su." In Android, the su command works in conjunction with an app called Superuser to grant the Android application(s) root access. The Superuser app is included in the rooted ROM; it's something you automatically get when you root your phone.

Android applications with root access can do a lot more. If you ever see an app on the market that says "for rooted devices only," it means that its functionality requires root access. A normal unrooted phone would not be able to perform that functionality.


        Android 4.0 - codenamed Ice Cream Sandwich, and based on Linux kernel 3.0.1
The above placed here January 30th, 2012/12:42pm is just to bring to light that Android 4 is out -and- that it, like the previous ones, is based on Linux. No we do NOT have it... yet. It is supposed to be 'officially' released this first quarter of 2012. That means we have from now until March 31st, 2012 to wait. Or we could do like others and install it ourselves. -But- we don't think so. We plan on Reading and Researching "a lot" before doing any of this to our phone. -And- waiting until there is an Official release of Android 4. Hopefully we will learn enough by then so that we can make changes and NOT brick our phone.

The Android 4.0.3 Ice Cream Sandwich (ICS) Firmware for HTC ReZound is now available and owners can now breathe easy knowing they won’t be stuck with their current firmware. The good thing is, this firmware is the official package leaked online, thus the future update roll out would just like this only that this firmware package is better as there are new features added that couldn’t be found from the original. Please note that your device doesn’t need to be rooted to use this firmware. However, if you’ve already rooted your device prior to this update, the rooting access would be revoked after the update is installed. The process is pretty straightforward but you’ve got to check the pre-requisites before going any further.

HTC Rezound

Pre-Requisites

A. All the data in your HTC ReZound should be backed up before you take the first step of the updating process. There have been reports that data inside ReZound smart phones have the tendency to go corrupt during the update. You don’t want take any chances especially if you have valuable data inside your phone.

B. Make sure you have at least 70% of battery before doing this tutorial. If the process is interrupted there is a greater chance that the phone will be unusable.

C. Disable your antivirus apps and security suites to ensure there will be no disruptions from the apps.

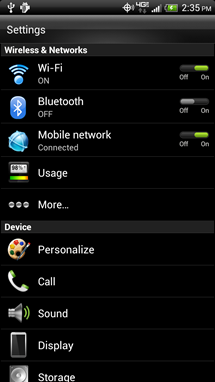
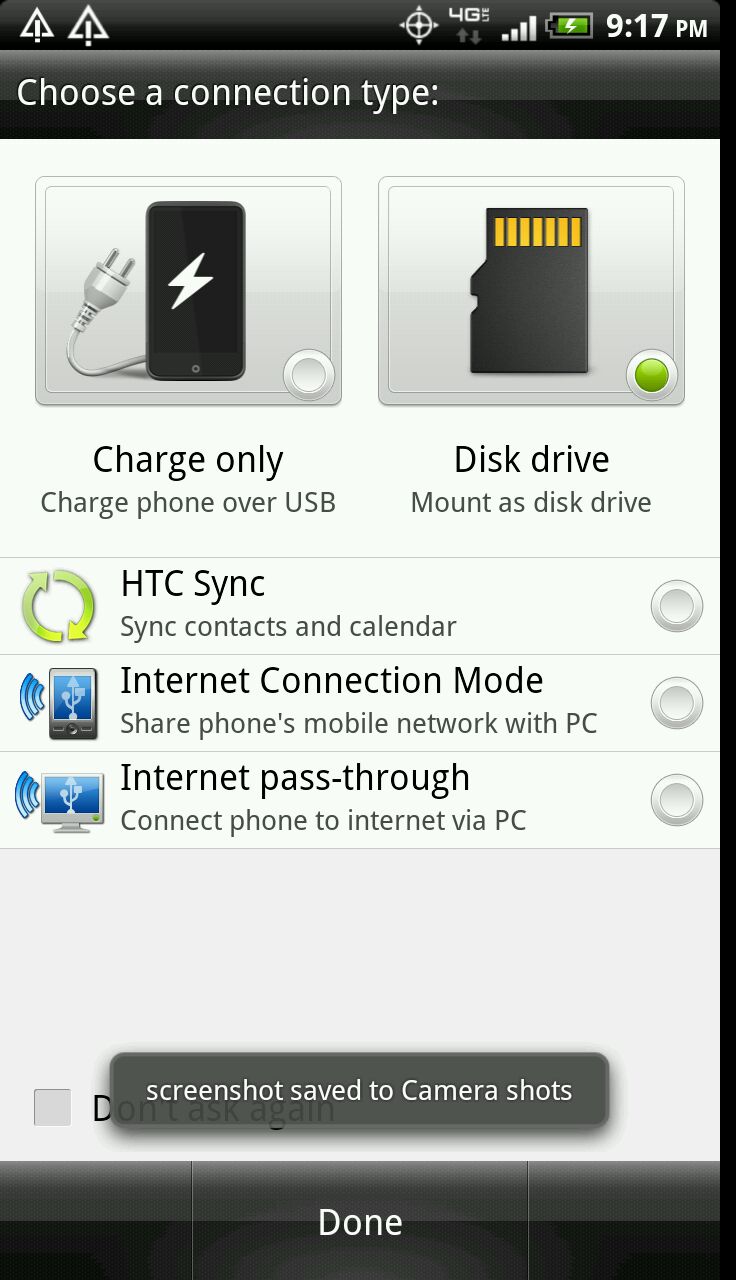
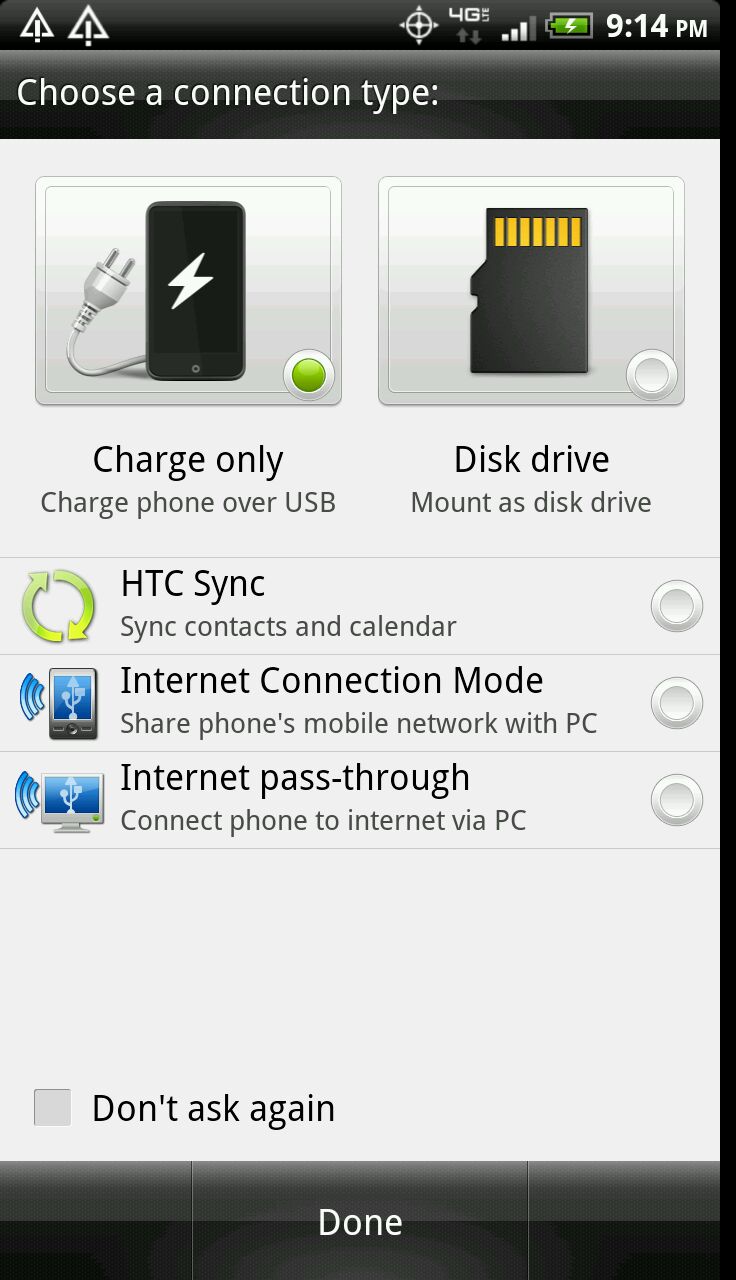
D. Enable USB Debugging by going to Settings => Applications => Development => USB Debugging.

Instructions

Step 1: Download the package from here and save it to your computer. Once the download is finished, rename the file to PH98IMG (without .zip at the end).

Step 2: Connect your phone to your computer and copy the package you just downloaded and renamed to your phones SD card. Make sure you put it on the root directory as it will become undetectable once you put it into any sub-directories.

Step 3: Turn off your phone and put it into Bootloader Mode by holding down Volume Up, OK and Power buttons together. If it boots normally, try this step over and over until your device is in the Bootloader Mode. Otherwise, you couldn’t continue with the update proces.

Step 4: Once you are inside the Bootloader Mode, select Recovery to enter into Recovery Mode.

Step 5: Inside the Recovery Mode select ‘Install Zip from SD Card‘ followed with ‘Choose Zip from SD Card‘ and browse through the root directory of your phone’s SD card and select PH98IMG.

Step 6: The update process will be just for a short while and you will be brought back to the Recovery Mode screen once it’s done. Select ‘Go Back’ then ‘Reboot System Now’ to restart your device into normal mode.

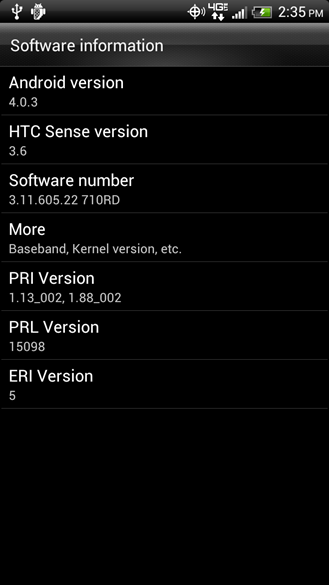
Step 7: Check the version of your phone now by going to Settings => About Phone. You should be seeing 3.13.605.7 version and 4.0.3 will also appear.

That’s it! Your HTC ReZound is now running on the official Android 4.0.3 ICS Firmware. Do let us know when you have questions.

"Borrowed" from Techzek


This is a release candidate for the OTA and by no means a final version.
Update: Here's the changelog:

Features/Enhancements
   1. Android OS 4.0.3 (Ice Cream Sandwich)
   2.  CMAS support added
   3. IPv6 over eHRPD supported
   4. UI updated to Sense 3.6
   5. Caller Name ID app added
   6. VMM/BUA plus updated
   7. New storage UI (under settings menu)

Issues Resolved
   1. Changing pin causes EULA to be displayed
   2. Wrong time displayed in and around Phoenix, AZ
   3. EAS message - "Client/Server Conversion Error".
   4. EAS message – “Exchange policies have changed”
   5. EAS message – “Certificate Error”
   6. Home screen partially blocked with black bar
   7. Hotspot data stalls
   8. Removed power mode settings (which forced device into CDMA only)
   9. Group message not displaying originating MDN
   10. Call button not disabled when using voice commands
   11. People widget displaying two different birthdays
   12. Verizon Location Agent removed – impacting battery life
   13. SSO athentication fails for VCAST Tones
   14. "To" field text deleted if device is rotated (in Compose or Forward Voicemail)
   15. Google Talk app formatting

Previously, on June 20th, HTC accidentally posted on their website that Android 4.0 Ice Cream Sandwich update for HTC ReZound was available and ready to be downloaded, however the page was taken down few minutes later. The page not only listed the update, but it also hosted the entire change log for the update. Below is the change log, and these are the changes that will be coming with this update.

Applications & Widgets
� V CAST Media Manager has been updated to Backup Assistant Plus with an enhanced user experience.
� Caller Name ID application has been updated and added to All Apps.
� Time zone issues have been resolved within the Clock widget.

Device Features
� Device is enabled with the Wireless Alerting System.
� Cisco AnyConnect support has been added to improve VPN functionality.
� Improved data connectivity for a better user experience.
� Improve device stability minimizes the number of resets.
� Improvements to Mobile Hotspot connectivity.

Email, Messaging & Web
� Improvements to default mail application now displays all Yahoo! mail contents properly

The update is definitely ready. This software update (Software Number: 3.14.605.10 710RD; Baseband Version:1.22.10.0421r, 1.22.10.0424r) hopefully be available for download officially very soon. Once updated, the phone should be running Ice Cream Sandwich Operating System (OS) and provide several enhancements, fixes and features. It is worth noting that this build (3.14.605.10) is the same build that was leaked directly, so if you cannot wait, you can download the leaked ROM and follow the discussions related to it at xda-developers over here, however, the update is just round the corner. Since Verizon had said the update will be rolling out by the end of July, it appears like the company will keep up to its words. Hopefully the wait for ICS will be over soon.

You can keep checking for over the air updates by following the steps mentioned below:
1. Go to Setting by tapping on the Apps icon from the Home screen.
2. Scroll down to find System updates
3. Tap on the HTC software update option
4. Tap Check now
5. Your phone will check for available updates
6. If a newer version of software is found, you will be prompted to download and install it. It is normal for phone to switch off and on during the update process.
7. If there are no newer updates available, the device will prompt that the phone is Up To Date.
8. Pressing the Home button takes you back to Home Screen.


 March 30, 2012/8:38am  Actually downloaded the Semi-Official Android 4 ICS yesterday -but- it took a long, long time and we had to go off to work before it finished. There were/are two versions of this "leaked" Update. The following was copied from the Android Community:

Directions and download files:

HTC ReZound 4.0.3 ICS stockDownload Link
HTC ReZound 4.0.3 ICS Rooted versionDownload Link

This will not work if you used the HTC Bootloader unlock tool. Your device must be fully stock with a locked bootloader.

– Download file, rename it to “PH98IMG.zip” (no quotes)
– Place the renamed file onto the root of the SD Card (not in a file)
– Power down your device - Power OFF
– Reboot into the bootloader by holding VOL DOWN + Power
– The flashing process should begin automatically

That is it! Let the phone do its thing and complete the update. It should reboot and you’ll be enjoying that tasty and buttery smooth Android 4.0.3 ICS and Sense UI in no time flat. Do this at your own risk, Android Community or the source of the files are not responsible should you run into issues.


 March 9th, 2012   Found this: Update HTC ReZound with Leaked Ice Cream Sandwich RUU 3.11.605.1
and this HTC Rezound: All Things Root Guide


Although the phone ships with Adroid Ginger Bread, it will be receiving an upgrade to the latest version of the operating system, known as Ice Cream Sandwich, early next year... in 2012... or so they say.
SlashGear Report

HTC Rezound Development New Ice Cream Sandwich ROM with Sense 3.6 for HTC Rezound

One thing we would like to bring to light, right here in the beginning of this section is... IF you mess with the phone you may, and probably will, have problems with the Updates. Today, Jan 27th, 2012, we learned of the First update for this phone. Then, in searching for further info, we stumbled into the AndroidCentral Forums. The HTC ReZound Smartphone section. In it we read the 'good' and the 'bad' about this new Update. It seems that most, if not all, of the problems were encountered by users with 'modified' phones. So, another reason to -beware-.

All of this stuff is setup to use the Windows OS. Our interest in this stems from curiosity, and the desire to get rid of some of the "extra" applications on our phone.

Android Central Forums -or- Clean Tool - Linux Version

"Install HTC USB Sync Drivers if not already installed. How is this done?"
Quoted from Android Central forums -but- the same question we had. And the answer was:
"Go over to XDA, check one of the millions of temp root threads over there. Almost every one of them have HTC USB drivers. If you happen to get them directly from HTC, make sure sync is closed(on the PC) otherwise the process won't work right."

Now our next question... Where is XDA???

"adb server out of date..........killing"
What do we need to do?
On your computer, check the system tray for the application "HTC Sync". If it's running stop/close/kill it.

Disabling the bloat should not prevent you from updating to ICS. If for some reason it does you can run the tool again to re-enable everything. As far as I know there is no reason to do a hard reset.

Also a hard reset is when you go into recovery and do a "factory reset".

 Answers to obvious Questions  
1.) The root isn't "tethered", you just need to plug your ReZound into your computer via the USB cable you use to charge it in order to run CleanTOOL. This is the rooting process with many phones as well. You'll still be able to use it like you normally did, nothing will change, except that the bloat you chose to disable will be, well, disabled.
2.) Like MrSmith said earlier in the thread, the packages/bloat are still on your phone, they're just disabled. If our future ICS update requires VCast and Blockbuster, and you chose to disable them, it still won't matter, because you didn't actually uninstall them from the ReZound. The OTA with ICS will still go through, and you'll be able to upgrade normally.

Negative. I'll try to clarify.
1.) Enable Sense (I'm assuming you already have it enabled anyway.)
2.) Menu > Settings > Applications > Running Services > All > HTC Sense > Clear Defaults
3.) Hit the home button. A box will pop up asking which launcher to use. Check off the box at the bottom to set it as default, and click on the launcher you downloaded.
4.) Run CleanTOOL on your phone. (Remember, HTC Sync OFF, Charge Only, Debugging ON, etc etc)
5.) Run Temp Root.
6.) Run disable Sense command
7.) Reboot the phone: Press Power for 10 seconds > Power Off > Wait 20 seconds > Press Power for 10 seconds.

Android Forums - HTC Rezound | Android Forums - root
Rooting Explained + Top 5 Benefits Of Rooting Your Android Phone
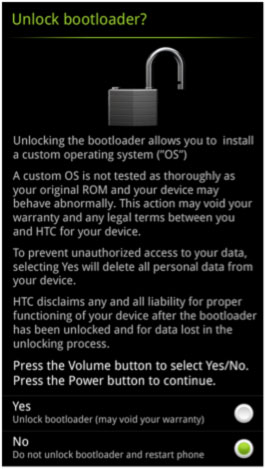
Unlock Bootloader

Now then, the above will take you to a Site that has lots of information about the Android System. It is basically a Linux System. One of the things we were looking at was the rooting process. This is making some changes to your phone that will allow 'root' access. Just like in Linux -and- just like in Linux it is recommended that you do NOT use this mode. Why?? "Power" can breed trouble. With root access you can change - and destroy - anything in the phone. IF, in your messing around, you should happen to 'brick' the phone, you are out the money. None of the manufacturers or carriers will fix it. At least NOT under warranty... and I'm not sure they could or would do it otherwise. Think it would be just as inexpensive to buy a new phone. So, unless you have a darn good, and valid, reason ... don't root your phone.
Note: Bricking means you have screwed up the OS to such a degree that you cannot get into it to fix it anymore...even to reset to stock. In reality this is hard to do, because most of the time you can at least get it connected to a PC in the recovery console, and use SDK (or whatever) to fix it. But it is always a risk.

 Quote from amonfog msg #25  Rooting is not cool for people who: know nothing of terminals and linux systems, are not developers for google, have brains, want to keep their phone carriers friendly, have experienced that in a pocket they can accidently push buttons and people who want to use their phone the best way possible (it cost the manufacturers loads of time to adjust the system in such a way that the phone works the best, why would you screw that up?).

Now with all that said, we still plan on getting more information about it. We like to know how and why things work the way they do. -And- we believe there are changes that can be made to our phone that will be leagal and improve the operations. More to come...

FREEWARE - Verizon HTC Rezound Bloatware Killer - CleanTOOL 1.1
Unlocking the Bootloader [HOW TO] Unlock Rezound's Bootloader [HTCdev.com]

-But- alas... In order to use the "CleanTOOL" you must install some HTC USB Drivers in your Windows System. Then you must unlock your bootloader... which again, voids your warranty. Once again "Power" can breed trouble.


The following was copied from: Android Forums

Rooting Best Practices
If you are new to rooting, you might want to be aware of some general guidelines for various root-related activities that might help you avoid some trouble along the way.

- Have a fall-back / recovery plan before taking any "scary" (risky) action. In other words, know what steps you'll need to follow if you encounter a problem.

- Make a backup before you alter or remove any system-related apps or settings. If you can't make a full, restorable (i.e., a Nandroid) backup, then don't make any changes--doing so without a backup is asking for bootloops or soft-brickings.

- If your Android device does not support a custom recovery or the ability to make a full device backup (i.e., a Nandroid backup), then you should avoid making any system-related changes that could affect the ability of your device to boot (i.e., modifying or removing system apps, etc.).

- Verify the integrity of any files you might flash. This means checking the file size and (MD5) checksum on the platform from which the file is being flashed. If you are flashing from your device, you should check its integrity there there's no guarantee that it matches it original source unless you verify that. If you are are flashing from a PC, you should also check the file's integrity from there, too.

- Be sure to carefully follow the ROM (or theme) dev's installation instructions. If wipes are required, be sure to not miss those steps. The sequences of steps is often very precise and following them correctly will help ensure a successful installation.

- When/if you overclock, be sure to not enable the "set on boot" option until you are sure your device is stable at the selected speed. Also, don't forget to to set a failsafe temperature profile/setting to keep your device from over-heating.

- Also, take care when first using a tool like ROM Manager. It makes doing some root operations very simple, but you might want to become with conversant with how to operate and navigate directly in ClockworkMod custom recovery. This way, you will be prepared for the possible eventuality when you really need to manually operate in ClockworkMod custom recovery. So, your first forays with flashing ROMs might be best done manually.

Let me know if you have any other things to add or expand on in the above.

Cheers!
Mount Points Available For HTC Rezound
Mount Script:
mount("ext4", "EMMC", "/dev/block/mmcblk0p29", "/system");
mount("ext4", "EMMC", "/dev/block/mmcblk0p35", "/data");
mount("ext4", "EMMC", "/dev/block/mmcblk0p36", "/cache");
run_program("/sbin/busybox", "mount", "/sdcard");

Format Script:
format("ext4", "EMMC", "/dev/block/mmcblk0p29", "/system");
format("ext4", "EMMC", "/dev/block/mmcblk0p35", "/data");
format("ext4", "EMMC", "/dev/block/mmcblk0p36", "/cache");
AndroidManager for Linux, Windows and MacOS
the above app requires installed AndroidSDK and busybox on phone (so and root) linux and macOS version reguires installed Qt libraries(libqtgui4, libqt4-declarative and libqt4-network 4.7 version)(install it from synaptic or some similar app)
Download the Android SDK
Installing the SDK

  Programming - Linux Section

 July 10th, 2013 / 4:05am  Well, here we go with another Android setup on Linux. (We are leaving the date at the top -cause- that is when we attempted this the first time... successfully!!) Seemed easier this time. Went into Yast2 and installed adb and fastboot. They can be executed from within our home page. In fact from anywhere.

We then created an AndroidSDK dir in our home dir and then installed the Android Developement Tools:
          adt-bundle-linux-x86_64-20130522.zip
inside it. We moved inside it to the Eclipse dir and execued eclipse. It worked fine, and in fact it created a workspace dir inside our home dir. So, it looks like we are setup again on linux.

 At 8:14am  Well, our first try at a 'fastboot' command from our Linux Box Failed!! I was tired so I went to bed. This morning after, and during, our walk with the dog we thought of some things. Then we also searched the Web. The error situation that we encounterd was:

ctaylor@dusty-tr2:~/AndroidSDK> fastboot flash recovery openrecovery-twrp-2.5.0.0-vigor.img 
sending 'recovery' (6 KB)...
OKAY [  0.144s]
writing 'recovery'...
FAILED (remote: not allowed)
finished. total time: 0.459s
ctaylor@dusty-tr2:~/AndroidSDK> fastboot reboot
rebooting...

finished. total time: 3.336s
Why?? Why? Ah ha!!! Got a reminder on the Web! We had 'RE-locked' our phone for some experimentation -and- we haven't yet 'RE-UNlocked' it!! This will coincide with another test that we need to make. The various instructions always tell you to put the 'items', or 'files', in the same dir as the adb and fastboot programs. Well, we have them executeable from anywhere. So, we should be able to move into a dir with the item or file that we want to use and then execute the commands from there. Should... hmmmmm... Dummy!! That's what you just tried to do!! Ok. -But-... we were still locked. So now we will try the Unlock from within Linux.
          Yep! It works!!
Ok, so we are acting like a little kid. -But- at our age we need all the excitement and joy that we can find. Figuring this out is very rewarding. Hope anyone reading this feels the same. Would have been even more rewarding IF we hadn't been so forgetful. Tried desparately to 'Tap' the 'Yes' button on the screen and it would not get the green dot!! Finally remembered that you use the 'Vol Up' key to get the yes!!! Another 'Senior Moment'.

The following was obtained from: Android Forums
the important images in a "full" RUU wuld be:
hboot(bootloader)
reovery
boot(where the kernel lives)
system(the rest of the code for the rom)
radio(for cdma)
mdm9k(for LTE)
splash1(the "HTC" screen)


 January 14th, 2013  State the date and then change it the very next line??? Yep. After getting this installed -and- somewhat working; we had a -BIG- System Crash. The Main Hard Disc. We have been fighting with it ever since. Why??? Cause we are also playing with openSuSE Linux -and- had Display Driver problems. This has evolved over 4 versions... 11.4, 12.1, 12.2 and 12.3. Kernel changes, Display Driver changes and overall System changes -ALL- combined to make it an interesting and, at times, frustrating year. We think we can see a lite at the end of this tunel -but- it is NOT all settled... yet. We are working in openSuSE 12.2 with version 12.3 still in test mode and not to be released till March. In that time we should know which one is the "stablist" and that will then become our "Main System". In the meantime, we are going to set this up... again... in or current openSuSE 12.2 version with hopes that it will survive. IF not then we will just have to set it up again in version 12.3. Installation notes from last year have been left for reference... -and- just because.

 October 29th, 2013 / 12:45pm  Well, we are leaving notes everywhere as we come across our previous notes about our "Video Troubles". They are finally over!!! The 'Lord' led us to a 'fix', the description of which is on our WebPage at: openSuSE 12.3 Thank you.


 Original start last year...   Ok, as of today, we are gona get serious with this section. Part of it involves setting up our 'Puter to, -or- with, a specific environment. We are going to need Java, if it is not already installed, and Eclipse. Most, if not all of us will install Java when we set up our SuSE machines. The Eclipse, however, is another animal. We tried following an example on the Net and it did not work. So, we will use some of it as an example and then just do it ourselves. (the problem was, Eclipse is not in either java-1_6_0-sun-devel -or- java-1_6_0-openjdk-devel of the openSuSE version that we have.)
Refer: Eclipse & Android SDK on openSUSE
Unlock Bootloader - Linux Version
Rezound Android Development

 January 14th, 2013 / 10:30am Alllllrighty now... this has changed cause we have an even newer version of openSuSE -with- a "possibility" of getting an even newer version. Sooooo... we are possibly going to set this up at least two more times. -But- if we don't set it up soon, we will never get to do anything. Hold on!!! Screeeech!!
Prior to our HD crash we were using 32-bit versions. AFTER the crash we have started using 64-bit versions. So... watch what we install!!

 Eclipse 3.7  Like the example from the Web, we installed the java-1_6_0-sun-devel version because Eclipse is allegedly faster using this Java implementation. Eclipse however was downloaded from the Web and installed in /usr/share/ (do it as root). To ensure that Eclipse can be updated, fix the permissions with:
     sudo chmod -Rc g+w /usr/share/eclipse
(-R means change files and directories recursively
 -c means output a diagnostic only when a change is made
)    This was a 32-bit version.

Install Development

 January 14th, 2013 / 2:05pm  With this install we are just going to try to use the software that came with the system. Welllll... we only used the Java.

  1. java-1_7_0-openjdk 1.7.0.6-3.16.1 - Java runtime environment based on OpenJDK 7 and IcedTea 7
  2. java-1_7_0-openjdk-devel 1.7.0.6-3.16.1 - This Java 7 compatible Java SDK is based on OpenJDK 6 and IcedTea 6.
  3. These next two involve some decision making.
  4. eclipse-SDK-4.2.1-linux-gtk-x86_64.tar.gz - The classic Eclipse download: the Eclipse Platform, Java Development Tools, and Plug-in Development Environment, including source and both user and programmer documentation.
  5. adt-bundle-linux-x86_64.zip - We have both, the 'Android-SDK' -and- the 'ADT Android-SDK'. The later contains a copy of Eclipse. We need to read up on it -BEFORE- installing the downloaded Eclipse.
    Now that you've downloaded the Android SDK, you don't need to return here for SDK updates. The SDK tools allow you to install additional packages and future updates from the SDK Manager.
Get --=> The Android SDK
   /windows/D/Downloads/CellPhones/HTC-Rezound/SourceCode/Linux/64-bit/   <-- our holding area
android-sdk_r21.0.1-linux.tgz - only contains SDK tools.
adt-bundle-linux-x86_64.zip - includes the essential Android SDK components and a version      of the Eclipse IDE with built-in ADT (Android Developer Tools)


The Android SDK provides you the API libraries and developer tools necessary to build, test, and debug apps for Android.

IF you're a new Android developer, we recommend you download the ADT Bundle to quickly start developing apps. It includes the essential Android SDK components -and- a version of the Eclipse IDE with built-in ADT (Android Developer Tools) to streamline your Android app development.

With a single download, the ADT Bundle includes everything you need to begin developing apps:

  • Eclipse + ADT plugin
  • Android SDK Tools
  • Android Platform-tools
  • The latest Android platform
  • The latest Android system image for the emulator

 October 29th, 2013 / 1:45pm  Ok, we are at it again. Our 'Puter is all fixed and now we are reinstalling all this -and- most of it through openSuSE 12.3 Yast2. Well, right off we are counterdicting ourselves cause the 'adt' is not in the SuSE Repos. Leastwise NOT the ones we have. However, 'Android Tools' is so we are going to use Yast2 to install 'adb' and 'fastboot'. That way we will NOT have to be in the same dir as the item we are operating on.

  1. Java via YaST2.
  2. Java JDK via YaST2.
  3. adb & fastboot via YaST2.
  4. kio_mtp & libmtp via YaST2
  5. Jumped 'back' to the beginning of this section and installed the Android Developement Tools as described there.

Start Eclipse with
     /usr/share/eclipse/eclipse
and accept, or change, the locations for your Workspace. You will then be presented with the Eclipse screen.    [export PATH=$PATH:/usr/share/eclipse/]

 Android R16 R21  We also must install the Android SDK. Could have been done before the Eclipse but we are doing it now. We have a tgz file and we will extract it to:
     /usr/share/android-sdk-linux
and this will become our $SDK_ROOT.    [export PATH=$PATH:/usr/share/android-sdk-linux]

Hmmmm... as usual things don't work the way they say they will. We jumped onto Android Developers and tried their tutorial that was supposed to produce a "Hello Android". Well, it didn't. So, we must investigate and see what we did wrong -or- missed in the setups. Because of the way they described the screens -and- the images that were included were different than what we could see... we suspect that we have a different version. Still think that it should have gotten a better result.
Note: We have learned that it was our fault. Patience is necessary at times and on this one it was. At least on our setup. The whole thing was slow in the emulation on our 'puter. Even though we have a fast one, it was still slow. So... wait... and then wait some more.

 Re-Load 30 Jan 12/3:03pm  Well, we poked around and changed some settings, and then had to leave for work. Unfortunately, we didn't take notes on what we changed and trying it again the "Run" didn't work... at all. So, we dumped Eclipse and Re-Loaded it. Didn't make any changes to the Android SDK (as far as we can remember) so we will use what is there.

Start up Eclipse and it is a new install... again. Once again we get asked about a workspace creation. There is a checkbox that will allow you to avoid this question ... IF you so desire. However, for now we will let it ask. The default, at least at this first startup is /home/ctaylor/workspace/, a directory not a file. It gets created, IF it is not there already, when you click on the OK. Then we are presented with a Welcome window. It contains 4 selections. Overview, Samples, Tutorials and What's New. We think we will Select the Tutorials.

Well, the first Tutorial listed is the 'infamous' "Hello World". Since, we were not successful with the one from the Web we'll try this one right in Eclipse. Ah Hah!! Right in the beginning we think we have found part of our problem from the previous. In this Tutorial we are told to - Make sure we are in the Java Perspective. We had changed ours to the Resource Perspective - before going to work. Maybe we had to be in the Java Perspective to do a Run.?.?

  1. Window > Open Perspective > Java
  2. New Java Project
  3. New Java Class
  4. Edit the class and add the necessary statements.
  5. To run your application, right-click on your class in the Package Explorer and select Run As > Java Application.
  6. The output should appear in the console at the bottom.

After creating a project with a name you then create a new class. Ok, we clikced on the "New Java Class" button. In the window presented the source folder had the name "Hello World/src" by default. For the Class Name we could not use "Hello World". It had to be all one word...HelloWorld. When Finish is clicked you will be presented information and code in 3 columns. Package Explorer, HelloWorld.java (in the editor) and Outline. Next we are to add a println statement that is going to print out our text. And save it. Now we run the app and it worked.

Weird... really to weird. We were interrupted by dinner and when we came back the phone was picked up, turned on, the Ring swiped and wow... the phone had a blank screen with "Hello,Android" at the top!!! Now what is wierder is ... it was NOT connected to my Computer!! However, it was in our botched attempt above. Now either this is a default message for something on the phone -or- my phone and my computer are talking behind my back!! Now we have absolutely no idea what application will produce that. We returned to the Home Screen and have not seen it again. Just to weird.

Now then what we would like is to try that Tutorial from the Web again with our new found knowledge (that we took notes on this time.) -But- there is a difference. The one on the Web Installs a Platform and creates an AVD (Android Virtual Device). That is why we saw a phone size display last evening and not on this one tonight!! Gota pay more attention when we are doing this stuff. Anyway...

  1. Eclipse and Android SDK installed
  2. Install a Platform - has 2.3.3 but not 2.3.4
  3. Create an AVD
  4. File > New > Project - Click on Android and then Android Project
  5. Enter Project name: HelloAndroid then click on Next
  6. In this Build screen; Select a platform version that is equal to or lower than the target you chose for your AVD. Then click on Next.
  7. In the Application Info screen; You need to select the application name; HelloAndroid
  8. For the Package name we will use; Package name: com.example.helloandroid
    This is the package namespace (following the same rules as for packages in the Java programming language) that you want all your source code to reside under. This also sets the package name under which the stub Activity is generated.

    Your package name must be unique across all packages installed on the Android system; for this reason, it's important to use a standard domain-style package for your applications. The example above uses the "com.example" namespace, which is a namespace reserved for example documentation - when you develop your own applications, you should use a namespace that's appropriate to your organization or entity.
  9. Edit the script and put in the suggested code.
  10. Select Run > Run.
  11. Select "Android Application".
  12. Depending on your environment, the Android emulator might take several minutes to boot fully, so please be patient. When the emulator is booted, the Eclipse plugin installs your application and launches the default Activity.

Now then, after doing all the above... and finally getting it to work - we don't remember just what it was needed for..?? Other than just doing it. It was all on our 'puter. The phone was never involved. Oh well, maybe we will think of a reason.
Well Numskull, it is all needed to get 'root' and to 'Unlock' the BootLoader. -- That's how ignorant we were... it was NOT needed for either!!

 March 9th, 2012  Doesn't really matter. We had a Hard Drive Crash on Feb 1st, 2012 and lost it all. Had to install a new Hard Drive. Hopefully the above will help us do it again. Perhaps we'll add some info to it when we do.

 July 3rd, 2013 / 5:40am   dsixda's Android Kitchen


  Programming - Windows Section

Again, this section will be performed in Windows 7 on our Laptop. (We are liking this little machine, and Windows 7, more and more.) The "setup" has been performed, for the most part, already up in our "Unlocking" and "rooting" section. (Java, SDK and the Drivers.) Please check the rooting a ReZound section for further info. Now we have to install the Kitchen.

 July 3rd, 2013 / 4:40am  We followed the directions and have created a Working Folder for "our ROM". We used cm-10.1-20130702-NIGHTLY-vigor.zip as our base. Even though we haven't yet tried it. The contents of the working folder are:

   Working:
and
   System:

Above are the three folders created inside your "Working Dir" folder. The 'other' folder contents display is your 'System folder'. The update and updater scripts inside the 'META-INF' FOLDER are explained in the installation of the 'kitchen'.


The META-INF folder:
   com/
       android/
           metadata
           otacert
       google/
           android/
               update-binary.orig
               updater-script.orig
               update-script


Refer: [how to] CREATE OWN ROM --- Newts-OnE-XxX --- dsixda's Android Kitchen
          Building Custom ROM

  Bricking Phone - Types

Copied from: Android Enthusiasts

Brick is a much-hyped word that gets bandied about with-out understanding what it is.

There's two types of brick, hard and soft. Lets go through this to make the distinction clearer.

  • Hard this is where the handset will absolutely refuse to boot at the press of the power button. Diagnostics: Dead screen, no power. That is the symptom of a hard brick. Reason: This can happen by inadvertently pulling the cable when flashing a ROM or even an update via the handset's supporting software such as Samsung Kies, Sony's PC Companion Suite etc. That is the worst case, that is why in this scenario, always, make, sure that no cable gets pulled unless told so by the supporting software in question. The other way is this, flashing in that manner when the battery power is low. Hence for that reason, it is recommended to have at least 75% of battery power in place prior to doing the update in that fashion. Its known as hard-brick, and requires specialist cables and stripping the device down to the circuitary board to revive it via JTAG cables.
  • Soft - this can happen through a bad flashing of the ROM in which yields the following. Diagnostics: it has power when the power button is pressed, and/or, the screen comes on. Reason: It can be a user error on this part. For example, failing to clear/wipe the data/cache, can cause Android to go into a boot-loop because of the mis-matches with the Android's virtual machine and the apps installed, or more than likely, a corrupted dalvik cache. The other, is flashing a ROM that is not designated for the handset which can cause the kernel to go into a boot-loop. This is generally easier to fix, but hangs, that is known as a soft-brick.

With those two separate forms of brick, it is generally speaking, a scare-mongering tactic.

The one pure simple reason why carriers do not recommend unlocking the boot-loader, is not just for the warranty.

Its more down to the fact, if the handset ever gets stolen, then unlocking the boot-loader will wipe everything, and re-initialize the handset to factory state, thereby all your contacts, call logs, messages and apps gets wiped cleanly. Also, this is to reduce the amount of support in the carriers, with people calling in or ringing up the technical support, "What happened with my handset - I did something and lost my contacts?"

Just to finish off this answer, you can revert it back, by re-locking the boot-loader at a later stage if you wish, that is in the event the hardware got damaged and hand it back in for repairs.


  Increasing Battery Life

This section, and the previous and the next, are totally a mess and will probably remain that way for a while. Finding info first - organizing later. (Well, later never came... for organizing anyway.)

 January 9th, 2016/2:32am  Found this in the  Avast Battery Saver   forum. This was in reponse to a feature request concerning the charge cycle:


(un)fortunately there's no way an app could affect the charging process. The device/charger electronics is responsible for that. App can monitor charging, for sure, show you the capacity, voltage, or even the current that flows in/out of the battery, but it can't say "now charge" or "stop charging".
Also, there's no such thing as "trickle charge" for Lithium-Ion batteries. These are very sensitive to overcharge and so the charge cycle is more like: stop charging when the battery is full, if the voltage drops below X, start charging again. You can read quite interesting article about charging Lithium-Ion batteries here:
http://batteryuniversity.com/learn/article/charging_lithium_ion_batteries
So I have been doing this wrong ever since I've had my phone. I just always take it off my belt and plug it in so that it would have a full charge whenever I went anywhere. Guess that practice will have to change.

 July 16th, 2015/1:40am  Sticking this in here so I do not loose it. There is a claim of a 3500ma battery for the ReZound. However, when I try to order it, they say that their order processing is 'not' ready yet and won't be until August 1st, 2015... my birthday! So we have to wait until then. The ordering location is:
 HTC Rezound Extended Lithium-Ion Battery w/Door - 3500 mAh  
Well, the above looses... they never got the ordering working by Aug 1st, 2015 like they said. It is now Aug 3rd. So we found this one:  HTC Rez Extended Batt on Amazon - 3600mAh   which has more power and it costs less!

Product Description - Received 6 Aug 2015

PRODUCT FEATURES
- Extended battery for the HTC Rezound 4G.
- Multiply your battery power by 2.5 times your original device battery (150% more).
- Sturdy and stylish back-piece to fit the extra power and keep your device looking fresh!
- And you can see the antenna foil. It is NOT covered up or painted.(TR)
  Well the 'new' back-piece became a problem. See:  HTC Case Ref  

- Compatible with: AT&T, T-Mobile, Verizon, Sprint, MetroPCS, US Cellular, & many more.
- Comes with a free screen protector for all around protection.
- One time set-up and you're ready to roll!

PRODUCT SPECIFICATIONS
- Battery Capacity: 3,600 mAh
- Battery Type: Li-Ion
- Voltage: 3.7V
- Watt-hour: 13.32wh
- Arrived with a 63% charge
- But I plugged it in anyway to get a Full charge.


ONE-TIME INSTALLATION
- 1) Turn off your device.
- 2) Remove the back lid of your phone. Start at the top-back side of your phone for easiest entry.
- 3) Remove the original battery.
- 4) Insert the PowerBear extended battery. Ensure the connector prongs line up for a snug fit.
- 5) Cover the back of your device with the PowerBear extended back lid. Make sure the camera holes line up with the camera and before firmly clicking the back lid into place around the edges.
- 6) Enjoy!

DISCOUNTED SHIPPING
- We offer SUPER FAST shipping - and for orders over $35; FREE shipping! Even more - all Amazon Prime members receive FREE 2-DAY SHIPPING! Most packages arrive in 2-3 business days.

EXTENDED 24 MONTH WARRANTY
- PowerBear aims to reach the highest limits of customer service excellence! If there is ANY REASON why you are unhappy or unsatisfied with ANY of our products, we guarantee you an exchange or refund within 2 years!

***PLEASE NOTE***
Only use this product with the original manufacturer charge cable. Cheap generic cables have shown to cause issues with functionality and circuitry.

 December 22,2015/9:27am  Well, last evening I was testing an app and left the phone sitting on without being plugged into the charger. The app was/is a battery hog and totally drained my battery. This newest Li-Ion Batt. I have NOT yet been able to get it to take a charge. Had to go back to one of my old batteries just to make sure that my phone is still ok. It is.

 30 Jan 12/12:30am  Horror of Horrors!!! It died whilst I was at work! Was looking at some of our pictures and then peaked at the two videos that come with the phone, and then... and then... it died. ZAP!! Nada. Nothing. Zero. Was it the Battery?? Did I get a bad phone?? Wow!! Wow! No warning, No dimming, just BLAM... it's dead. Now I presume you understand that I was scared and in a panic. The "last time" we looked the Battey Symbol was a Full Green. However, we can NOT remember when the last time was. -But- on our 'old' phone IF it was the Battery, we could at least turn it back on, it would tell us the Battery Needed Charging and then shut back down. This 'new' one... nothing. When we arrived back at the humble abode, the phone was plugged into the AC adapter. Nothing. Then after a few minutes we got the Red/Orange LED indicator on. It was charging. We waited until the LED turned Green and tried to turn the phone back on. It was slow in comming back up. Thought we had to press the Power/Lock button to many times. But then we forgot, at Power ON, you must Press and Hold the Button until you see some activity. It is NOT just a Press and Release. So, now that "we are using it more", we need to pay more attention to the Battery Status. Also might want to consider installing that Extended Life Battery.

Alllllrighty Now. There seems to be, and are, claims of poor Battery Life not only in this Smartphone but in others. So as mentioned elsewhere, we purchased the Extended Battery cause we got what we considered an exceptionally good deal. Half Price. Now then, we still have NOT installed the Extended Battery. -But- we have used our phone -and- we have continued our searches and reading on the the Net... via our Desktop. Not so sure all those claims are valid.

    We are injecting this here cause we found some new info whilst checking out things for our other new endeavor, Helicopters. Battery operated ones. We have learned that Batteries Deteriorate over time... whether they are being used -or- not. Therefore a "spare" battery won't last much longer than the one in use. Sooooo, since we have already purchased the Extended Battery... we are gona install it now. And we are going to try the other suggestion of storing the 'other' Battery (the original) in the fridge... NOT the freezer -but- the fridge... at 40% charge.

Now then, they talk out of both sides of their mouth. In one paragraph they tell you to almost completely discharge a Lithium-Ion battey after every 30 charges. And in the next they tell you to never completely discharge a Lithium-Ion battery. The reason for the "almost" complete discharge??? To avoid creating a digital memory. What??? I thought one of the great features of these Lithium batteries was that they didn't do that in the first place?!?! Refer: TechRepublic and Battery University

 ICS Note: 9 Aug 12/3:46am From the forums on the Web, it appears the battery seems to last a good bit longer... in ICS

 Charging  You do not need a new charger.. Look again.. The micro USB in your car will fit. It looks a little smaller, but it still works. That groove makes the micro-usb port look diferent but all normal ones still fit. I use the charger that came with it, -but- at the PC and in the car you can use an old metropcs mirousb cord. Any will work fine. The wide side up.
Taken from: The HTC Forums

Yesterday, at approximately 5 or 6 o'clock in the morning, we took our HTC ReZound off charge. We had it beside us at the computer, made a couple of calls, just pushed the Power/Lock to look at the screen and view some other things on it a number of times. No Internet, No Bluetooth. We got one text message from Verizon about our Pix Place account being inactive for 150 days. We were supposed to log on within 30 days to maintain it. We have one picture on our phone and tried to send it up to the account. Was not successful -but- we tried. Not much else was done with the phone except to look at the screen a couple of more times. Went to work... phone on belt... and at work took two pictures of our time schedule. Came home from work, looked at the screen again and then set the phone down on the desk and went to bed.

Now here it is, approximately 5 or 6 o'clock in the morning, the next day and our phone has NOT been on charge. How-some-ever, according to the little green Battery at the top of the phone, it is almost FULL of Charge. Again, everything was/is new... as of January 5th, 2012... and today is January 11th, 2012. So, we find it strange that a couple of people in particular had such bad experiences with their Batteries. One claimed it died over night doing nothing. Well, this was a 24 hour period of doing almost nothing and the Battery is still almost Full.
Will report again after a day of more heavier use.

 Note:  Chris Ziegler on The Verge seems to have had the same experiences that we have had with this phone's battery. You should charge it every night -but- IF you use it "Normally" it should last all day. Now if you use it as an MP3 player, or watch a lot of streaming video, or Surf the Web a whole lot using 4G then you had better have a charger with you. Not sure how much more the Extended Battery will help, cause we still haven't installed ours... yet. Still on the Regular Battery examination.

Suggestions from the Web

Refer: YouTube
1) All Apps-->Settings-->Applications-->Manage Applications
Tap the "Running" Tab at the top of the Screen. Examine the processes you have running. Again, this is a newly purchased phone and everything is still the defaults. The processes we found running were:

  1. Settings 25MB - 1 Process/0 Services
    Quite obvious, this is the Process we are currently using.
  2. Sync Service 3.4MB - 1 Process/1 Service
  3. HTC Location Service 7.1MB - 1 Process/2 Services
  4. Google Services 14MB - 1 Process/1 Service
  5. Mobile IM 5.0MB - 1 Process/2 Services
  6. Fb Chat 3.0MB - 1 Process/1 Service
  7. HtcDm 4.6MB - 1 Process/1 Service
  8. Facebook 4.9MB - 1 Process/1 Service
  9. Touch Input 18MB - 1 Process/1 Service
Do a "Force Stop" for as many processes you see that you don't use. If your battery life is terrible chances are you have a ton of unused processes running.
2) Get a data on/off widget. Just turn off the 3G/4G radio when you're not using it. This will save you a ton battery life!
3) Get a good task killer like "Gemini App Manager." Use the "one button optimize" button every now and then during the day to kill off unwanted apps.
4) Use the power settings bar widget and turn off GPS and Bluetooth. These two will drain your battery significantly if they are on.

 July 14th, 2013 / 5:06pm  Whilst looking for info on the Antenna situation we found this info;
The two most likely things to cause heat are the CPU and the cell radio (i.e. transmit section). The cell tower monitors your phone's signal strength and adjusts your phones power output to maintain an adequate signal. I am wondering if the antenna contacts are an issue for those having heat problems. If the connection is bad, your signal will be bad. This will cause the cell site to tell your phone to increase transmit power, which will generate more heat and kill the battery faster. It would be interesting to know if those having heat problems are seeing low signal strength and/or poor battery life. -Joe (Rezound) Msg #505


  Wi-Fi vs 3G/4G

This section, and the previous two, are totally a mess and will probably remain that way for a while. Finding info first - organizing later.

 The Generations  New mobile generations have appeared about every ten years since the first move from 1981 analog (1G) to digital (2G) transmission in 1992. This was followed, in 2001, by 3G multi-media support, spread spectrum transmission and at least 200 kbit/s peak bitrate, in 2011/2012 expected to be followed by "real" 4G, which refers to all-Internet Protocol (IP) packet-switched networks giving mobile ultra-broadband (gigabit speed) access.

Network Mode - HTC Rezound

yes turn on wifi. WiFi will automaticly turn on when in range of a remembered source, then resume 3G once out of range.
4G smokes your battery much faster than wi-fi. You can change your settings to turn off 4G in the network menu. Choose "CDMA only" instead of LTE/CDMA.

Internet speed is the different from two.

Courtesy Jack P at: Yahoo Answers

 Wi-Fi:   the signal comes to your phone from a wireless router or modem, which is somewhere in your home, office, school. The signal has a limited range, up to 150 feet from the modem most times.

 3G:   The third generation of wireless internet. The internet comes to you from a cell phone tower somewhere in your neighborhood. Speeds vary usually between .5 and 1 megabits per second.

 4G:  The Fourth generation of wireless internet. The internet comes to you from a cell phone tower somewhere in your neighborhood. Speeds vary usually between 6 and 15 megabits per second.

July 14th, 2013 / 5:25pm
Yes, 15 minutes. And for those asking how to change this:
-Settings
-Wireless and Networks
-WiFi Settings
-Press Menu button then Advanced
-WiFi Sleep Policy 

Sorry, but confused a bit. On the Advanced setting page above, it says for sleep policy that the timing is when to turn off wireless in favor of network. I understand letting the wireless go to sleep after 15 minutes can save battery, but if it reverts to the Radio network at that point, doesn't that defeat the purpose somewhat?
Jay S.

The network radio is always on anyway (unless in airplane mode) so the assumption would be that having both on will draw more power. I will tell you this, when I have been on a cruise and turned off the network radio, the phone lasted over a week on a single charge so yes, the network radio is the big power hog as well as the display. but if you think you are saving power by leaving WiFi on, I would say no unless you turn off the network radio. The problem with that is you will get no text or calls.
Joe


 Antennas: July 14th, 2013 / 4:55pm   For lack of a better place at the moment; we will stick this info here:
We've all read that the back cover of the ReZound is the antenna.
If one takes off the back cover, one sees strange metal shapes in the cover which must be the antenna.

If one examines the extended battery back cover, one notices much less metal.
The antennas in the extended case are just covered up with a black material of some type.
Upon further close examiniation we can concur; the antennas are there, just black.

Courtesy Frank at: Yahoo Answers

As for T-Mobile goes, there is no true 4G technology. There is HSDPA+ which is comparable to current WiMax (Sprint's 4G). However, not all phones support HSDPA+. 3G is HSDPA/UMTS. It is faster than many of the older generation phones. Wi-Fi is Wireless Fidelity which uses a wireless router, and a broadband internet connection.

For a perspective think of this.
1990 - 2000: Average speed of Internet connected PCs for the home was 14.4 - 56kbps
Early 2000 decade, broadband brings about 512kbps (about the "3G" standards).
Today, there are speed averaging about 10 - 15 MBPS (1MBPS = 1024kbps).
4G and HSDPA + currently averages 5 - 10MBPS.

As for devices to use, there are PC modems. They will plug into the USB port of your notebook. The USB port looks like a small rectangular hole, and most notebooks have 2 - 4 of these. You could buy a USB modem, and from there - use a notebook to connect when you don't have a Wi-Fi connection. Inquire about any data caps. If they say there are caps, then you shouldn't use it to stream video.

If you want to rely on a phone like device, the ones with the best screens will be smart phones. Currently, there are only 2 that supports T-Mobile's "4G". That is the G2, and My Touch 4G. The G2 had complaints on flimsy hinge for the keyboard. Both have a touch screen, and it will take getting used to.

If you need a physical keyboard, then RIM typically has the best one. For that, go with the 9700, or 9780. However, the web browser is not as good as on the Android devices (such as above). If you want an Android (good browser), and a physical keyboard, the T-Mobile slide will be a better option. Most of the phones will use HSDPA/UMTS (3G).

As for the plan, if you go with a smart phone which is the closest to a PC experience, you will need to have a data connection for you to use it fully.

All smart phones will have Wi-Fi these days. If you have a broadband connection at home - invest in a wireless router. You will then be able to rely on the home network's capability rather than cellular.

Mobile network works anywhere there is signal. It's usually faster. Wi-Fi just works in the range of the source of it which usually is not a very wide range.

Wi-Fi isn't a cell phone technology, it's a wireless networking technology designed to be used on a LAN over short distances. You may be thinking of WiMAX which is one version of 4G. Some cell phones support Wi-Fi so you can use them around Wireless hotspots.
3G and 4G are umbrella terms for the various cell phone technologies that we've seen over the last few years. "3G" is slowly being phased out in favour of "4G".

Hello ,

It's Chris here....

I'd like to take a few moments - to explain to you something - that I know confuses a lot of people.

How do I know this? Because it confused me for months - and nobody could explain it simply....

I'd like to take a few moments - to explain to you the difference between 3G AND Wi-Fi.

Now -- here's the thing....

...both 3G and Wi-Fi - are ways to connect to the internet.

That's all they are.

Lets look at both in a bit of detail.

Wi-Fi means 'Wireless Free.' Literally - being able to connect to the internet using no wires.

Most homes and offices and coffee shops have Wi-Fi. At home you will need to buy a Wi-Fi router - and once it is plugged in - you can surf the web from your laptop/cell phone anywhere within the radius of the Wi-Fi (which is usually just your home and yard/garden).

3G is something different.

3G - is a service that cell phone networks provide.

Anywhere there is a phone signal - you can use your phone companies 3G service - to get online.

This means - if you are out in your local supermarket - you can connect to the internet using your phone companies 3G network.

Basically 3G is just a phone signal that is very fast and comparable to Wi-Fi.

So lets say you are at home and you want to get on the web.

If you have Wi-Fi - you would use this. And this would be the same internet connection that your Internet Service Provider gives you.

But if you do not have internet access at home - you could use your phone companies 3G to get online.

3G vs Wi-Fi - a summary:

Wi-Fi: is a wireless connection in your home or office (simply a wireless connection to your internet like the ones laptops use)

3G: is a type of Cell/mobile phone network...meaning its a connection you can use ANYWHERE you have phone signal.

A few things you should know:

  • While some Internet Service Providers offer both 3G and Wi-Fi internet, they usually consider them separate services and require separate subscriptions.
  • 3G is almost always more expensive than Wi-Fi - so when Wi-Fi is available -- use it!
  • 3G can be quite fast -but is in most cases Wi-Fi is faster.
  • Now - while we are on the subject - let me quickly throw in....

    ...4G!

    What is 4G then?

    Quite simply - 4G is beginning to appear on tv ads. 4G is the successor to 3G - that's all.

    It will do the same thing as 3G (ie provide Internet Access from a phone signal) but it promises to be a lot faster and quicker (and no doubt more expensive...)


    I hope this may have been helpful for you !
    e-How Tethering   Wi-Fi Ruler App   Cellular Telecommunications and Cell Phone Technology   Wireless technologies   Wi-Fi Standards   3G-4G-Wi-Fi Explained  


       HTC ReZound Vs Galaxy Nexus Vs Droid RAZR


    HTC ReZound Vs Galaxy Nexus Vs Droid RAZR Triple compare at: geek.com


    Galaxy NexusDroid RAZRHTC Rezound
    Operating SystemAndroid 4.x
    Ice Cream Sandwich
    Android 2.3.5
    Gingerbread
    w/ Blur
    Android 2.3.x
    Gingerbread
    w/ HTC Sense
    Screen4.65-inch 1280x720 HD Super AMOLED4.3-inch 540x960 Super AMOLED Advanced4.3-inch 1280x720 HD
    IPS LCD
    ChipsetOMAP 4460
    1.2GHz
    dual-core
    OMAP 4430
    1.2GHz
    dual-core
    Qualcomm S3
    1.5GHz
    dual-core
    Dimensions

    135.5 x 67.94 x
    8.94 mm
    (GSM version)*

     
    130.70 x 68.90 x
    7.1 mm
    129.54 x 66.04 x
    13.72 mm
    RAM1GB1GB1GB
    Internal Storage
    16/32GB
     
    16GB16GB
    SD card slot
    No
     
    yes (16GB included)yes (16GB included)
    Front Facing Camera1.3MP1.3MP2MP
    Rear Camera5MP AF with LED Flash with zero shutter lag and fast shot2shot8MP

    8.0 megapixel camera with auto focus, /2.2, 28mm wide angle lens, 2 x LED flash

    Bluetooth

    3.0 with A2DP

     
    Stereo Bluetooth Class 2, Version 4.0 LE+EDR3.0+ with A2DP
    Connectivity

    GSM/HSPA+
    or
    CDMA/LT

     
    GSM/HSPA+
    or
    CDMA/LTE
    CDMA/LTE**
    Battery
    1750mAh
    (GSM Version)
     
    1780mAh
    Non-removable
    1620mAh
    Wifi

    802.11 b/g/n

     
    802.11 b/g/n802.11 b/g/n
    Video Recording

    yes 1080p with stop motion

     
    yes 1080pyes 1080p with slow
    motion
    Price$299.99 (Verizon)$299.99 (Verizon)$299.99 (Verizon)
    Special Features

    It's a Nexus, on Verizon

     
    Kevlar backBeats audio and earbuds
    HTC-One vs HTC ReZound

      Some definitions

    Info obtained from: iowabowtech on the Web
    hboot is just HTC's proprietary version of a bootloader. It has a few bells in it not found in many other android bootloaders such as the ability to auto-flash zip files from the sd card if they are specifically named to to a particular string recognized only by that version of hboot. Kind of a cool "get out of jail" feature, but it comes with a price...a security flag referred to as s-on.

    s-off disables the security check that runs on a normal, s-on scenario. That check is looking for an official signature on any files that would be loaded through the bootloader. s-off bypasses that check so it's both more dangerous (because most any file can be rammed through by the end user) but it also allows much more flexibility that can be used for positive root means like loading unsigned custom recoveries, boot img's, radios and other hboot versions. Radios/hboot versions may be leaked or extracted from an officially signed file (still viewed as not legit by the security flag) so they can be loaded individually without loading the entire update. This sort of thing can come in handy for rooted users who want to update the nuts and bolts of their phone while staying on custom roms the whole time. So in a nutshell, being s-off can be compared to a fully unlocked bootloader on some other Android devices.

    Fastboot is an option within hboot or most any android bootloader these days that allows a connection with a PC/Mac/Linux box. On the computer end, resides the sdk program which includes specific files for fastboot interaction with an android phone who's user is actively in the bootloader > fastboot mode at the time. In this configuration, you can then use known fastboot commands to perform various activities such as flashing partitions, force factory updates, wiping, unlocking the bootloader (only on phones that allow by default), boot and reboot devices, etc. Fastboot can be used under normal circumstances (when the phone is alive and well) but arguably it's most handy use is when there has been a major system upset and the only thing still working on the phone is the bootloader.
    guide-to-android-terminology -- android-terminology
    Restoring To Stock-
    RSD -
    RSD'ing is the equivalent of restoring an iPhone, it just flashes the bootloader, recovery, system, boot, data and webtop (if supported). This can only be done on Motorola Android Phones.

    ODIN -
    ODIN was an internal program that was used at Samsung when your phone was sent in for repairs, but it was then leaked and modified, and it is now used to install unsigned software and kernels.

    RUU -
    RUU'ing is the equivalent of restoring an iPhone, it just flashes the bootloader, recovery, system, boot, data. This can only be done on HTC Android Phones.
    dictionary-for-beginners -- pyramid (HTC Sensation / XE / 4G) RUU Guide -- Charlie's the Man --


      Hardware

    Copied this from: xdadevelopers. It had some interesting info we wanted to save. It was/is about moving from a ReZound to a Galaxy S3.

    The Galaxy S III has a Qualcomm Snapdragon S4 CPU that clocks in at 1.4GHz, while the Rezound uses a Snapdragon S3 clocked in at 1.5GHz. For those that aren't too familiar with CPUs: Even though the Rez is clocked in a .1 higher, the S4 is newer and has the upper hand. The GSIII has 2GB of RAM (while the international version just has 1GB but a quad-core over dual) and the Rezound has 1GB. I've come to quickly realize it's because of how much memory Touchwiz uses. At the moment of me typing this, I have every app closed on my GSIII (minus the launcher) and I have 803MB of my RAM used. That being said, I never run into an issue of almost running out of RAM (I'll get into management later when I review software.)

    Both phones use 8MP camera on the rear capable of recording in HD. However, as known, a higher MP count does not automatically mean a better camera. No matter what ROM I use, I seem to have issues getting my GSIII to focus from time to time. Even when I can get it to focus, it just seems that the Rezound takes a slightly better picture. I would post comparison shots but I no longer have my Rezound.

    Now, for the screens. The Rez uses a 720p SuperLCD IPS display and packs a whopping 342DPI, making it one of the best displays out. The GSIII uses an HD Super AMOLED with a 720p resolution. While it has a smaller DPI count (320) it provides very crisp (but not as sharp compared to the Rez) images with "true" colors. I did a side-by-side comparison of a few images at full brightness and the GSIII was superior. Now, as I said though, it isn't as "crisp" as the rezound. However, unless you have the phone an inch from your eyes, you can't really tell.


      ReZound Processor

    Qualcomm Snapdragon MSM8660 (Snapdragon S3) Multi-core Processor Info

    • Type: Snapdragon MSM8660
    • Manufacturer: Qualcomm
    • Year Released: 2010
    • Codename: Snapdragon S3
    • CPU Structure (complexity): RISC
    • Width of Machine Word: 32 bit
    • Primary (RAM) Data bus: 32 bit
    • Supported Instruction Set(s): ARMv7
    • Recommended Minimum Clock Frequency: 1200 MHz
    • Recommended Maximum Clock Frequency: 1500 MHz
    • Semiconductor Technology: CMOS
    • Minimum Feature Size: 45 nm
    • Special Features: 2x Qualcomm Scorpion Harvard Superscalar processor core, 266MHz LPDDR2 memory interface, Embedded DSP (GSM, GPRS, EDGE, UMTS/WCDMA, HSDPA 7.2Mbps, HSUPA 5.76Mbps, HSPA+ 28Mbps/11Mbps, MBMS, CDMA2000 1xRTT, CDMA2000 1xEV-DO, CDMA2000 1xEV-DO Rev. 1, CDMA2000 1xEV-DO Rev. B baseband), Embedded Seventh-generation gpsOne GPS module, gpsOneXTRA Assistance, Adreno 220 GPU

    Verizon HTC Rezound ADR6425 (HTC Vigor)

    Release Date: November, 2011
    OS: Google Android 2.3.5
    CPU: 32bit Qualcomm Snapdragon MSM8660, 1500MHz
    Memory: 1024MiB RAM, 15258MiB ROM
    Display: 4.3" 720x1280 pixel color TFT SLCD
    Cellular Phone: dual cellular operation (Parallel operation)
    Physical Attributes: 66 x 130 x 13.7 mm
    CDMA2000 CDMA EV-DO WLAN Bluetooth GPS Camera Secondary Camera


      Backups

    A NAND -or- NANDROID is a complete image of your phone. If you do a nand, you can restore all of your apps, and data. NAND will overight your ROM. It doesn't just put the apps back, it completely restores your phone to the way it was when you made the NAND.

    For example, you want to completely switch over from Fresh Rom to Baked Snack Rom.
    Then you would use Titanium Backup, as it backs up all your apps + data. You flash Baked Snack, and use Titanium Backup to restore all your apps and data.

    Let's just say you want to TRY out Baked Snack. You would use NAND to keep an image of your phone when you're switching from Fresh to Baked Snack. Your apps won't transfer this way, but here you can see whether or not you like Baked Snack. So if you don't like it, you NAND restore your Fresh Rom, and bam! Everything's back to the way you left it.

    Generally though, people do both because either situation could occur.

    From what we had read about backups, we thinks that you need to have a fresh SD card or at least make sure you have enough room on your current card.

    Refer: AndroidCentral


      Updates

    DO NOT ever attempt to accept an OTA while rooted.
    Please refer: Scott's Verbiage

    Well, here it is, the first Major over the air Update. According to the page, the ReZound should soon be seeing Software Version 2.01.605.11 and Baseband Version 0.95.00.1118r. It's 52.8mb in size and is listed as ADR6425LVW_2.01.605.11-1-02.605.6. Now then, as you may know IF you've read any of our other pages, we DO NOT like updates. However, this one sounds important and like it fixes some things. -But- it is described as an "Over the Air" Update. I mean... over the cable internet updates can be a big headache... now we are gona get them over the air?? Ok. How??

    One of selections in the Settings is:
        Software Update
        Check to see if there is a new software update for your phone.
    Now we wonder how this works?? Must you have your Smartphone connected to your Computer or what?? Since it is called "Over the Air" we suspect that the PC is not required. However, to ensure a good Power Level, we would suggest connecting to either the 'Puter -or- the AC Adapter. Ya never know how long an Update might take.

    The changelog:
    • Updated signal strength meter to 5 bar Received Signal Strength Indication (RSSI).
    • Screen Timeout issues while connected to Wifi have been resolved.
    • Resolved issue with Mobile Hotspot data stalling while multiple users are connected.
    • Improved audio quality during voice call.
    • Reduced forced closures related to the People application.
    • Improved device stability reduces continuous resets.
    • Resolved issue with Task Manager stopping Mail background service.

    We haven't installed the Update... yet. And it has not automatically installed itself either. Mainly cause, we have Wi-Fi and 4G turned off!! Already knew how to turn off Wi-Fi and just learned today how to kill 4G/3G. So, datawise we are dead. We have been reading and reading the reviews that are out on this Update. The news is good -and- bad. One of the complaints is; Verizon Location Agent. Running constantly now in background. Yes that would be a problem... a battery drainer.

     unlocked & root  This phone was released to the World on November 14th, 2012 by Verizon. It seems that it was no sooner in the stores than 'devs' were unlocking, rooting and changing the OS and Software for this phone. It is good to have them around and doing what they are doing cause, a lot of what they do gets incorporated into the phones by the Manufactures. Something that we have experienced with computers for years. -But- these also bring problems... in the beginning. Because of the changes made, the Update System doesn't seem to recognize the phone. -Or- it just doesn't know how to Update a changed System. Fortunately, for us, we haven't made any mods... primarily cause we haven't learned enough yet. So, the Update should go as clean as an Update can on our phone. -But- first we want to look into that Verizon Location Agent problem -or- possible problem.

    One other thing. It appears that you had better "save" anything that you want to save -BEFORE- updating. This is a Cardinal Rule in Computing and it should carry over into these Smartphones.

     Friday 27 Jan 12/12:38pm   At this point in time it appears that we should hold off on this Update IF possible. The reason we hate Updates is rearing its ugly head!!

     January 31st, 2012/3:32am  Well, we didn't get a choice. After resting and watching TV we came back to our Computer and Phone which were both on, but not active. Picked up the phone to look at something, pressed and released the Power/Lock and then with the Home Screen showing all of a sudden the phone shut down! Now this was NOT a normal shut down. In fact it didn't shut down all the way. It was more like a Restart. We then were informed that we were getting Updated Software from Verizon Wireless. It took about 6 minutes. We now are members of the 5 bar club... like it or not!

    Now here is the real catch. We had Wi-Fi, Bluetooth and Mobile Network ALL turned OFF. Got the Update anyway. So, it looks like the only way you can avoid this update is to be Unlocked and rooted. We haven't reached that point yet.


      Another Specs Listing

    Specs


    Screen:
    4.3-inches, 720 x 1280 px, 16,700,000 colors
    QHD (Accelerometer / Proximity Sensor / Ambient Light Sensor)
    Camera:
    8.0 MP / Dual LED Flash / Zoom / Auto-Focus / HD Video Recorder / 2.0 MP / Video Calling

    Music:
    Beats Audio / SRS Virtual Surround Sound (MP3 / AAC / WMA / M4A / WAV)
    FM Radio:
    Yes

    Data:
    LTE
    Wi-Fi:
    802.11 b/g/n / DLNA
    Bluetooth:
    3.0

    Processor:
    1.5 GHz (Qualcomm MSM8660)
    Memory:
    16.0 GB
    Slot:
    microSD
    Battery:
    1600 mAh Li-Ion
    Talk Time:
    11.8 hours
    Standby Time:
    15 days

    Form:
    Block / Google Android OS v2.3
    Dimensions:
    132 x 71 x 10 mm
    Weight:
    163 g
    Network:
    CDMA 800 / 900 / LTE 700
    Radiation (SAR):
    0.43 W/kg (Below Average)


      From Ebay on the Web

    Detailed item info

    Product Description
    Smart and sensational, the HTC Rezound is a high-end smartphone that operates on a CDMA network. This HTC smartphone is powered by a dual-core processor that makes multi-tasking a breeze. This phone runs on the Android 2.3 Gingerbread OS that is packed with Google Mobile services. The 4.3-inch S-LCD display of this Android mobile is perfect for watching movies and browsing websites. HTC Sense, an innovative user interface, lets you customize your Homescreen and Menuscreen with widgets and shortcuts. Integrating an 8 MP camera, the HTC Rezound lets you capture crystal-clear images. With 3G and Wi-Fi support, this HTC smartphone allows you to surf the web, check mails, and post updates on social networking sites. This Android mobile features onboard GPS, with Google Maps integration, that offers navigational assistance to help you reach your destination. The TV-out feature of this HTC Rezound lets you share the phone's media content with a TV or projector.

    Features
    Product Features
    • See it, hear it, like never before
      The HTC Rezound lets you hear music the way the artist intended, with no compromises. The Beats Audio digital signal processing mode delivers thundering bass, soaring midrange, and crisp highs. It's designed to work with the included Beats Audio headphones and you'll have an immersive musical experience that will rock your world.
    • Studio-crisp sound
      With Beats Audio technology and headphones for studio-crisp sound, the HTC Rezound delivers more than entertainment - this is an experience.
    • Cinematic sights
      The 4.3-inch HD 720p screen offers amazing pixel density, perfect for viewing the latest movies and shows from HTC Watch in super-fine quality. The 16 x 9 aspect ratio means no distortion or cropping with your HTC Watch content.
    • Details matter
      With the HTC Sense camera, ultra-crisp 8 MP images and 1080p video are just the beginning. Capture the world on a grand scale with the Panorama scene. When life is in motion, use Action burst for the perfect shot or slow-motion video for an instant replay. Ready to party? Low light mode lets you capture the nightlife, and a 2 MP front-facing camera is perfect for cheek-to-cheek portraits with pals.
    • HTC Sense innovations
      It's how you would design a phone for yourself - only a lot less work. Get started instantly - from the lock screen, simply drag a shortcut icon into the ring to jump straight to an app of your choice. Take care of business on your schedule by creating tasks from emails and messages to respond to later. Sync them to your Microsoft Exchange account so you always have your to-do list with you.