Welcome to Our openSuSE 12.2 Info Website!

Yep. We gots lots more in here than is really needed, -but- as stated in many places, this is primarily for ourselves. Now IF anyone can benefit from any of this -- GREAT. But if not then just enjoy the story... or not

Ok. Our previous blurb here stated that Version 12.1 wasn't even finalized yet - and this one probably wouldn't be out till 2012. Well, 2012 is here and on Feb 17th they put out Milestone 1. Haven't brought it down... yet, cause we had a System Crash. Yep. This time it was the Hard Ware. The main Hard Drive to be exact. And we got KDE 4.8 installed on Version 12.1 which, in this latest Recovery, we made our Main System. (Not so sure that either was a good choice at this point. )
They weren't!! We went back to openSuSE 11.4 and KDE 4.7 as our Main System. This openSuSE 12.2 is looking real good and we are looking forward to making it our Main System in the not to distant future.

-But- there is a lot of good info on the 12.1 page, so you might want to view it. It was a good system 'except'... we thin the biggest problem was in the Graphic Operations. -But- the rest of it was good. So IF you can't find something here, look over there. This one got a little scrambled cause of our Hard Disk crash ... and Recovery... and learning/setting up our new Laptop... and learning/setting up our new Smartphone. Each, of which, has its own priorities.

However, because we can't just stay with what we got, we will probably start investigating, working on and playing with Version 12.3. So look in all three for our latest discoveries.
 UPDATE: March 6th, 2013  We got a new nVidia Driver yesterday and we are testing it on this version. IF it works out and eliminates our Freeze-Ups then we may keep this verion of openSuSE a while longer. -But- we have trecked thru the preliminary versions of openSuSE 12.3 and now it is to be released next week -and- we have been happy with it. Decisions, decisions.....?.? -But- the biggest thing is testing the Driver... on BOTH!!

  Public Release

Refer: SUSE LINUX Enterprise Server 9 Administrator's Handbook - and
openSuSE 12.2 Startup.
OS Information
		  OS:            Linux 3.4.6-2.10.1-desktop x86_64
		  Current user:  ctaylor@dusty-tr2
		  System:        openSUSE 12.2 (x86_64)
		  KDE:           4.8.4 (4.8.4) "release 2"
Display Info
		  Vendor:        nVidia Corporation
		  Model:         GeForce 7300 LE
		  2D driver:     nvidia -or- nouveau
		  3D driver:     NVIDIA 304.60 -or- nouveau Gallium (7.11)

Our system environment is the same as in our openSuSE 12.1 setup.

 SuSE 12.2 PR Install  
We brought down the Public Release version today. We are going straight to the Main System. If it ain't ready now, then something is drastically wrong. We are going to use Grub2 and systemd. They are to be the defaults and the future. So, we will go with the flow and figure out how to triple boot with the new stuff.
(Well, as it turned out, we don't have to figure out anything. They did!! Right off the bat we can boot into ANY of our System setups. This SuSE / openSuSE is getting smarter all the time.)

  1. Preps - Downloaded iso and Burned DVD
  2. Created a 12.2 dir on the L: drive and saved the personal configs for both us and root
  3. Re-Boot with DVD - License is correct - for 12.2
    Language and Keyboard both for English, USA. Mouse and GUI work.
  4. System Probe - Analyzing 'Puter... seems satisfied.
  5. Install Mode - New. Auto Config - NO!!
  6. Time Zone - Time and Date correct. Set it for Phoenix, AZ USA
    Did NOT set it for UTC. In the installation settings it claimed that our Hardware Clock was set for Local time.
    OK, things have changed. The correct adjtime file was NOT installed. You will have to do this yourself. See: System Time
  7. Desktop Selection - KDE Desktop which is the default.
  8. Suggested Partitioning - We edit the Partition Setup. Have 2 Hard Disks.
  9. Create New User. Do NOT use as admin. - NO Auto Login.
  10. Set root password.
  11. Installation Settings.
      Booting -> Boot Loader Installation -> Boot Loader Options
     We are leaving the defaults for this initial setup on our "Main System". Our "Triple Boot System" setting will have to wait till we learn what to set in this new Grub2.
  12. Software - Make our selections
    1.  Lightweight X11 Desktop Environment  xscreensaver
    2.  X Window System  MozillaThunderbird, wine
    3.  Multimedia  audacity, timidity
    4.  Graphics  dia
    5.  Console Tools  makedev
    6.  Web and Lamp Server apache2, apache2-prefork, apache2-mod_perl, apache2-mod_php5, apache2-mod_python, php5-ctype, php5-dom, php5-gd, php5-iconv, php5-mysql, php5-zip
    7.  DHCP and DNS Server  bind, dhcp-server, dhcp-tools, YaST2-dhcp-server, YaST2-dns-server
    8.  Base Development  gcc, gcc-c++, glibc-devel, make, patch
    9.  Intergrated Development Environment  cervisia, kdevelop4, kate
    10.  Java - jedit  
    11.  Linux Kernel Development cscope, ctags, indent, kernel-source, kernel-syms, patchutils
    12.  Web Developement  apache2-mod_tidy, kfilereplace, kimagemapeditor, klinkstatus, tidy
  13. Firewall & SSH - Disable. Messes with our VMware.
  14. Install.... and first reboot.
  15. Oh WOW. Got some new screens that look gorgeous.
    As it turns out, these "New" screens are from Grub2.
  16. Hostname and Domain - dusty-tr2 / TRComputing
    NO to change hostname via DHCP
  17. Network Config - Everything looks good ... use it.
  18. Test Internet connection - said it failed and then said Success.
  19. Loading the Package Manager
  20. Online update - Do it... accept patches.
  21.  Oct 19, 2012 / 4:46pm  We were doing our "Re-Load" and it crashed - locked up - required a Power Off Reset!! - after this step. Picked up at the following step after the Re-Boot.
  22. Hardware config - Do it
    alevt and nxtvepg were installed for the TV card.
  23. FINISH!! And claims to be good!!
  24. First Login - OK! - Remove DVD
  25. Re-Booted and could get to New System... once again.
  26. Right off -first thing- opened a terminal, signed on as root and did a 'zypper up'. Even though we obtained a 'ton' of updates just before our latest install, there were none this time. They were all obtained at the end of this install. -But- we checked anyway.
    The second thing we did was set the time correctly. /etc/adjtime was missing... again.
    The third thing was to install the nVidia drivers.
  27. Copied inxi into /usr/bin
    This can be a very handy command. It will tell you all about your computer. Things you need to know. A copy may be obtained at: inxi options
    Thanks 'oldcpu' for telling us about it.
    As it turns out... there is a copy installed "with" the System in /usr/bin/X11.

 October 19th, 2012 / 6:15pm   Well, with our latest "Re-Install" it did NOT fix the Freeze Problem. And we are using the default graphics of 'nouveau'. So it is NOT the nVidia native drivers. It will, however, require a PowerOff Reset. On this last one we lost our System...

 Added September 6th, 2012/7:33am  Had to work last night so only got the itial install. It booted right up this morning - OK. However, that nice screen we got with our latest updates to RC2 "with nouveau" is NOT there. Something changed -or- we have to do another 'Update' already.

First things first. Set our Red Background on 'root'. Set 'root' as one of the choices on the 'Logon Screen'. Got the Dolphin and Firefox installed by the System removed from the Task Manager and installed our own. Do not like their way. We like to open multiple instances of each and their way only allowed one use.

 Added September 10th, 2012 / 6:15pm  Today we installed our Personal Items, such as, the .alias, .function and .xinitrc. Re-booted and we have the same problem that we had with the RC2, the initial terminal windows that we have automatically installed came up at the top of the screen. Now then, the "fix", which was found accidentally in the RC version, was to go into our previous 11.4 operation and then back to this one. -BUT- now we don't have our previous version installed!! Gona have to figure out another way... a real fix. First we'll get the nVidia installed.

 Display Graphics  Ok now, we have an nVidia Card. "Normally" we need to install the 'Native Driver' in order to get the 'best' performance. However, in our testing of RC2, we made an 'Update' on the System, towards the end, that removed our nVidia Driver from use and swapped in the nouveau Driver. This was not noticed immediatley because it worked as smooth as our Native Driver.!.! VMware 8 complained about Direct Rendering and our nVidia tool said the driver wasn't loaded. Otherwise the operations were fine.

But now... when we installed the "Latest Public Release" -and- the nouveau Driver was/is the default, it is NOT smooth in operation like it was at the last of RC2 usage... AFTER the last 'Update'. Think it must have been using some parts of our nVidia Driver that was installed BEFORE the update. Anyway, see... nVidia Install

 September 12th, 2012 / 8:48am   Networking & The Neighborhood  Now we finally get to the 'Local Network'. This involves Samba, Windows Shares and HTTP. This has already been discussed in the Networking Section below.

 September 12th, 2012 / 9:25am    'root' stuff  Contrary to what some believe, we give ourselves 'more' permissions than normal. They are our machines and no one else uses them... leastwise, not in Linux Mode. Our Windows D: drive is, by coincidence, our Data Drive. We download and save stuff there. Consequently, we need to be able to 'write' to that drive from our other places. Now that this version is becomming our "Main System" again, we are going to investigate more with the Laptop sharing and storing. Ah, but to be careful and not allow to many permissions. We still have our Router Block. Have NOT allowed any external access... not even by us.

Now then, what changes do we make in 'root'??

  1. Wallpaper - Red Backgound... Announce you are in 'root'.
  2. inxi to /usr/bin/ -- IF it is not already there.
  3. Our DIR_COLORS to /etc/
  4. Our hosts file to /etc/
  5. Our smb.conf file to /etc/samba/
  6. Our httpd.conf to /etc/apache2/
  7. Our mod_userdir.conf to /etc/apache2/
Checked the IP Addresses in the above copied files to make sure everyone is happy.

 September 13th, 2012/9:01am - .xinitrc  
Refer: xinitrc and xsession and xinitrc play together

 September 15th, 2012 / 3:59am - VMware 8  Finally getting around to installing VMware 8. (After much harassment from our new kitten.) Ok. After the installation we installed the "Patches" and then Un-tarred our saved copy of Windows 2000. Yep. We are still using it. Mainly for Homesite reasons -but- that will be changing here soon. We purchased a copy of "TopStyle 4" and we are going to start using it. However, it appears to want Vista and above. So, we will also be moving up there .... maybe. It is hard to leave something that has been so good to us... so this change over will be slow. Just like us changing over to 64-bit was slow. Now we have two 64-bit machines and both are running 64-bit Systems. Checked our New Smartphone -but- it is only 32-bit.


  An Announcement

We are going to state this, mostly for ourselves -but- for anyone else that might be interested. You will find a bit of a conglomeration of things in this story on our openSuSE 12.2 installation and use. Versions 11.4 and then 12.1 were to be our last and final install of a "New System" for a while... a long while. We wanted to get into some other types of 'puting. -But- they were NOT satisfactory -and- we have found and decided that we need to move over into the 64-bit world. So, this is going to be all that we know - and maybe more! (think we are gona change the colors too... to light.)

Ok, we changed the colors from a lite blue to a darker blue. Really like the looks of the openSuSE 12.1 and it has a lot more info -and- a lot of the info applies to this version. Some with only minor changes.
Possibly Refer: openSuSE 11.4 and openSuSE 12.1


  openSuSE 12.2 - to 64 or not ? ?

Well, the first Milestone of 12.2 is out. We are late, but we brought down a copy to see IF there are any improvements. There were some blurbs about some fixes -but- we'll see. Need to create the install DVD first.

Jonathan Coulton created a "mashup" of the two songs mentioned above and our recent computer endeavors brings those songs to mind. Being born in '46 (64 reversed) -and- having graduated from High School in '64, -and- we just recently left the age of 64, -and- since 64-bit computing is becoming more vogue now, we thought that we would make history and finally move into the 64-bit world. We have had that capability since January of 2007.   The "fabulous" computer  we purchased at that   time was our   trusty  HP m7480n   with one of the first - two core processors - a Pentium D 940. It also had 2GB of RAM which we have maxed out at 4GB. It came with two 300GB Hard Drives, one of which recently died and we replaced it with a 500GB Drive. Now this machine is capable of 64-bit operations -but- it was released with a 32-bit Windows Media Center. It was billed for, -and- towards the Entertainment side. Our interests at that time were the Processor, RAM and HD size. The rest were just extra luxuries... to us at that time.

As usual we are at the lower, -or- minimum specs of some of the "newer" and more "modern" computer requirements. Windows 8 ... wait a minute ... isn't this about Linux?? Yep. -But- (that word again!!) we have a lot of Software that is Windows specific and we like it and plan on continuing to use it. -And- ALL of our customers are Windows users... cause that is still the default OS for most of the Computers sold today. Windows has continued to evolve with the market and the latest one, Windows 8 "requires" 64-bit Hardware. -And- we try to have the Windows OS's on hand to stay familiar with and to use for our cherished software. Homesite for one, which is what this WebPage is being 'created' in.

Now, continuing on with the above thoughts, we just recently purchased a New Laptop, an HP dm4-2165DX. Strangely enough it is also billed as an Entertainment machine. Once again our primary concern was with the Processor, RAM and Hard Drive. In this instance we obtained a machine with an Intel Core i3-2330M Processor, 6GB of RAM and 640GB of HD.... in a Notebook!! On top of that it has Windows 7 Home Premium 64-Bit Edition. Welcome to the 64-bit world!! We are arriving there whether we want to -or- not.

So What!?! Well, as mentioned above, Windows 8 requires 64-bit hardware -and- in order to run it in a Virtual Machine, VMware requires version 8. -And- VMware version 8 requires 64-bit hardware. -And- IF there are starting to be all these 64-bit requirements then we had better get our butt in gear and move over. So, we will start with openSuSE 12.2 as our first adventure into the Linux 64-bit world. We proudly got a Triple Boot System setup on our Desktop Machine, finally after our crash back in '09, so we will use that "extra" boot partition for our 64-bit experiments. This could get velllly intelllesting.... The Lord has been with us and we are sure He will continue to show us the way(s).


  openSuSE 12.2 m2 -and- our 64-bit stumblings

Ok. We have investigated and investigated and investigated. Think we can stop the investigations and start doing something. This will be our last entry in the 32-bit openSuSE VMware Homesite for a while. Our next entries will be from the new 64-bit operation.

 Oooops!!   Welllll... we aren't as smart as we thought we were!! As mentioned elsewhere, we had a Hard Disk failure on Feb 01, 2012. The "old" HD was a 300GB that served us well, however, since we were replacing the HD, we decided that we could use more room... so we got a "larger" Hard Disk, one of    500GB    in size. We... are just a small, tiny, little Company -and- mostly Home Private work and operations. Therefore, anything larger would be a waste and a Garbage Collection point. The MAIN Reason for "needing" more room was/is to setup and run multiple Operating Systems.

Now then, you would think that only a 200GB increase wouldn't cause much of a problem. WRONG!! Seems that these "older" Operating Systems and some of the Programs -Do NOT- handle Drives Larger than 300GB very well... and some NOT at all!! We used to use Partition Magic a very fine and useful tool that ... unbeknownst to us in the beginning ... had the 300GB limitation. -Or- IF we did know, we forgot. This was learned and/or re-learned and experienced when the larger drive was installed a month ago.

Now we still had not attempted our Triple Boot Setup with this New Larger HD ... till now... and Oooooppps... We screwed up our system!!!

How?? Well, that is exactly what we are trying to figure out at this time. Now HALF of the problem(s) come from our NOT remembering exactly what we did the first time around. The other HALF is because of ... changes. Changes in Hardware and Software... and NEW Limitations... which were really there all the time. We were just shielded from them because of our "Luck" in our purchase of the HP m7480n back in January of 2007. Luck??? Yep. The 600GB drive in the advertizement turned out to be two 300GB drives... which as we have learned ... and have been lamenting about throughout this document... is the limit of some of the "older" Operating Systems and Programs. Our favorite, Partition Magic, being one of them. We have innocently used it all these years not realizing that we were limited.

Ok, so what did we do??

  1. We started to install openSuSE 12.2 -but- the drive layout didn't look right and we could NOT remember what we had setup. Even our docs weren't clear enough for some reason. We thought that we had allocated more room for the 3rd Partition. Soooo... we aborted the install... 1st mistake.
  2. Re-Booted into Windows Media Center. Why?? So we could use Partition Magic to check on our Partitions. -But- after arriving in Windows we were rudely reminded that Partition Magic didn't work anymore and we had gotten another Partition Manager off the Web.
  3. "Using" this other Partition Manager, MiniTool Partition Wizard, we looked at what was setup and re-examined our notes and decided that we had set aside the intended amount of Disk Space. So, we used the "Free" Partition Manager to set aside a Linux Swap, root and home. ... 2nd mistake.
  4. Injected here, in a convoluted way, is some admittance that we don't necessarily have ALL that happened -nor- the "proper" corrections - listed here. This was a lot of tounge in cheek, praying -and- directions from the Lord that accomplished this. He opens my mind and puts in ideas that I try -and- they work!!
  5. Re-Booted and ---- BLAM!!  We lost the System!!! It couldn't find the NT Loader or something like that. Yes... shame on us we don't remember the exact message(s).
  6. So we get out our SuperGrub... which has rescued us in the past. Well, it was looking good -until- our Linux actually started booting ... and FAILED!! It couldn't understand the info concerning the E: drive and a couple of other things. Once again, shame on us we don't remember all the messages. At a time like this, a lot of panic sets in. -But- we must explain to those who don't know... the E: Partition is a Special one. It is the Recovery Partition. It is a special FAT Partition that is created in a format that allows it to be larger than a "normal" FAT partition -and- it is only readable by the Recovery System. How-some-ever, we usually have it listed in our fstab and it is shown in our device listings -so- we remember it.
  7. So, next, we tried using SuperGrub and booting into Windows Media Center. We were successful. In fact these current notes are being entered through Homesite while booted up in Windows Media Center.
  8. Allllrighty Now. We Re-Booted without the SuperGrub disc and was presented with our menu.lst choices. We selected our SuSE Linux 12.1 and it was looking good ... and ... and it Failed. However, we were able to get a root sign-on. Then we did a startx and during that we did some Ctl-Esc and Ctl-Alt-Del and Ctl-Alt-F1 and finally got a Linux System to boot-up to the Desktop. Now this was -NOT- a normal system. In fact we are not sure what it was. The home dir was empty!! Throwing -all- caution aside at this point, we edited fstab and commented out the E: drive. Then we Re-Booted and selected our SuSE Linux 12.1 from the menu.lst choices -and- it worked!! Matter of fact we are editing this in Homesite inside Win2K inside VMware. So, we have our system back... almost -or- for the most part.
  9. With our System back we used GParted to fix up our "Large" Hard Disk. The Extended Partition got extended and the "extra" partitions for the Triple Boot were created... logical ones... inside the Extended Partition.
  10. In MiniTool Partition Wizard's defense ... we do believe that this whole fiasco was our fault because we didn't read enough about its usage -before- using it. -And- "Extended Partition" was not in its vocabulary and it -was not- outlined like in Partition Magic and GParted. Therefore, we believe that we violated the HD rules. You can only have four(4) Primary Partitions on a Hard Drive. That is the reason for the creation of Extended Partions and Logical Drives.

 HP Laptop   Recognition injected here for the Newest member of our Computing Family. An HP dm4-2165DX Notebook. We have had this fine piece of equipment for almost a month now -and- done very little with it. Why?? Cause... Anyway, we decided that it could be used to look up some clarifications for us whilst we were stumbling through our endeavors here on the Desktop. It was/is almost ready to be used -but- we don't have all our stuff on it. This "recovery" from our Hard Disk failure -and- other things have been more involved that we anticipated -or- expected.


  openSuSE 12.2 m2 - finally the install

Ok now. After the fiasco above, we are going to try once again to install a 64-bit version of openSuSE 12.2 m2. -But- first we'll make sure our Web Pages are copied to a safe place.... proper backups?? Yep.

-But- (that word again) before continuing we need to spell out, or list, some HD specifics. We have:

  • /dev/sda5 openSuSE 12.1 swap
  • /dev/sda6 openSuSE 12.1 root
  • /dev/sda7 openSuSE 12.1 home
  • /dev/sda8 openSuSE 12.2 swap
  • /dev/sda9 openSuSE 12.2 root
  • /dev/sda10 openSuSE 12.2 home
Now then, we list each... in each others fstab and we allow reading by all and changing by root(s). Naturally, the names are changed, in each side, to protect the innocent. Now think... Taylor... do we have it all straight this time?!??!?

 Nope!!  Straight or not... this whole thing has been, and is, a dismal failure. Can't even boot up the current version of SuSE that we were running!! We had to, and were lucky enough to get back to our Windows side. We have not been happy with SuSE for a long, long time. Think version 10.3 was our last good version. All of these 11.x versions and especially these 12.x versions have been a pain in the arse!! Need to re-evaluate our notes and examine why we moved 'up' in versions. We are going to have to Re-Build our whole Linux Side of the System. Part 'may be' our fault because of the errors that were made with this new larger HD -but- things shouldn't have been this bad. Well, maybe they are!! I may have to do a FULL and I do mean FULL System Recovery. Once again our bungling, the system differences, and the changes made in how things are done have compounded to make things tricky. Seems that our Recovery Partition is causing some problems.

 The Lord's Rescue... again.  In disgust, we had shutdown our system and went off to the living room and pouted... watched some TV... and took a nap. Later we went back in to our System and it fired up... openSuSE 12.1 presented its menu.lst. The Lord had fixed it whilst we were off pouting. The Recovery Partition is still a problem and the newest install, openSuSE 12.2, is not a selection -but- we can, once again, dual boot into Windows and Linux.


  On to Milestone 3 M3

Alllllrighty now... we are finally once again going to try to get a "New" 64-bit version of openSuSE 12.2 installed. The initial steps appear to be the same. Don't know why they wouldn't be. The size of the computer words is basically invisible to the user.

However, we are now at the step where we set up our Partitions. As usual it wants to use the wrong ones. Not the installers fault, we just have a conglomerated system. We edited the Partition setup to get things the way we want them:

  • /dev/sda5     2.44GB    openSuSE 11.4    swap
  • /dev/sda6   47.43GB    openSuSE 11.4    root
  • /dev/sda7  205.39GB    openSuSE 11.4    home
  • /dev/sda8     2.44GB    openSuSE 12.2    swap
  • /dev/sda9   20.69GB    openSuSE 12.2    root
  • /dev/sda10  81.73GB    openSuSE 12.2    home

Now then, you may have noticed that we went back to openSuSE 11.4. We just were NOT happy with version 12.1. We'll see IF this new version 12.2 becomes any better BEFORE making any major system changes. The incorporation of 12.1 as our main system, AFTER our Hard Disk failure, was in itself a failure... as far as we are concerned. The delays -or- hesitations in operations was becomming a problem and we were having troubles with our USB ports and... well, just don't remember all the problems -but- we had less with 11.4 so that is why the switch back. Now to experiment with the newest creation and 64-bit mode.

Ok. After accepting the Disc Settings we were presented with the User Settings. These were filled out -or- in as usual. No to using the password for Administrator and No the Auto Login. This required us to set a password for the root user.

Now we get to the Installation Settings

 Booting  Alllllrighty now... it wants to use Grub2 -but- we don't ... yet. Didn't see anywhere to tell it to NOT mess with the MBR. So, we assumed that it would -and- we DO NOT want it to mess with it. Part of our Triple Boot is to use the Grub Menu List in the "Main System". We'll eventually have to learn how to use the new Grub2 -but- not now.

 Software  We need to go through this and get the necessary items to build a functioning System -with- VMware installed. This is going to be the New 64-bit Version 8...which is why we need this 64-bit version of SuSE. For the most part, the selections should be the same as before. The names and functions, or operations, are not really changed. Just the computer word size. Except we did find that some of our favorites are missing. We'll just get this initial install and then look on the Web for 64-bit versions.

Ok. The install was kicked off and it is doing its thing. Now all we have to do is wait. Looks the same in its installation procedures. Ok. Getting our first re-boot... it was successful. Now to complete the install. First we enter the Hostname and Domain Name. Don't allow DHCP to change our Hostname. Never really understood this. Why set one in the first place IF you're going to allow it to be changed.

Click on Next and we get Analyzing System and then it displays the Network Configuration. We are going to use what it has suggested. We click Next and it saves the Configuration. We are then askedIF we want to test our Internet Connection and we say yes. It Fails to bring down the Release Notes -BUT- it says the test was a success. Does a few more things and then Displays the Release Notes!! Next is clicked..

Now we get Hardware Configuration. We accept what it found and click Next. It saves some settings and then Congradulates us. It is finished. So we click on Finish... and it Re-Boots into the system... well almost. We get the Sign-Onscreen. Looks like we got that version we didn't like in version 12.1. Just a box for one name and password. No selections. So we entered our username and password and hit Enter.

We have a Desktop

Our first 64-bit install and Sign-On is successful. Now to see if we can get our Triple boot working properly. Hmmmmm... it just kicked off into some Heavy Operations... all on its own. Must be some final setup items. Took a couple of minutes and then it settled back down. The screen is driven by nouveau and it has that "floating" action when Windows are moved around. It also lacks 3D... or at least it did. We need to see IF our nVidia driver is also capable of 64-bit -or- IF we have to get a newer one. Let's see what they, openSuSE, have for us in their repositories.

Well, this is/was NOT a smooth transition.... later.

 It is Later - April 17th, 2012  Permissions!! Things that you have to set again... and again... and again with each new install.


  Beta1

We are NOT going to do a Full install. We are going to use Zypper in conjunction with a DVD created from the downloaded Beta1. The Reports on the Forum vary with success -but- one in particular gave great praise for doing an Update. So, we are gona try that. Still using nVidia 295.40 even though 295.53 is available. We will install it AFTER we do the Update.

 The DVD /7:47am Opened up a 'root' window and did a 'zypper dup'. We got a message about 'libportaudio2' being downgraded and then about its vendor being changed.

 Added 7:57am Well, that was a dismal failure. It couldn't find the DVD!! Gona try an Update using the Repos.


  Beta1 ... again

 ARRGGG!!!  Nothing seemed to work. Gave up and went to work. Upon arriving home we investigated and decided to just boot the Install DVD and select Update instead of Install. In the first part of the Update it removed all the Repos that we had.

The Installation settings were next. We are only going to list the 'important' ones here.
Packages

  • Packages to Update: 1454
  • New Packages to Install: 192
  • Packages to Remove:20
  • Total Size of Packages to Update: 4.4 GB

The others are important -but- we are not going to type all of them into this Web Page. To much for us.

 Added 2:29am  It finished the install and died!! Had to do the Power Off Reset. Naturally, we could not boot into the Updated SuSE cause the name has changed. We are gona have to find out what it is now and edit our Menu.lst. WE did. All to NO Success.

 Added June 7th, 2012/10:22am  Scrapped all ideas of trying to Update the Milestone to the Beta1. Just went for a Full Install from a DVD. This was with the knowlege gained from reading the reports on the openSuSE Forums. The Install went OK -but- not perfect. We had to disable the 'install from images' concept and the Install finished in Curses Mode Text.

We did get the 'inxi' script installed and copied the neccessary parts from the Grub Menu.lst and placed them in our SuSE 11.4 Grub Menu.lst. Now, hopefully, we will be able to triple boot... which is about to be tested.

  • First we Re-Started...
  • The MBR took us to our SuSE 11.4 Grub Menu and the 12.2 Beta1 System was in the list.
  • We selected -and- booted up into our 11.4 version to make sure it still works...
    OK. It does.
  • Re-Started again...
  • This time we selected the 'Normal' boot of openSuSE 12.2
  • Oh Boy!! We are presented with the 12.2 SignOn Screen. The first time after the install it did not have a screen manager selected. So we did not get a Desktop. We had to select a Screen Manager. This time we didn't cause it remembered what we had chosen before.
  • We have a SignOn and a Desktop!!!

 Added June 8th, 2012/4:34am  Do to the New Kitty -and- work, we did not get much else done yesterday. Today, we booted up into the 'New 12.2' version right off. At the 'SigOn' we decided to sign on to 'root'. After entering 'root' and its password we hit Enter. Got the same result that we did the first time we tried to sign on to the 'Normal' 12.2 version. It just 'blinked' and came back to the SignOn screen. Once again it did not default to any of the Screen Managers. It evidentally will set up each individual user with a history of their selections. Since we changed users by selecting 'root' the Screen Manager selection was gone... till we selected one for this 'New User'. Not sure that, that will be good for an unsuspecting New User... ie; a 'Noobie'.

We, I, do however, LIKE the new SignOn. We always liked the slow progression of the equipment icons. We're glad they are back. In 'root' we altered the Login Procedure so that 'root' was/is one of the choices. Also got some cool Red Backgrounds to use in 'root'. We like to remind ourselves that we are in 'root' by a blazing Red background. We used to use the KDE Gear and use the color feature to make its background Red. -But- with the changes to this New KDE, we can not set the background of KDE Gear to Red. So, we just found some Red backgrounds....and picked one.

For now, we are going to leave the 'User' background Green.

 nVidia 10:19am  Allllllrighty now. We installed the nVidia 295.53 driver and it worked first time!!

 Added June 9th, 2012 / 1:58pm  Today we installed our Personal Items, such as, the .alias, .function and .xinitrc. Then we also added the Dolphin, Desktop Camera, nVidia App and YaST2 to the TaskBar -or- Bottom Panel. The VMware installation will be covered below.


  Beta2 Install -Full

Well my friends, this one was interesting. We stuck the DVD into the drive and started the Install. Now the challenge here is ... we have a Triple Boot System. The System is set to boot-up in SuSE 11.4 - by default. However, this is using Grub'1' NOT Grub'2'. During the install, we used our option to choose Grub1 over Grub2.

Troubles!! It hung on the Animated Splash Screen. Had to Power Off reset. Upon the Re-Boot it hung in the Animated Splash Screen again. Re-Booted again and this time selected "FailSafe" mode. It recognized that the Installation was NOT finished and completed it... however... the animation portion of the Animated Splash Screen kept going. We had to move our mouse around to clear the screen to see the install info. This was rather annoying cause it kept writting back over what we had just cleared!! Finally we got onto a Desktop. Re-Booted again and after the Animated Splash Screen we got our LogOn Screen. This time it created our User. We entered the proper info and got logged on to openSuSE 12.2 Beta2.

 Personal Stuff  Copied over the .alias, .function, .bashrc and .xinitrc from our saved versions. It's the stuff we install for every version. Oh and lest we forget... Samba, http.conf

 .xinitrc  Inside this one we start a couple of Terminal Windows to use in our daily operations. We have them of a specific size -but- in this version they are comming up about 3/4 short. Now we can click and hold on an edge and drag them bigger and they stay. It is just the initial size that is a Big Surprize. Got absoulutely no idea of why -or- where to look. See below in RC1. Actually, in nVidia. Anyway, the problem was of our own creating. We were using a previous .xinitrc and we can't. Must use the newest version and then everyting is ok.
Well, all is NOT well. In RC2 we ARE using the supplied template -but- we are NOT getting the proper sizes -or- locations.

  openSuSE 12.2 RC1 -and- RC2

Alllllrighty now... they have released - Release Canidate 1. Hopefully, it works as good -or- better than Beta2. As mentioned previously, we are keeping Beta2 until the Final Release shows it is as good. Our experiences with it so far has been very positive, except for the install. Hopefully, that will be fixed in this version. Downloading it now.

 The Install - 13 Jul 2012 /6:07am -and- 06 Aug 2012 /3:39pm  Placed the DVD in the drive at startup and we started the installation.

  1.  Welcome Screen  Well, it is good in the fact they got the version correct -but- the Copyright is only 2008-2011. Think that last date should be 2012.
    Well, guess we are gona have to report it. Still not correct in RC2.
  2.  System Probing  Not much to say here, except that it did it.
  3.  Installation Mode  Here we are selecting "New Installation". However, we are unchecking "Use Automatic Configuration". Because of our Triple Boot system, and other things, we must configure it ourselves.
  4.  Clock and Time Zone  Now this is interesting. It has New York selected by default -but- it has "our" time displayed. -And- they are three hours different this time of the year. We clicked on Phoenix, Arizona and it became our Time Zone and the time updated by a couple of minutes. We, naturally, left the Region as USA. The time was wrong in Beta2 at each restart. So, we will see IF it gets corrected this time. We did NOT select "Hardware Clock Set to UTC". We prefer Local Times.
    Side Note:They did NOT fix the time. It is wrong at every boot-up.
    Once again the above scenario exits. However, we will have to wait for the boot-up to see IF that portion was fixed.
  5.  Desktop Selection  We are taking the default of KDE. We, like many others, grew up on Windows and KDE is close to it in operation.
  6.  Suggested Partitioning  Here is where we differ -but- they are getting better at analyzing our system. They have /dev/sda9 as root and /dev/sda5 and /dev/sda8 as swap which is correct... -but- they are trying to grab our 11.4 home on /dev/sda7 instead of /dev/sda10. On top of that we want to mount our 11.4 partions and our Windows Data Partions. So, we have to "Edit Partition Setup...".
  7.  Create New User  Here we have the usual request for name and ID information. However, it has as default using this password for "System Administrator" and to "Automatic Login". We UNCHECK both.
  8.  Password for System Administrator "root"   We only got this screen cause we didn't let it use our password above for this. We mean, after all, one of Linux's claim to fame is security. Why make it to easy to defeat it???
  9.  Installation Settings
    1.  Partitioning  Displays our Partition Setup.
    2.  Booting  Here it is selecting GRUB2. Now because of our TripleBoot Setup, we are going to change this back to GRUB1. Yep. We are gona have to learn how to do the Triple thing with GRUB2 -but- not yet. Why not??? Cause.
      Ok this time through no Kitten. First we select Grub -instead of- Grub2. Then in BootLoader Options we UNCHECK "Set active flag in Partion Table for Boot Partition" and we UNCHECK "Write generic Boot Code to MBR". Now in 'Boot Loader Location' we UNCHECK "Boot from Master Boot Record". We left the "Boot from Extended Partition". In clicking 'Next' we get a warning about the bootloader being installed on a partiontion that does not lie entirely below 128GB. -But- we will 'fix' that later.
      LaTER: Well, between writing this up -AND- fighting with our NEW Kitten, we forgot to set this and started the install. It was rapidly Aborted and fortunately did not mess up our 11.4. -BUT- it did mess up our Beta2. So this time we will just install and not worry about these notes... and right now the Kitten is sleeping!!
    3.  Software  Now then, here is where we make a lot of selections that are for some reason not selected already. Well, that's cause they are trying to keep the system lean. Don't install stuff if it is not needed. Course there are some things that get installed that we think shouldn't -but- everyone has their own ideas. We on the other hand "need" certain things in order to setup our nVidia and our VMware in particular. Other items are just cause we like to use certain software. So we enter "Software Selection and System Tasks". After entry we select the "Details" Screen. On this install, we are NOT installing all that we usually do. Just what we need to get our system going with nVidia and VMware 8. All the other things will get installed later when they are needed. Not doing speculation this time. We have previously installed software and never got around to using it -before- another update!!
      1.  Lightweight X11 Desktop Environment  xscreensaver
      2.  X Window System  MozillaThunderbird
      3.  Web and Lamp Server apache2, apache2-prefork, apache2-mod_perl, apache2-mod_php5, apache2-mod_python, php5-ctype, php5-dom, php5-gds, php5-iconv, php5-mysql, php5-zip
      4.  DHCP and DNS Server  bind, dhcp-server, dhcp-tools, yast2-dhcp-server, yast2-dns-server
      5.  Base Development  gcc, gcc-c++, glibc-devel, make, patch
      6.  Intergrated Development Environment  cervisia, kdevelop4, kate
      7.  Java - jedit  
      8.  Linux Kernel Development cscope, ctags, indent, kernel-source, kernel-syms, patchutils
      9.  Web Developement  apache2-mod_tidy, kfilereplace, kimagemapeditor, klinkstatus, tidy
      10.    
    4.  Locale Settings  English
    5.  Time Zone  What we set already, USA / Phoenix, Arizona
    6.  User Settings  Lists User and that root has a Password.
    7.  Default Runlevel   is 5: multiuser with network and display manager.
    8.  System  Information...
      System: HP Pavilion 061 - ER884AA-ABA m7480n (0ny1114RE101EMERY00)
      Processor: 2x Intel(R) Pentium(R)D CPU 3.20GHz
      Main Memory: 3.50 GB
    9.  Installation from Images  Now then, this was a problem in Beta2... or was that Beta1??? Anyway, on our first try ...and hopefully only try ... we are going to leave this ENABED.
    10.  Firewall and SSH  Because we have had so much trouble with this in our VMware Ops we just automatically DISABLE it. We feel that our Router offers enough Security for us. To much security can be just as bad as not enough. All this Security and Idiot Proofing is what slows things down. Just think how much faster your PC could be without all that... just think about it. And when the Lord returns and sets up His Kingdom it will be like that. No Security will be needed cause... EVERYONE will obey the 10 Commandments... ALL of them.

    Annndddd... after our selections it added in some more. Now we install.

  10.  Install  It does a Warm up... and then goes on to install.
  11.  ReBoot  Is Successful!!
  12.  Hostname and Domain Name  dusty-tr2 and TRComputing. UNCHECK "Change Hostname via DHCP"
  13.  Network Configuration  It only found two things;
    our AR5413 802.11abg NIC
       Not Configured yet. and
    our 82801G (ICH7 Family) LAN Controller
       Configured with DHCP
    Upon clicking 'Next' it saves the Configurations.
  14.  Test Internet Connection  It normally passes this test. -But- this time it failed. We just clicked Next and will fix this when the System is Up.
    Once again it failed.
  15.  Loading the Package Manager...  
  16.  Online Update.  Well, since we can't get connected, this is kind of futile. But we clicked next and it is doing something... It is retrieving packages!!
    Again!!
  17.  Patch Download and Installation  Interesting. For a connection that failed it sure is going out on it and Retrieving / Installing a lot of stuff. Ok. It finished and we clicked on Next.
    Once again it is Downloading and Installing stuff!!
  18.  open SuSE 12.2 Release Notes  Need to check on their comments about the "nomodeset" parameter. We do think that things are different than what they are saying.
    Well, either they changed it -or- we read it wrong. Seems to be ok in this new version.
  19.  Harware Configuration  This is nice, they found our sound card -and- our TV Card. Maybe we will get the TV card to work with this version. It is looking promising in everything else. Cross our fingers. It saved the Configuration but flashed up a little box that said there was 1 Error. But it went away. So we'll just have to wait and see.
  20.  Installation Completed  Finished. Now IF it will only boot into the new System like they have in the past, we will be able to copy the starting point and edit our menu.lst over in our 11.4 so we can get our boot choice.
    Success again to this point.
  21.  Yahoo!!!  We got the new System SignOn. And successful again in 12.2 version.

 July 13th, 2012/10:15am   August 6th, 2012/5:44pm   Allllrighty now. We have a new openSuSE 12.2 Desktop. First thing we do is LogOut and SignOn as 'root'. we want to get the 'Triple Boot' Set Up. And the first thing in 'root' is to set the Wallpaper to Red. Want to emphasize that we are in 'root'.
Again we go to 'root' to set things up... Red Wallpaper and our 'Triple Boot'.

Ok. The code is set and we are going to try our first Full ReBoot. Uhmmmmm... -After- we remove the DVD. Whooopeee!!! and Yahoooo!! It worked fine through our Triple Boot Setup. (Yep. We're still kids.)
Hurahh!! We were successful again on the 'Triple Boot'.

 July 13th, 2012/10:38am  In the User Area, we added the LogOff, File Manager and Camera Icons to the TaskBar -or- Panel. Now we are gona try to add in an nVidia Driver via YaST2. First we must add the nVidia Repositories. Well... that was a dismal failure. They don't have any Community Repos that this version understands. So, we will have to do it the hard way. Please refer to the nVidia section. ... We did and by the way, it works with nVidia version 295.59   304.43.

 VMware July 14th, 2012/7:47m   We installed VMware 8 and it is working fine. Matter of fact we are in it now editing this file on our Laptop via Homesite on our Desktop. Please refer to our Previous VMware Install cause they are the same. This used the same fix from Stefano Angeleri. This 'fix' has worked now for Beta1, Beta2 and RC1.


  openSuSE 12.2 RC2

Well, according to the 'new schedule', this one was on time. Naturally, we had to go off to work after the download and did not get to be first on install. Probably pretty close on the first to download it though. We did get the DVD created.
And then, and then... we decided to change our color scheme on this Web Page. It was to light and looked to wimpy. So we darkened the colors and now we think it looks better. That's how we get side tracked!! Now... gota take care of the pool and the lawn!
Annnddd... now we have decided to combine the RC1 and RC2 descriptions. By now they should be pretty much the same anyway and we will only note the differences.
So, jump to the above... for the install part.


  Grub2

We have decided to investigate Grub2 more and try to use it since it seems to be becoming the default everywhere. Parts of the two mentioned Web Pages have been copied into here. For the full stories please read those other pages.

 Changed mind... again  For the time being... whilst we are still using openSuSE 11.4 as our 'Main System'... we are just gona keep using Grub1. We will use Grub2 fully when we make openSuSE 12.2 our 'Main System'.

This was copied from Grub2 Info Class
To begin with, the following files and directories are important to us:

/boot/grub/grub.cfg (/boot/grub/menu.lst file in old GRUB)
/etc/default/grub
/etc/grub.d/

Also the commands:

update-grub2 (update-grub in old GRUB)
grub-mkconfig (Recommended)

are also very important if we really want to customize GRUB2 menu.

Also Refer: Grub2 Tutorial

GRUB stands for GRand Unified Bootloader
LILO (stands for LInux LOader)

The first sector on a hard drive is called the Master Boot Record (MBR). GRUB replaces the default MBR code with its own code.

Refer: Chapter 9. The Boot Loader GRUB and Chapter 10. The Boot Loader GRUB2

 October 24th, 2012 / 1:00am  James from Austin has created some very useful scripts to be used in maintaining and using this openSuSE.     Refer: James Blog Info

 Info from James   If anyone has wondered about the new grub 2 selection menu in openSUSE 12.2 then here is what these two lines mean when selected.

  1. The top line just called openSUSE, will select the most recently installed kernel standard load line when selected. Each time a new kernel is installed from any source, the top line will load it.
  2. Advanced options for openSUSE, will list all installed kernels and their recovery modes when selected. This will include the same kernel to which the top openSUSE line refers to.
  3. By default, the first entry called openSUSE will be used after five seconds has expired if nothing else is selected. Press the up or down arrow once to stop the default kernel load timer.
  4. If you select the Advanced options for openSUSE and change your mind, just press the ESC key to return back to this original menu.


  PERMISSIONS!! & File Systems

This permissions info was copied over from our openSuSE 12.1 and 11.4. So, until we get it edited there may be some things that look and/or sound strange.


It was said that openSUSE 12.1 uses btrfs by default. Well, it doesn't. It uses EXT4. The following descriptions of the File Systems were obtained from Linux Tweaks.
(This also applies to openSUSE 12.2)

Ext2

Ext2 is Linux's 'old standby' filesystem. It was the default for most of the major early Linux distributions. While it has been mostly supplanted by versions 3 and 4, ext2 is still popular on USB and other solid-state devices. This is because it does not have a journaling function, so it generally makes fewer reads and writes to the drive, effectively extending the life of the device.

Recommended Use: USB/Solid State Drives, or any case where you need high stability with minimal reads/writes.

Ext3

The most notable difference between ext2 and ext3 was the introduction of journaling. In short, journaling filesystems are meant to recover more gracefully in the event of a system crash. Whenever you find yourself in doubt about which filesystem to use for Linux, ext3 is nearly always a good bet. It�s extremely mature, extremely well supported, and contains all the features you�re likely to need for a desktop OS.

Recommended Use: If you have no specific reason for another filesystem, ext3 is an excellent default.

Ext4

The most recent in the ext filesystem line, ext4 includes many major improvements over ext3 like larger filesystem support, faster checking, nanosecond timestamps, and verification of the journal through checksums. It�s backward and forward compatible with versions 2 and 3, so you can mount a ext2 or ext3 filesystem as ext4, and the other way around. You may however lose some of the benefits of the newer versions when mounting as the older. Many of the modern Linux distributions now offer ext4 during the install, and some are using it as the default.

Recommended Use: Ext4 should be stable enough for desktop and server needs. If your distribution offers it as an install choice, it should be a good choice for nearly any usage needs.

Btrfs

Btrfs is still in development, and may not yet be ready for production server use. That said, it has been included to some extent in the Linux kernel and is available as an install option in some distributions. Some of the interesting features include transparent compression, snapshots, cloning, and in-place conversion (with rollback) from ext3 and 4. According to the lead developer, Btrfs aims to "let Linux scale for the storage that will be available." Btrfs, once completed and matured, will likely be a strong contender in the Linux filesystem world on both desktops and servers.

Recommended Use: Eventually, Btrfs should make for an excellent filesystem for servers and other high-bandwidth high-storage devices.


Perms Info - from 11.4

A thorn in my side. Even though they are necessary... I strongly dislike them. My "local" setup would probably make a security fanatic cringe.

After the initial installation, the HD situation is this:

 /dev/sda    279.4 GB    Systems    ID    1st Drive  Owner   Group
 /dev/sda1    79 GB    HPFS/NTFS    7    C:   root   users
 /dev/sda2    7.3 GB    Win95 FAT32 (LBA)    c    E: Recovery   root   users
 /dev/sda3    194.3 GB    W95 Ext'd (LBA)    f               
 /dev/sda5    2.01 GB    Linux Swap    82    swap          
 /dev/sda6    41.93 GB    Linux /    83    root   root   root
 /dev/sda7    102.08 GB    Linux /home    83    /home   root   root
 /dev/sda8    2.04 GB    Linux Swap    82    Test swap          
 /dev/sda9    20.87 GB    Linux /    83    Test root   root   root
 /dev/sda10    25.10 GB    Linux /home    83    Test /home   root   root
 /dev/sdb    279.4 GB    System Data    ID    2nd Drive  Owner   Group
 /dev/sdb1    263.85 GB    HPFS/NTFS    7    D:          
 /dev/sdb2    15.61 GB    W95 Ext'd (LBA)    f        root   users
 /dev/sdb5    15.61 GB    Win95 FAT32    b    L:   root   users

Refer: Linux Files and File Permissions - Partion Types

Now then, you will notice that initially root owns everything! The first of the above two references explains all this and is good reading. As I have mentioned before, somewhere in these WebPages, I have two 300GB HD's which at one time would have given me Big Bragin' rights. Now, they are just average. However, the key part is ... there are two drives. In my catestophic System Failure (my own dumb fault), most of my data was saved because of the two drive setup. System(s) on one drive and data on the other. Further details can be found in my Starting Over Web Page.

What this is leading up is... changes. I need to have access to the Downloads area of the 2nd Drive. I have tried to bring down some files and save them... and could not... to the Downloads area. Had to save them in my Own home area. Not the way I had it setup before. There are 3 types of permissions... UGO: User(or Owner) - Group - Other. In each of these there are 3 types, rwx: Read - Write - eXecute. These permissions can be changed for the whole drive, individual folders and on individual files. If you are worried about security, then stay away from 'Other'. It is also referred to as 'World Permissions'. I do believe that should be enough said about that.

However, I am going to give 'World Permissions' on the Downloads Directory. I want to be able to save files from the Net from anywhere on my machine... be it Linux or Windows or a Test System. And I plan on giving myself root group permissions. It is a local system and I am the main user and owner. I'll still be somewhat restricted -but- not totally.

The permissions for Users can be changed in one of two ways. Either via the Command Line while in root, or via YaST2. On the last part I am assuming that you have an openSuSE System.

The Directories and Files are better done from the Command Line. In fact I don't think there is a way to do it in YaST2. (I looked and didn't see anything obvious.) We need to know these commands anyway. chmod ugo +rwx would give ALL the permissions to everyone. For the most part that is NOT what we want to do. This can also be done as chmod 777. Octal digits can be used instead of the letters.

Oh Darn!!  A glitch... on my part. My Downloads dir is on a Windows NTFS Drive! Linux chmod doesn't do a thing. After scratchin' me head for a few, and searchin', I finally remebered that there are some special NTFS commands to do this. All I have to do is remember them! Think I discovered this in 11.3 -or- 11.2.

Well, it was in 11.2, and the same thing happened here... ntfs-config was left out... it is used to modify the read/write permissions on those NTFS Drives. -BUT- the fstab must also be modified.

This is the way it was configured -by default- by the System Install:
/dev/disk/by-id/ata-ST3300631AS_5NF1J2GA-part1          /windows/D  ntfs-3g    users,gid=users,fmask=133,dmask=022,locale=en_US.UTF-8 0 0
This is what is needed to make it practically useful:
/dev/disk/by-id/scsi-SATA_ST3300631AS_5NF1J2GA-part1	/windows/D	ntfs-3g    defaults,users,locale=en_US.UTF-8	0	0
and we need to alter the 'L' drive a little:
/dev/disk/by-id/ata-ST3300631AS_5NF1J2GA-part5 /windows/L  vfat  users,gid=users,umask=0002,utf8=true 0 0
Which needs to become:
/dev/disk/by-id/ata-ST3300631AS_5NF1J2GA-part5 /windows/L  vfat  users,gid=users,umask=0000,utf8=true 0 0

Allllrighty now... I did a test save from the Net through Firefox and it worked!! So, we are back in business. Works in RC2.

  System Time

 Still Broke!!  We were under the impression that the time problem was fixed. It was not. Annnddd.... the file 'adjtime' was/is not there! Created one. Re-booted and the time was/is correct.
September 11th, 2012 / 1:18pm Bug 779859

The time has been a problem in the last couple of openSuSE versions. There were complaints from others -but- there is also an explanation and a fix at: Configuring the Clock. In short, the time is based on the number of seconds since the Epoch (00:00:00 UTC, January 1, 1970). This is really crazy cause we do believe that they are gona run out of places. That was over 42 years ago!! This time will end on January 18th, 2038. That is 26 years from now. At our age and our health we don't think we are going to have to worry about it. Be to old at that time anyway.

Now back to the subject. One of the important factors to have set is the Time Zone. To convert the seconds since the Epoch the glibc API functions require the information of the timezone, that is, which Time Zone offset from UTC is used for local time and what rules like Daylight Saving Time (DST) must be applied. Now then, we set this Time Zone when we installed the System. Annnddd... it has stayed correct. So something is working.

Something that we don't understand... they say that the CMOS/BIOS clock should be set to UTC... -but- we have been setting it to Local Time forever... and the previous versions have understood it.

 Added July, 26th, 2012  Now then, we like to use Local Time. -And- we have since we started using Linux ... way back. So, lets analyze and investigate this...

  • /etc/sysconfig/clock - has always been there.
  • /etc/adjtime - new with systemd -and- openSuSE 12.2
  • BugZilla Ref
  • /etc/adjtime - the contents
       0.0 0 0.0
       0
       UTC -or- LOCAL

    From the manpage:
    The format of the adjtime file is, in ASCII:
    • Line 1: 3 numbers, separated by blanks:
      1. systematic drift rate in seconds per day, floating point decimal;
      2. Resulting number of seconds since 1969 UTC of most recent adjustment or calibration, decimal integer;
      3. zero (for compatibility with clock(8)) as a decimal integer.
    • Line 2: 1 number: Resulting number of seconds since 1969 UTC of most recent calibration. Zero if there has been no calibration yet or it is known that any previous calibration is moot (for example, because the Hard-ware Clock has been found, since that calibration, not to contain a valid time). This is a decimal integer.
    • Line 3: "UTC" or "LOCAL". Tells whether the Hardware Clock is set to Coordinated Universal Time or local time. You can always override this value with options on the hwclock command line.
    Problem and Fix:
    What we found was... the last line was set to UTC instead of LOCAL!! Reported it in the Bug 517959
    Well, it's 'broke' in RC2 also!!

    Refer: Time Precision - HowTo


      KDE4.x -and- KDE3

    KDE (Kool Desktop Environment) SC (Software Compilation) 4.8 released Jan 25 2012.

     26 Dec 11/11:12am   Refer: KDE4.8 Sched -or- KDE Software Compilation 4 (KDE SC 4)

    This version of openSuSE 12.2 will contain a released verion of KDE4.8.x. Not sure yet what the 'x' number will be. However, at this time, RC2, they are using KDE4.8.4 "release 2". -But- the 'Official' Release won't be till next month -and- a lot can change between now and then.

    Now the following is a repeat from our openSuSE 12.1 -but- we think it is neat so it is included here - to NOT get forgotten. After all, this is to become our "Main System".

    Allllrighty Now!! It is really, really simple to get the above view. (IF... you are using KDE4.6 -or- and I think, KDE4.7 it is different. Please see: KDE4.6 -or- 4.7)

    1. Click on the SuSE Orb in the Lower Left hand corner.
    2. Click on Configure Desktop
    3. In the window that pops up, under Workspace Appearance and Behavior, Click on Window Behavior and then Select Task Switcher IF it is not already selected..
    4. In the line - Effect, select Cover Switch from the dropdown menu.
    5. Click Apply down in the lower Right hand corner.
    6. Press and hold the Alt Key, then hit and release the Tab Key... keep the Alt Key held down.
    7. Your windows will look similar to the picture above.
    8. IF you click on one of the side windows it will become the center... and the window of focus when you finally release the Alt Key.
    9. Enjoy and show off your new found toy.


      System Notes

    Mime Type Icons can be found at: [/usr/share/icons]
    KDE4 sysinfo "My Computer" at:	 [/usr/share/kde4/apps/sysinfo/about/images]
    Desktop menu entry files at:     [/usr/share/applications]
    application's icon:              [/usr/share/pixmaps]
    directory of C header files:     [/lib/modules/2.6.22.5-31-bigsmp/build/include]
    list of TV stations:             [/etc/X11/xawtvrc]
    Wallpapers:                      [/usr/share/wallpapers]
    
    /usr/bin/vmware
    
    Emoticons at:                    [/opt/kde3/share/emoticons/Default]
    
    Karamba & Sensors at:        [/opt/kde3/share/applnk/Utilities]
    Karamba Themes at:               [/home/ctaylor/.kde/share/apps/superkaramba/themes]
    =======================================================================================
    In /etc/bash.bashrc:
    This will make the prompt char on the next line:
    	# Other prompting for root
    	_t=""
    	if test "$UID" -eq 0  ; then
    	    _u="\h"
    	    _p="\012 #"
    	else
    	    _u="\u@\h"
    	    _p="\012>"
    
    In /etc/bash.bashrc set the prompt to this to get the title lines you want.
    	*)
    	    # With full path on prompt
    	    # PS1="${_t}${_u}:\w${_p} "
    	    PS1="${_u}:\w${_p} "
    =======================================================================================


      Multi-Media & Restricted Formats

    Mulit-media & restricted formats we got from Carl's list for 12.2 in the Multi-media and Restricted Format Insatllation How to. To install them we did this the long way using YaST2 with the Packman 12.2 repos. You can get them from here:
    Index of /suse/12.2/
    It was necessary to mod his list a bit to install both the 52 & 54 versions of libavcodecs, libavformat, & libavdevice. Some Packman apps have problems if both aren't there. Some have problems even with both. For those that do, under 12.2, contact Packman; they want to know. We have had no problems with VLC, smplayer(packman's) amarok, kaffeine(Suse).


    Now then, the above was copied from the Forums and edited and stuck in here. We didn't get all that to work ... yet. Restricted formats/12.1

     VLC and Videolan / from our openSuSE 11.4 Page  This gets special attention because... there can be problems and I had some. First, it is recomended that you install libdvdcss via this repository Index of /pub/vlc/SuSE/11.3/ and then remove the repository. Seems that it and the Packman repos don't get along. Anyway, I had troubles with the initial install of VLC version 1.1.8. I couldn't display the wmv's attached to e-mails from my friends and relatives. After much research I found a "One Click" Install for VLC version 1.1.9. That cleared up my problem. (VLC means VideoLAN Client)


    Today is July 29th, 2012: As of today, in the following referal they DO NOT mention version 12.2. (That changed and they do now, October 21st, 2012) -But- in the Command Line examples at the bottom of this Reference, you can substitute the 12.2 version number for the var <openSUSEversion> and it works!!
    Refer: http://www.videolan.org/vlc/download-suse.html

    Ok. We are putting ALL of our info in here. No jumping around from page to page. This system is looking pretty good and we plan on keeping it a long time. Soooo... the info on this WebPage may, no will, get more abundant as we continue on. A lot of the stuff below gets installed IF you use the videolan commands above. BUT NOT ALL. You will have to do some of them.

     From our openSuSE 11.3 Page 

      Multi-media and Restricted Format Installation Guide

        Now then, we get e-mails from our friends and relatives. Annnddd... they send all these videos and sounds in these various formats. So we need to load up on the comparable creations for Linux that will handle these different formats.

        This info came from the openSuSE Forums. The Additional Repositories you will need are:

        1. Packman:        Index of /packman.inode.at/suse/12.2/
        2. Videolan VLC: Index of /download.videolan.org/pub/vlc/SuSE/12.2/

    N.B. You will install one package from VLC: libdvdcss That's it!! Then REMOVE this repo. Install this Package FIRST.
    I just copied this and then looked for info. Seems that Videolan and Packman can have some problems. So we just disable Videolan - not remove it.

    Then install these:
    • libavcodec52
    • libavdevice52
    • libdvdnav4
    • libdvdplay0
    • libdvdread4
    • libffmpeg0 ... as of 11.2 has been dropped. Replaced by first two in this list.
    • ffmpeg
    • libquicktime0
    • libxine1
    • libxine1-codecs
    • libxvidcore4
    • smplayer
    • vlc
    • w32codec-all ... may -or- may not cause troubles. We finally had to remove it.
    • xine-ui
    • xvidcore
    • libqt4-sql-sqlite

    Also see: Check your multimedia problem in ten steps and Restricted Formats/12.2


    Restricted Multimedia Formats (MP3, MPEG-4, etc.)

    Note: Different copyright and patent laws apply differently depending on what country you are in; if you are unsure about a particular restriction or patent, you might consider applying for legal advice. This site does not offer legal advice. For more information about why some formats/codecs are restricted and why they don't ship out-of-the-box on openSUSE, read Restricted formats.

    zypper addrepo -r http://packman.inode.at/suse/12.2/packman.repo
    zypper addrepo -r http://www.opensuse-guide.org/repo/12.2/libdvdcss.repo
    

    Install the packages:

    zypper install libxine2-codecs k3b-codecs ffmpeg lame gstreamer-0_10-plugins-bad gstreamer-0_10-plugins-ugly gstreamer-0_10-plugins-ugly-orig-addon gstreamer-0_10-plugins-ffmpeg libdvdcss2
    
    The above wa copied from Restricted Formats/12.2. They have a one click implementation on their site which you are welcome to use instead of the above. We prefer the more hands on method.


      My HP dm4-2165DX Laptop

    This entry is added... because. Really, due to extenuating circumstances, our Laptop has become more and more involved in our Local/Home operations. As stated elsewhere, in the beginning of this Document, we are moving over to the 64-bit world. Our Laptop came with Windows 7 Home Premium 64-Bit Edition installed. This turned out to be quite a powerful little machine. So, we are more or less combining the two. In fact, at this moment we are editing this file, which is on the Laptop, via Homesite, from within Windows 2000, via VMware 8, from with openSuSE 12.2 RC1.

    Now then, Windows 7 and openSuSE 12.2 seem to be working together like we haven't experienced since our SuSE 7.3 and Windows XP days. That was a time when things worked... like they said they would... for the most part. We had our whole household Networked together and the chief was SuSE 7.3. We haven't had that tightly a knit grouping since. Partly our fault, cause of time and partly cause of changes made in both SuSE and Windows... and we didn't keep up. That is changing here with these two 'latest' versions. (Windows 8 isn't officially out... yet. 24 Jul 12)

    Win7 Shortcut to Your Network - See the Neighborhood

    1. Right-Click on the Windows Orb (The Start)
    2. Click Properties
    3. Click Start Menu tab (IF not already selected)
    4. Click the Customize button
    5. Scroll down and click the Network box
    6. Click OK
    7. Click Apply
    8. Click OK

    A network shortcut will now appear on the Right-Side of your start menu. You can drag this icon onto your desktop if you care to have a Network icon on your desktop as well.

    openSuSE Neighborhood

    In order to see the Windows Shares, we must have Samba installed and working.

    1.


      Networking - Mainly Local


    Refer: SambaNotes
    Important to remember, Samba only runs on Linux machines.

     Samba:  This is at the top and repeated/copied from versions 11.4 and 12.1 cause... it, or they, didn't get started in those systems either. Two routines(daemons), smbd and nmbd need to be running in order to properly access the other systems and drives between Windows and Linux. They didn't get started automagically. -And- because this got copied... the dates may, or may not, be correct for this installation. But this applies to all three Systems.

     30 Jun 11  Annnddd... later we are finding nmbd NOT running. So this has been added to REMIND ME ... check smbd -and- nmbd ANYTIME you do NOT have communication between the Systems on VMware and your Main System. Also see the Apparmor note a little further down.

     26 Mar 12   Ok, we got another. I couldn't access my "New" Laptop from my Desktop. Kept getting server timeout. Searched the Web and the first item mentioned using:
        rcnmb restart && rcsmb restart
    which for lack of anything else... I did and... it fixed the problem!! Then I got to thinking (which I forgot to do in the first place) Hey! Why didn't I read my reminder above?? -But- since the restart commands will start a non-running nmb or smb that could have been the case. It just so happens that the individual that was having my same problem is also using openSuSE 12.1. Co-incidence??? (But now we are in/on 12.2 ... which is working fine!! AFTER a proper setup and restart.)

     What we need:  

    1. apache2 - running and started in runlevels 3 & 5
    2. dnsmasq - running and started in runlevels 3 & 5
    3. nmbd - running and started in runlevels 3 & 5
    4. smbd - running and started in runlevels 3 & 5
    5. smbpasswd -a username (as root)
    6. NO Apparmor!!!
    7. NO Firewall!!!
    What's installed:
    # rpm -qa | grep samba
    • samba-winbind-3.6.7-48.12.1.x86_64
    • yast2-samba-client-2.22.2-2.1.2.noarch
    • samba-winbind-32bit-3.6.7-48.12.1.x86_64
    • samba-krb-printing-3.6.7-48.12.1.x86_64
    • samba-client-3.6.7-48.12.1.x86_64
    • samba-3.6.7-48.12.1.x86_64
    • samba-32bit-3.6.7-48.12.1.x86_64
    • yast2-samba-server-2.22.3-2.1.1.noarch
    • samba-client-32bit-3.6.7-48.12.1.x86_64


     Added December 6th, 2012 / 6:07am  We may -or- may not need the following added to our /etc/xinetd.conf. Further investigation is required.

    #
    # swat   stream  tcp  nowait  root  /usr/sbin/swat  swat
    #

    Refer: SWAT Setup openSuSE
    E. When using Firefox to start Samba SWAT, you use the URL: http://localhost:901

    Ok. This is cool....

    Apparmor and the Firewall have both given us a lot of headaches over the years of our VMware usage. Now this latest version, of both, still hasF problems. Will have to investigate further -but- for now both are disabled. Most of our security is handled by our Router. So far ... without any problems. Most, in fact ALL, of the time, we do not allow outside access... even to ourselves. Only a couple of times to our trusted friend Scott Dudley.

     RunLevels & VMware - July 3rd, 2012  They still haven't fixed these. This appears to be an installation error that is fixed via the following steps:

    1. Go to YaST2 > System > System Services(Runlevel) >Expert Mode.
    2. Move down to, and select, VMware
    3. Uncheck levels 2 and 3.
    4. Ya only need, and must have, Runlevel 5.
    It is a VMware error -not- an openSuSE error. Till they get it fixed we have to watch this.

    Oh Bummer!  Well, it finally caught up with us. We copied the http.conf  file from 11.3 to 11.4 AFTER saving the newest one. To many changes and it did not work. That was why apache2 was not starting. Put back the newest one and apache2 is now running. Now to see if our local stuff will work.
    Injected Note: In this version, 12.1, we didn't copy the previous versio -but- we did edit the current one. Ok, in the System Runlevel Services apache2, nmb and smb are enabled with a Yes. (Simple Mode)    Still can not get nmb to run..?.!
    (-And- Yes. This all applies to this 12.2 version also.)

    Ok. Should have been smart enough to look here sooner -but- we weren't. In the /var/log/samba/log.nmbd it tells me why it can't start.

    [2011/02/03 00:12:57,  0] lib/fault.c:250(dump_core_setup)
      Unable to setup corepath for nmbd: Permission denied
    [2011/02/03 00:12:57,  0] nmbd/nmbd.c:857(main)
      nmbd version 3.5.6-2486-SuSE-SL11.4-i386 started.
      Copyright Andrew Tridgell and the Samba Team 1992-2010
    [2011/02/03 00:12:57.586374,  1] ../lib/util/params.c:513(OpenConfFile)
      params.c:OpenConfFile() - Unable to open configuration file "/etc/samba/dhcp.conf":
            Permission denied
    [2011/02/03 00:12:57.589025,  0] nmbd/nmbd.c:861(main)
      error opening config file
    
    So, now our quest is why can it not read the configuration file???

     Samba and Apparmor  Well, this is it. Seems that there is a problem with the apparmor security. We didn't think it was running cause ... we tried to stop it with
       'rcapparmor stop'
    and the command was not recognized. Then after embarrassing ourselves and telling everyone on the forum that apparmor 'was not' a problem on our system cause it wasn't running, only to find out that it was!!
    When you go into YaST2 and then System Services (Runlevels) we find out that:
         aaeventd -and- boot.apparmor
    are both running. We stopped them and then we were able to start smb and nmb -and- they stayed running. Now we can properly access all our Windows Neighborhood -and- the word is; they are gona fix it before the release.
    Well, they didn't. That is why this section was included in our 12.2 Info.

     The Good  Gota have a good note in here somewhere. We were able to transfer this WebPage up to our site via this installation of openSuSE 12.2 Beta2.

     Good and Bad  We are using openSuSE 12.2 RC1 quite heavily now - cause we like it!!! As mentioned elsewhere we are able to use our Windows 7 Laptop as our central data machine for our Web Pages. We are getting into VMware 8, firing up Windows 2K (Yep. We are still using it. Operations are very reliable under it!!), firing up Homesite (Haven't switched to TopStyle 4 ... yet.) and then editing our Web Pages -on the Laptop machine- ; -from the Desktop machine-. Good Samba Networking. The only 'bad' (IF you can call it that) is that we can not transfer up to our WebSite via the Desktop from the Laptop. Won't allow remote files to be transferred and we are not sure ... yet ... which is complaining. Our System -or- our ISP.

    Another good point is... When we connect to our Windows 7 Laptop it will ask for a 'Username' and a 'Password'. This is good for security. Annndd... along those lines of connection, it can -and does-, timeout. Annnddd... you must be sure to exit the App, Homesite, BEFORE turning off the Laptop. Annnddd... make sure you are in "Power On" Mode BEFORE closing the lid on the Laptop. In/On this Laptop, our HP dm4 2165DX, we can... (and probably so can others, just have to read the instructions...) set the machine up so that we can close the Lid and the System will 'stay active'. That way when Tasha the Streak(our new Kitten) decides to play Ricochete... bing bing bing... Rabbit, our Laptop keyboard won't be available to bounce off of and screw up our editing!! We have it set so that IF we are using the AC mode, the System will "Do Nothing" when the Lid is closed. IF we are in Battery mode it will "Sleep". And in Sleep mode we will not have access to the Hard Disk. So that is why in AC mode we do nothing so that we can still access our HD from the Desktop Machine. Clear??? Ssss-alllight.
    So how to keep Windows 7 laptop up and running when you close the lid?

    1. Click on the power icon on the right side of windows taskbar and click on More power options.
    2. Click on Change plan settings on the selected power plan. Click change advanced power settings.
    3. In the power options window, expand Power buttons and lid and Lid close action.
    4. Change it to Do nothing on both 'On battery' and/or 'Plugged in' based on your preference.
    5. Refer: How to keep Laptop On When the Lid is Closed?

     August 10th, 2012/2:19am  And we are happy to report that all this works in RC2.

       Some changes are needed to obtain local operations.

    One of the things I like about Linux is... I can setup my own WebSite Locally. I'm sure it can be done in Windows -but- it is more fun and understandable, to me, here in Linux. Please read the following changes carefully -AND- back up your originals BEFORE you make any of these changes.
    Just a note: We have setup our 'Local WebSite' on our Windows 7 Laptop using some software known as XAMPP.

    Annnndddd... a little caution and humor on the side. IF you setup a "Local" version of your WebPages watch out that you don't get confused as to which is which. Running them 'Locally' can, -and- does, look just like your site up on the Web. IF you would happen to forget to transfer it up to the Web, then you will NOT see the changes that you have made. -But- when you go back to the source --- there they are! We sometimes, like possibly you will, get side tracked and THINK that we have made a transfer... when in reality we haven't. It can be embarrassing and humorous all at the same time. -And then... and then we have the case where we are editing our source on one computer -from- another -and- we transfer the file from the "other" computer up to our WebPages and wonder why the changes don't show. Yep. We have made these mistakes. That is why this little paragraph is here.

    The httpd.conf file and the mod_userdir.conf file... both found in /etc/apache2.
    In the httpd.conf file ... add the Include for mod_userdir.conf and the other changes. I am allowing FollowSymLinks cause ... I have a SymLink to my local WebPages over on a Windows drive so I can Edit and View in both Systems. (Dual Boot)

    ln -s /windows/L/public_html public_html      ...which results in...
    public_html -> /windows/L/public_html/      ...in your home dir.

    (Of course, this assumes that the public_html that was originally there was empty -and- was removed.)

    These were the changes to the httpd.conf file:

    # added 13 Jul 09
    Include /etc/apache2/mod_userdir.conf
    
    # forbid access to the entire filesystem by default
    <Directory />
        Options Indexes FollowSymLinks
        AllowOverride None
        Order deny,allow
        Deny from all
        Allow from dusty-tr2.TRComputing
    </Directory>
    
    ... and in the mod_userdir.conf file ... un-comment the UserDir:
    # the UserDir directive is actually used inside the virtual hosts, to 
    # have more control
    UserDir public_html
    

    More changes for Samba Local ops

    Ok, got a second 'puter and the need developed to access the files in my Rezound work area on the 'old' one from the 'new' one. This envolved the following steps:

    1. On 'Old': Modify Samba smb.conf file and add:
      [CM11Rez]
              comment = Directory for Android development
              path = /home/ctaylor/Android/cm11.0-rezound
              browseable = yes
              read only = no
              create mode = 0755
              guest ok = no
              printable = no
    2. On 'New': Create TR7480 dir -- md TR7480
      I created it in my home dir.
    3. On 'New': mount -t cifs -o user=ctaylor   //192.168.0.3/CM11Rez   /home/ctaylor/TR7480
      It will ask for password.
    4. ls -F TR7480
      and it will list the dir on the 'Old PC'.
    5. Now I can compare the files ...
    6. Refer:  Mounting Samba  


      VMware 8

     January 9th, 2013 / 4:36am   This 'may' look a little jumbled in the dates and times. Reason is... We started out with version 8.0.3 and then 8.0.4 was discovered and finally at the end of the year 8.0.5 came out. Don't know if there will be anymore for version 8, or not, since version 9 is now out. However, they want another $119 for it. We may be at the end of our VMware updating.


     January 4th, 2013 / 8:23am  Wait!! Hold on... We have a new version:

    VMware-Workstation-Full-8.0.5-893925.x86_64.bundle
    File size:326M                VMware Workstation 8.0.5 for Linux 64 bit 
    File type: bundle
    Release Date:2012-11-06       MD5SUM:5dc860bfe285edb69e31c0889aa9211e 
    Build Number:893925 
    

    We missed this one... but got it now. -AND- it installed without any patches! The only problem, IF it can be called one, is libcanberra. It can't find it -but- it still loads up and works. It appears that libcanberra has something to do with sound. However, for the life of us, we can not find anything about it in our searches -- other than lots of others have had the same problem.

    We found this info on it, the sound, -but- it shows that they were using /usr/lib and ours is using /usr/lib64. That may be a problem... library changes like this have been in the past. We'll have to research it.

         Portable sound event library    Some SuSE info.

    Allllrighty now... we have an answer. This library is primarily for GNOME. We are using KDE and it is NOT needed. So, we edit the:
       /etc/X11/xinit/xinitrc.d/libcanberra-gtk-module.sh
    file and comment out the setting of:
       GTK_MODULES=canberra-gtk-module
    and replace it with:
       unset GTK_MODULES
    This eliminated those error messages at startup and sound works fine! Now we need to get VMware to check "which desktop" is being used before they try to load software that is not needed. Course with further investigation we may find the problem is with our SuSE -but- at this time we doubt it.

    Wellll... maybe we ain't so smart after all. The above did NOT stop GTK_MODULES from getting set. So for now, we just put an unset GTK_MODULES in front of our /usr/bin/vmware.


    We just brought down the latest version of VMware 8. Haven't even gotten the original version 8.0.2 installed and we are getting a newer one, version 8.0.3 8.0.4. The delays have been cause this version of openSuSE, 12.2, has been in a state of flux. Finally got a Beta1 which we got installed. It isn't perfect -but- then again it is not the Released version either. This is primarily for testing, so we are gona test it with VMware 8... the 64-bit version.

     June 10th, 2012 / 8:23am  

    VMware-Workstation-Full-8.0.3-703057.x86_64.bundle
    File size:324M                VMware Workstation 8.0.3 for Linux 64 bit 
    File type: bundle
    Release Date:2012-05-03       MD5SUM:aa9ce2d953f21f9d902de00ffd2fcb5c  
    Build Number:703057 
    
    We have a new version:
    VMware-Workstation-Full-8.0.4-744019.x86_64.bundle
    File size:326M                VMware Workstation 8.0.4 for Linux 64 bit 
    File type: bundle
    Release Date:2012-06-13       MD5SUM:de0ea94362f9c044bb4a03682dee2d05  
    Build Number:744019 
    

    VMware Workstation 8 System Requirements

    PC requirements:

    • System requirements:
      • 64-bit x86 Processor
      • 1.3GHz or faster core speed
      • 2GB RAM minimum/ 4GB RAM recommended
      • 1GB minimum available hard disk space for guest operating systems
    • Workstation installation:
      • 200MB of available disk space for Linux
      • 1.5GB of available disk space for Windows
    • For Windows 7 Aero graphics support in a virtual machines
      • 3GB RAM (Host PC)
      • Intel Dual Core, 2.2GHz and above or AMD Athlon 4200+ and above
      • NVIDIA GeForce 8800GT and above or ATI Radeon HD 2600 and above
    • Host operating systems* (32-bit & 64-bit):
      • Windows 7
      • Windows Vista
      • Windows XP SP2
      • Windows Server 2008
      • Windows Server 2003
      • Ubuntu 8.04 -11.04
      • Red Hat Enterprise Linux 5.0 - 6.1
      • CentOS 5.0 - 6.0
      • Oracle Linux 5.0 - 6.1
      • openSuSE 10.2 - 11.4
      • SuSE Linux 10.2 - 11 SP1
      • Mandriva Linux 2008 – 2011

    Now then, we don't really know why they are requiring a 64-bit Processor because they offer a 32-bit Host version. So, you are REQUIRED to have a 64-bit processor -but- you can load -or- install VMware on a 32-bit -OR- a 64-bit host ... depending on which version you download. We haven't tried the 32-bit version.
    -But- alas we put on our thinking cap. They are offering a 32-bit version cause... even though you have 64-bit hardware you can still be running a 32-bit System. Which is just what we had with our Desktop. Still do on the Windows Media side.

     Multi-Media 2:51pm  Installing the Multi-Media junk. Having trouble with two of them... libxine1-codecs and vlc. -And- we see in the forum that others are having troubles with these two. They claim a fix -but- we will just wait for the next Release.
    STILL, INSTALL THE MULTI-MEDIA STUFF BEFORE YOU INSTALL VMware 8.

     June 10th, 2012 - The INSTALL : Got side traced and now back to it. We first change to 'root' and then to the VMware 8 dir and then execute the command:
        sh VMware-Workstation-Full-8.0.3-703057.x86_64.bundle

    1. Presents a license agreement - to which we agree.
    2. It asks IF we would like to check for 'product updates' on startup -and- we say no. We'll check on our own.
    3. Next is a question about sending anonymous system data and user statistics to VMware 8. Again we are saying no. Have enough trouble just trying to get things to work normally. We don't need all these background operations. We'll help in other ways.
    4. Next it is asking us to enter the user that will initially connect to the Workstation Server. They are choosing 'root' which we will leave.
    5. Next we are picking a dir for our 'shared virtual machines'. We are going to accept their suggestion of
          "/var/lib/vmware/Shared VMs"
    6. Next they are asking for a port to use for 'https'. We are accepting their suggestion of:
          HTTPS port: 443
    7. Now we get the message "The product is ready to be installed." And we click on Install.
        Installing VMware Installer 2.0
        Installing VMware VMX 4.0.3
        Installing VIX core
        Installing Network Editor
           ....
        Installing VMware Player
           ....
        Installing Workstation
        Installation was successful.
      Missed a few, as signified by the dots, -but- we'll get them on the Next Install... IF we remember -and- are fast enough.

     June 10th / 9:19am  So, now we have an executable 'vmware' over in /usr/bin. We will try it from our home dir... we did and got the usual message for a first time run of VMware. It says that 'Several modules must be compiled and loaded into the running kernel -before- we can run VMware. So, we will click on the Install. And naturally we are asked for the 'root' password.

    It went off on a compile operation and Failed on two modules; vmblock and vmnet. We looked for fixes -but did not find any. Don't have time right now to do any more.

     Added June 13th, 2012 / 5:04am  There is a patch for vmnet. It is: Patches and it contains:
        vmblock.tar
        vmci.tar
        vmmon.tar
        vmnet.tar
        vsock.tar

     Presumptions are made...  From previous install and patch experiences we are making some assumptions.

    1. This MUST be a clean install. So we must uninstall anything previous -and- delete the dir /usr/lib/vmware.
      1. Open a konsole or xterm and log in to root as "su -"
      2. Stop VMware: /etc/init.d/vmware stop
      3. Uninstall the VMware Workstation. Type in:
        vmware-installer -u vmware-workstation
      4. AFTER changing to /usr/lib delete the VMware 8 directory by typing:
        rm -rf vmware
      5. After completely uninstalling 8.0.x workstation, uninstall vmnet and vmmon kernel modules:
        # modprobe -r vmnet vmmon
      6. Reinstall VMware-Workstation ... (We're using the 64-bit version this time)
    2. sh VMware-Workstation-Full-8.0.3-703057.x86_64.bundle
      This installs a fresh copy of VMware 8 The install steps are the same as the ones listed above. The Install was successful.
    3. Unload vmmon kernel module (again!)
      # modprobe -r vmmon
      This step may -or- may not be necessary. Don't use it and IF you have troubles do everything again and include this step... -or- not.
    4. Now we are going to essentially swap out some modules: (the ones listed above) In performing these patches.

     June 14th, 2012 / 3:01am  We successfully installed VMware 8 and brought up our Win2k. We don't have our Samba and Networking setup... yet... so naturally our Win2k couldn't see the other drives. -But- it will work!! This is our FIRST USE of VMware 8. It looks different and seems to be ok. More info as we use it.

     January 9th, 2013 / 5:02am  As stated in the beginning, because of version changes during our install and use of openSuSE 12.2, things gto kinda jumbled. Now IF you are installing version 5 -- jump down to Version 5 Finish.

    Hmmmm. Guess we should mention how this was accomplished. Just have to remember and descramble the steps. First we need to recognize Stefano Angeleri from whom these 'fixes' were obtained. Brought down his fix; vmware802fixlinux340.tar.gz ; which contained:
       vmware3.4.0.patch
       patch-modules_3.4.0.sh
    We didn't use the patch-modules, we just executed the VMware patch -- AFTER using some previous procedures..
    All this is needed in RC1 and it works just like it is.

       cd /usr/lib/vmware/modules/source     # Move into the dir

       $ for i in ./*.tar; do tar -xf $i; done       # Extract the sources
       $ for i in ./*.tar; do mv $i $i.orginal; done    # Save the Originals

    # Copy vmware3.4.0.patch to this source dir... and execute it.
       patch -t -f -p1 < vmware3.4.0.patch

    # Now we re-create the tar's:
       $ tar cf vmblock.tar vmblock-only
       $ tar cf vmci.tar vmci-only
       $ tar cf vmmon.tar vmmon-only
       $ tar cf vmnet.tar vmnet-only
       $ tar cf vsock.tar vsock-only

    # Configure VMware 8:
       vmware-modconfig --console --install-all

    Launch VMware Workstation 8.


     June 26th, 2012/3:34pm  Because we are curious by nature -and- because we need -and- want to find out... we are NOT going to put in the "Patches" for this first run of VMware 8 on our openSuSE 12.2 Beta2. Why??? Cause it is a newer version of the kernel. We are up to 3.4.2-1 now. -BUT- it is NOT a newer Version of VMware 8.
    Hmmmmm... should have checked that first -cause- there is a newer version. So now we are going to have to remove the one we just installed and then install the new one. Bummmmer!!! Was hoping for a clean installation. New version is:

       VMware-Workstation-Full-8.0.4-744019.x86_64.bundle Last updated: 13 JUNE 2012

    Release Notes

    So, we brought down the "Newest" version of VMware 8 and installed it. This was performed as 'root' so now we exit and Re-SignOn as ourselves. We have not yet been asked for the license, which we purchased a couple of months ago, but it will probably ask for it when we sign on here. The command to do that is:
       /usr/bin/vmware
    Annndd upon entering that we get a number of command lines and then a dialog box that says it must compile several modules and load them into the kernel. -- Here is where we find out IF fixes are needed.
        OH DARN!!!!

    Complained about the modules. Another Un-install and then Re-install and then try the patch. Looked for new patches and none were found.

      Version 5 Finish  

     June 26th, 2012 / 5:03pm  Allllrighty now. We have success!! It installed -and- we brought over our trusty Win2K and it worked!! Movin' right along.
    Needed to upgrade Tools from VMware 7 to VMware 8. This is to be added to the virtual machines's vmx file. Read KB article 1714 for tips on editing vmx file.
    We just used kwrite.
    isolation.tools.guestInitiatedUpgrade.disable = "FALSE"
    NOTE: - You must completely exit VMware. -Or- it will over write your change.

     RunLevels - July 3rd, 2012  They still haven't fixed these. This appears to be an installation error that is fixed via the following:

    1. Go to YaST2 > System > System Services(Runlevel) >Expert Mode.
    2. Move down to and select VMware
    3. Uncheck levels 2 and 3... only want 5.
    It is a VMware error -not- an openSuSE error. Till they get it fixed we have to watch this.


      nVidia and the Kernel

    Refer: SUSE LINUX Enterprise Server 9 Administrator's Handbook
    openSUSE Graphic Card Practical Theory Guide for Users

     Note:  The video info is spread "across" both sections. Here and the Nouveau section. Some things apply to both. So, with appologies, we say... look in both.

     UPDATE: March 6th, 2013 / 10:15am  We have a new Native nVidia Driver - 304.84 - Released on 4 Mar 13. Got it installed on our 12.2 version today. Now we need to see IF it got rid of our Freeze-Ups. Last-today we installed 304.64 on the 12.3 version with fix-ups from Larry Finger. It will be replaced with this newest version shortly.
    Special Note: Today, March 8th, 2013 at 4:03am we are starting our extensive testing of this Video Software. Computer has been on for hours but doing nothing. We are having trouble with CTRL-ALT-F1. On this new driver it is a blank screen. Trying to find out why. We also got it loaded in 12.3 and it is having the same problem. Course it had it before. Both have the same wierdness at sign-off. A scrambled, colorful screen full of characters/images.

     Another Update: March 13th, 2013  We searched for an answer on the CTRL-ALT-Fx problem. Found one in a discussion on LinuxQuestions.org

    					   
    More permanent solution to the Ctrl-Alt-F1 to Ctrl-Alt-F6 blank screen problem
    I tested impert's suggestions in detail and arrived at the following fix.
    In interest of readability I repeat myself.
    
    My five points are as follows:
    
    1) I first discovered that Ubuntu does not use /etc/inittab ... so workaround 
       suggesting modifications thereof are unhelpful.
    2) Lack of inittab is not a problem if it turns out that getty is running. Do a 
       top and check that getty or mingetty is running.
    3) To be really sure getty is running, do ctrl-alt-f1 and assume you are at a 
       login screen even though screen appears blank.
    Log in as root (on Ubuntu I always enable root) and type reboot. For me it worked. 
    That confirmed that I did have a functioning terminal -- but it was invisible.
    4) Modify /etc/default/grub looking to delete "quiet splash" as has been suggested
       several places and make the following specific changes:
    Code:
      #GRUB_CMDLINE_LINUX_DEFAULT="quiet splash"  <-- Commented this line out
      #GRUB_CMDLINE_LINUX=""   <-- And this one -- and added the following two lines:
      GRUB_CMDLINE_LINUX_DEFAULT=""
      GRUB_CMDLINE_LINUX="nomodeset"
    
    5) As root, run update-grub and reboot.. Problem solved!
    It is entirely possible that even more minor changes to /etc/default/grub will work 
    ... but I only tested this far.
    

     May 12th, 2012  

    It has been announced that the newest kernel at this time, 3.4.6 Jul 26 09:36:26 UTC 2012, will be included in this release of openSuSE.

    Linux 3.4.6 includes a whole host of changes to drivers for AMD, Intel and NVIDIA graphics chips. The new kernel, expected to be released later this month, also contains a new USB DisplayLink driver and lays the foundations for better support for hybrid graphics technologies such as NVIDIA's Optimus.
    Refer: nouveau section -- just for grins

    Some other Info:

    1. S.A.K.C. - SUSE Automated Kernel Compiler - Version 2.75
    2. nixCraft
    3. NVIDIA Accelerated Linux Graphics Driver README and Installation Guide
    4. X86-64 Explained

     January 3rd, 2013 / 1:15pm  Today, we looked at the YaST2 graphics section -and- they have the nVidia 304.64 driver as their latest selection. Even though we have done it the "Hard Way" we are going to "Update" our system with this version. Something might be in there that we missed -or- they might have added something that we don't know about. It is even stated on the nVida Site that some manufaturers provide "special" versions of their Drivers. So, one last try, cause nVidia isn't providing anything newer... yet.
     January 14th, 2013  OK. We haven't experienced any lockups... yet... -but- we have been bouncing back and forth between 12.2 and 12.3. In 12.3 we are using the nouveau Driver. No lockup there either -and- it is performing great. First time the nouveau Driver has worked this good on our System. This is good since it is possible that nVidia has ceased support for our board. -But- that is NOT a definite... yet.
    We would just like to get a System that is reliable and will NOT LockUp -or- Crash while we are working on things... like our new Smartphone. Partially because of this Driver situation we have NOT fully recovered from our Hard Disc Crash almost a year ago!! One of these two will become our "newest" Main System -but- 12.3 isn't going to be released until March. Certainly in that time one of these two can be proven to be reliable.

     October 29th, 2012  We are putting this at the top cause IF it works, it will be of greatest interest to other nVidia users. What?? Well, we like some others, have been experiencing random System Freezes. During all the Net research and reading of the forums almost everyone was blamming nVidia Graphics. So we plodded along updating to the newest drivers as each came along.

    Now then we got the latest System updates and part of them were for Xorg. This we found out made a difference in the Video operations. Well it should. -But- it stopped our nVidia driver from working -or- at least for the most part. When we ran the nvidia-settings app it said the drivers were not running. However, this was a similar experience that we had in the last RC2. There was enough of the nVidia driver left that it made the nouveau operate smoothly. Part of this was accomplished through the "recovery" bootup. The normal boot was giving us a Black screen.

    In order to get the nVidia drivers to work with these latest updates, we had to add "nomodeset" to the Grub2 command line. That in itself is a task. At any rate with this nomodeset added in we could get a proper runup of our system and the graphics.

     Note: October 19th, 2012 / 02:43am   Now then, as stated in many, many places; either actually -or- in our mind; ... THESE WEB PAGES ARE PRIMARILY FOR OURSELVES ... IF THEY ARE OF ANY HELP TO ANYONE ELSE -GREAT-. However, IF you are trying to use the info in this nVidia section to setup your machine --- READ IT ALL!! It has trials -and- tribulations discussed and mentioned. Various confgurations MAY BE mentioned. So get them straight and DO NOT get in a hurry.

    The NVIDIA graphics driver uses a Unified Driver Architecture: the single graphics driver supports all modern NVIDIA GPUs. "Legacy" GPU support has been moved from the unified driver to special legacy GPU driver releases.

    The NVIDIA graphics driver is bundled in a self-extracting package named NVIDIA-Linux-x86_64-nnn.nn.run. On Linux-x86_64, that file contains both the 64-bit driver binaries as well as 32-bit compatibility driver binaries; the NVIDIA-Linux-x86_64-nnn.nn-no-compat32.run file only contains the 64-bit driver binaries.

    Linux x64 (AMD64/EM64T) Display Driver

    Version 295.40      295.59       295.71       304.37       304.43    304.51    304.60
    Release Date Wed Apr 11, 2012     Mon Jun 11, 2012     Mon Aug 13, 2012     Aug 27, 2012     Sep 24, 2012     Oct 18, 2012
    Operating System Linux 64-bit
    Language English (US)
    File Size 55.74 MB       55.8 MB       61.1 MB

    Release Highlights

    • Added support for the following GPUs:
      • GeForce GT 635M
        GeForce 610M
        ...more added. See Reference
    • Closed a security vulnerability which made it possible for attackers to reconfigure GPUs to gain access to arbitrary system memory. For further details, see: http://nvidia.custhelp.com/app/answers/detail/a_id/3109
    • Fixed a bug that caused DisplayPort devices to occasionally fail to turn back on after the system is resumed from suspend.
    • Added a ModeValidation X configuration option token, "AllowNon3DVisionModes", to allow modes that are not optimized for NVIDIA 3D Vision to be validated on 3D Vision monitors.
    Refer: nVidia

     nVidia 304.60/October 23rd, 2012/11:49ap We brought down the "Latest" nVidia Driver so that we might have the "Latest" of everything. Even though nouveau displays better, it is still not right for our system. Moving windows is to slow -and- it lags and then goes to far in the movements. We are not even going to bother checking VMware 8 operations with it. Just gona install the nVidia Driver.
        Version: 304.60 Certified
        Release Date: 2012.10.18
        Operating System: Linux 64-bit
        Language: English (U.S.)
        File Size: 61.1 MB
        Refer: nVidia Drivers

    Now then, we and a lot of the rest of the openSuSE Community have been experiencing System Freeze Ups with this latest version of openSuSE 12.2. This is the 3rd "fix" that is supposed to correct that problem. We'll see....


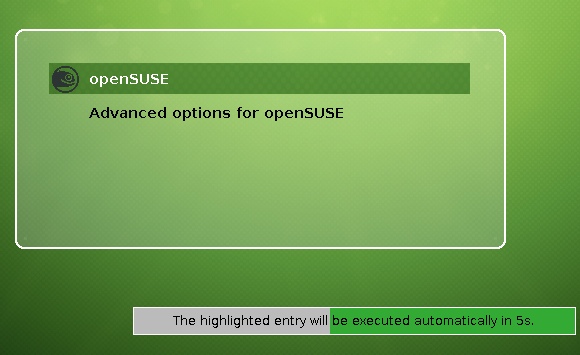
    Ok. We have a BIG Change...


     GRUB2  We decided to use Grub2, the new default, in this install on our "Main System". Things are a little different with it. This will be noticed by the new screen at boot-up. It is not the usual text mode. -And- it does not have an options line.

    To compensate for this: At the initial Grub2 Screen just hit the 'e' key if you are on the correct line... which is normally the first line listed. (IF you are not on the correct line hit the 'Down Arrow' to stop the timeout.) This 'e' will put you into an editor. That may be a misnomer cause... the changes you make are NOT really saved. Leastwise with the commands we have learned so far. The changes will only be for the current boot-up. The Arrow keys will navigate you around the screen. Look for a line that starts with "linux /boot/..." and probably spans two -or- more lines. At the end of the line it will have "quite showopts". After showopts type a space and then 'nomodeset'. IF you want to go into commandline mode, also add a space and a '3'. Use Ctrl-x to boot into the system. It will show a black 'Commandline Screen' and then the 'Plymouth Geeko' screen and then a 'Commandline Screen' waiting for you to login.

    Logon as 'root'. Move to the dir in which you have previously downloaded the nVidia installer that you want to use. (Type in "sh NVIDIA" and then hit the TAB key to finish the name.
    Then enter a "-q" Then hit ENTER) Example:

    sh NVIDIA-Linux-x86-xxxxxx -q

    The -q means use the default answers, which are usually yes. You might want to use -aq to avoid the licensing question.

    After the install is finished you need to execute:

    "modprobe nvidia"

    Now do a "shutdown -r now" and login normally. Well, that is not totally true. You may have to place a "nomodeset" in your boot parameters.

    So how do we do that in this new Grub2?? As 'root' we edit the file '/etc/default/grub'. In the editor, scroll down to the line that begins with GRUB_CMDLINE_LINUX_DFAULT and add a space plus 'nomodeset' at the end of the line. As usual, leave out the quotes. After the edit, run
        grub2-mkconfig -o /boot/grub2/grub.cfg
    to update the main configuration file.

    /etc/default/grub -- Chapter 8. The Boot Loader GRUB2

    Problems will arise if applications use the wrong version of a library. This can be the case if there are either old libGL libraries or stale symlinks left lying around. If you think there may be something awry in your installation, check that the following files are in place (these are all the files of the NVIDIA Accelerated Linux Graphics Driver, as well as their symlinks):

        /usr/lib/xorg/modules/drivers/nvidia_drv.so
        /usr/lib/xorg/modules/libwfb.so (if your X server is new enough), or
        /usr/lib/xorg/modules/libnvidia-wfb.so and
        /usr/lib/xorg/modules/libwfb.so -> libnvidia-wfb.so
    
        /usr/lib/xorg/modules/extensions/libglx.so.x.y.z
        /usr/lib/xorg/modules/extensions/libglx.so -> libglx.so.x.y.z
    
        (the above may also be in /usr/lib/modules or /usr/X11R6/lib/modules)
    
        /usr/lib/libGL.so.x.y.z
        /usr/lib/libGL.so.x -> libGL.so.x.y.z
        /usr/lib/libGL.so -> libGL.so.x
    
        /usr/lib/libnvidia-glcore.so.x.y.z
    
        /usr/lib/libcuda.so.x.y.z
        /usr/lib/libcuda.so -> libcuda.so.x.y.z
    
        /lib/modules/`uname -r`/video/nvidia.{o,ko}, or
        /lib/modules/`uname -r`/kernel/drivers/video/nvidia.{o,ko}
    

    If there are other libraries whose "soname" conflicts with that of the NVIDIA libraries, ldconfig may create the wrong symlinks. It is recommended that you manually remove or rename conflicting libraries (be sure to rename clashing libraries to something that ldconfig will not look at -- we have found that prepending "XXX" to a library name generally does the trick), rerun 'ldconfig', and check that the correct symlinks were made. An example of a library that often creates conflicts is "/usr/X11R6/lib/libGL.so*".

    If the libraries appear to be correct, then verify that the application is using the correct libraries. For example, to check that the application /usr/X11R6/bin/glxgears is using the NVIDIA libraries, run:

        % ldd /usr/X11R6/bin/glxgears
            linux-gate.so.1 =>  (0xffffe000)
            libGL.so.1 => /usr/lib/libGL.so.1 (0xb7ed1000)
            libXext.so.6 => /usr/X11R6/lib/libXext.so.6 (0xb7ec0000)
            libX11.so.6 => /usr/X11R6/lib/libX11.so.6 (0xb7de0000)
            libpthread.so.0 => /lib/tls/libpthread.so.0 (0x00946000)
            libm.so.6 => /lib/tls/libm.so.6 (0x0075d000)
            libc.so.6 => /lib/tls/libc.so.6 (0x00631000)
            libnvidia-tls.so.304.64 => /usr/lib/tls/libnvidia-tls.so.__DRV_VER__ (0xb7ddd000)
            libnvidia-glcore.so.304.64 => /usr/lib/libnvidia-glcore.so.__DRV_VER__ (0xb5d1f000)
            libdl.so.2 => /lib/libdl.so.2 (0x00782000)
            /lib/ld-linux.so.2 (0x00614000)
    

    Check the files being used for libGL -- if it is something other than the NVIDIA library, then you will need to either remove the library that is getting in the way or adjust your ld search path using the LD_LIBRARY_PATH environment variable. You may want to consult the man pages for ldconfig and ldd.


        End Big Change
          The following nVidia stuff was for the Pre-Releases.

    Hmmmmm... interesting. We could not use the Ctl-Alt-F1 and then init 3. The system crashed. At least the Video portion. We are going to Re-Boot and set the parameters in the Boot Options line.
    Note: In RC1 and RC2 we can do this!! July 15th, 2012 / 1:49pm September 3rd, 2012 / 11:48pm

     A little Note:  In this version, 12.2, they have finally placed the '[' ']' brackets around the responses in the Boot-Up lines of code that get displayed IF you press the Esc key or have it set that way by default. Either they listened to my suggestion -or- someone else thought of it too. I have been adding them to the rcstatus file ever since version 6.2!! Now I no longer have to do it.


          Finally we get to the procedures....!!
    To perform these operations we need to get into a Terminal as root.

    This particular step (what step??? - the blacklist step!!) we believe is no longer needed. nVidia adds an nvidia.conf file that contains this "blacklisting". For now we'll skip it and IF it becomes a problem we will return and state so.

    # Prevent nouveau and nVidia conflicts by BlackListing nouveau.

        echo "blacklist nouveau" >> /etc/modprobe.d/50-blacklist.conf


    ** Now then, you put the following code in a file, call it say ... NoKMS.sh and save it in the same dir that you saved the nVidia file in.
    Execute it as: sh NoKMS.sh

    # Kernel Mode Setting is NOT supported by nVidia, so we remove it.
    # recreate initrd without KMS, if the use of KMS is enabled in initrd
    if grep -q NO_KMS_IN_INITRD=\"no\" /etc/sysconfig/kernel; then
    sed -i 's/NO_KMS_IN_INITRD.*/NO_KMS_IN_INITRD="yes"/g' /etc/sysconfig/kernel
    mkinitrd
    fi
    -OR-
    if grep -q KMS_IN_INITRD=\"yes\" /etc/sysconfig/kernel; then
    sed -i 's/KMS_IN_INITRD.*/KMS_IN_INITRD="no"/g' /etc/sysconfig/kernel
    mkinitrd
    fi

    OR you could just edit the "/etc/sysconfig/kernel" file and change the "no" to "yes".

    ***** Ok we have a change here. In openSuSE 12.1 the "logic" has been changed.
    ***** The setting is now called KMS_IN_INITRD and it is set to "yes". We
    ***** must change it to "no" in order to use our nVidia Drivers.

    Ok... in 12.2 we have a change again. They went back to NO_KMS_IN_INITRD="no". Sooooo... for our purposes we must change the "no" to a "yes". Everybody clear on that??? not really


    Change the script file accordingly.

    After changing the above file, do a "mkinitrd" (IF you did not do it in a script) then
    Reboot your machine 'shutdown -r now' and enter 'nomodeset 3' on the Boot Options: line.(without the quotes)

    Use the nVidia installer that you downloaded. Switch to the dir where you
    saved it and execute the following:
    (Type in "sh NVIDIA" and then hit the TAB key to finish the name.
    Then enter a "-q" Then hit ENTER) Example:

    sh NVIDIA-Linux-x86-xxxxxx -q

    The -q means use the default answers, which are usually yes. You might want to use -aq to avoid the licensing question.

    Now pay attention here. The nVidia installer will tell you to use SAX2.
    DO NOT!! It is no longer available. They are working on a SAX3 -but- it is NOT ready yet. Now then, we get a big OK and it was succesful.
    After the install is finished you need to execute:

    "modprobe nvidia"

    Modprobe is used to add a loadable kernel module (LKM) to the Linux kernel or to remove an LKM from the kernel.
    Refer: WikiPedia

    Now do a "shutdown -r now" and login normally. Well, that is not totally true. You may have to place a "nomodeset" in your boot parameters.
    Also, it has been learned there is a KDE4 conflict. IF the Logon does not finish loading you probably need to edit a file in KDE4... which is described in the KDE4 section.

    IMPORTANT: You need to recompile and install the nVidia kernel module
    after each kernel update. This is done with the following command:

    sh NVIDIA-Linux-x86-xxxxxx.run -K

    IF you need to UnInstall it do the following:
    sh NVIDIA-Linux-x86-xxxxxx.run --uninstall

     July 15th, 2012/2:06pm  The nVidia Driver, 295.59, works fine with RC1. Well, except for the .xinitrc as noted below.

    nVidia Note:  It works like this (if you didn't know already): First number indicates the series of the card, for example 7300LE is 7 series, 8800 is 8 series and 9300 is 9 series. Next three numbers indicate the perfomance level of the card. 000-400 means it's a low-perfomance card (like mine), 400-700 means it's mid-range and 700-900 means it's a perfomance card. My wife's machine has an nVidia 7600GT, a mid-range card which works good for her games. If she keeps on, we may have to get her a High Performance card. Then I can have hers!!

      One driver for all products
    • There is one single NVIDIA Driver for all our products. To select your download:
      1. (a) if you have a GeForce, Quadro, TNT2 or RIVA, click on Graphics Driver and select your product and Operating System, else
      2. (b) if you have an nForce Motherboard, click on Platform / nForce Drivers, select your nForce product and choose your Operating System.
      3. European users: please download the "International" version (where available) of the NVIDIA Driver.


    Well, we have a problem, still, with our .xinitrc file. The two windows that we have automagically loaded are coming up short... by about 1/4 of their size. However, the rest of the video operations are fine. Windows can be moved and there is no lag or continued movement. Works like it should.

     July 15th, 2012/2:31pm  The xterms in the .xinitrc are still coming up short and all the way to the top. For some reason it is using the Failsafe options. Needs further investigation.
    Well, we did. Problem is ours!! We used our previous .xinitrc and it is NOT the same. There are subtle differences and it won't work. Must have the newest version.

     August 9th, 2012/9:33am   Well, as mentioned above, using the newest .xinitrc did NOT work in RC2. We haven't installed our nVidia Driver yet so before complaining alot we will do that.
    Well, guess a complaint is in order. After the nVidia installation the Terminal windows are still out of place on boot-up. Further investigation is needed.


          End nVidia Pre-Release stuff


      nouveau Gallium

    Refer: SUSE LINUX Enterprise Server 9 Administrator's Handbook

     Note:  The video info is spread "across" both sections. Here and the nVidia section. Some things apply to both. So, with appologies, we say... look in both.

    Wow.... In all the years we have been using SuSE and openSuSE, the only Graphic Drivers that properly worked with our System were the Native nVidia Drivers. When the nouveau drivers were loaded, usually by default at install time, the operations were NOT smooth -and- we had no 3D according to our VMware operations. Now in this latest version, openSuSE 12.2, things have changed. This we have learned via the RC2 and the latest updates -before- even getting the Public Release... which is due in a couple of days on September 5th.
    Refer: nouveau Gallium

    Now then, upon first startup -after- updating to the latest we got the following message:

    We had that in the 12.1 version -but- don't remember exactly what it was all about.
    Refer: openSuSE 12.1 nomodeset in Grub.

    -But- we are still gona put in our latest nVidia Driver.


     November 19th, 2012/10:57am  Ok. Things have changed. We are having System Freezes to often. We are going to try the "trick" of switching over to the Nouveau Driver -but- still have the nVidia Driver installed. This can get tricky -but- thanks to oldcpu and pilotgi on openSuSE Forums we have some good advice and ways of doing it.

    One ofthe reasons we are calling this a trick is... cause during our initial testing with the Milestone Releases we had a time that it switched to Nouveau "on its own" and we were using Nouveau -but- thought that we were still on nVidia. Now we are having these constant Freezes right in the middle of something important and we need to find a fix. So far it has been "analyzed" as being a problem between nVidia and Linux. So, we are gona try this route.

    1. Switch to "init 3" mode.
    2. Remove the "blacklisting" of nouveau. It may be in one -or- two places, depending on whose instructions you followed. Anyway, check for:
          /etc/modprobe.d/nvidia.conf -or- /etc/modprobe.d/50-nvidia.conf
      and either remove them or at least edit them and comment out, or remove, the blacklist on nouveau.
      Rut, Roh... we made a mistake.(it happens...) We haven't been this low in the code for a while and didn't realize that 50-nvidia.conf and nvidia.conf are not even close to being the same thing. Further explanation below...
      One other place to check is:      /etc/modprobe.d/50-blacklist.conf
      It may also contain a nouveau blacklisting. Fix it IF it is there... please. We got cover all the bases.
    3. Next we need to change:
           /etc/sysconfig/kernel
      You can do this through YaST2 -or- just edit the file. Use "vi" if you can. Less chance of formatting characters getting in there. Anyway, what you need to change is:
           NO_KMS_IN_INITRD -- change it to "no"
    4. After changing the above file, do a "mkinitrd" (IF you did not do it in a script).
    5. Now IF you put "nomodeset" in your grub -or- grub2 boot up, you need to remove it.
    6. Ok - let's restart:   shutdown -r now
    7. ***** IF you still experience problems then as a last resort -- remove the nVidia Native Drivers.
    8. Switch to "init 3" mode.
    9. Move to the dir with the nVidia Drivers and execute:
      sh NVtabkey -uninstall
    10. Well, it didn't work as planned.... frown.. I really hate grub2!!!!
    11. We put it all back to native nVidia.

     Nov 19th / 3:21pm  Ok. Here we are in the afternoon. Been strugglin with this all day. Now you will notice up above that we kinda declared 50-nvidia.conf and nvidia.conf to be the same. Well, they are not. The later, IF it exists, only contains "blacklist nouveau". The other file, 50-nvidia.conf, actually has some configuration information in it. However, we accidently in our efforts above deleted it. Well, it was on purpose, but stupidly. OK. Anyway, we got it back. It contains:

    options nvidia NVreg_DeviceFileUID=0 NVreg_DeviceFileGID=33 NVreg_DeviceFileMode=0660
    This file, and the values are discussed here: nVidia FAQ

    Now these values were talked about by others in the conversations that we happened upon in our openSuSE Forum. There have been other conversations by other Linux users and they have all centered on nVidia... concerning these freezes.

    Ok, now we come to the crazy part of all this. It appears that removing that file,   /etc/modprobe.d/50-nvidia.conf   , may have fixed it. Anyway, things feel, and look and are stabler.
    November 19th, 2012 / 3:51pm


     Nov 19th, 2012 / 6:13pm  Alllllrighty Now!! We have encountered some info that might, just might put some light on these problems. It comes from ArchLinux -but- it comes from the 2006/2007 time frame. And it is concerned with the values mentioned up above: ArchLinux Bug

    ***** What we have:
    > ls -l /dev/nvidia*
    crw-rw-rw- 1 root root 195,   0 Nov 19 13:32 /dev/nvidia0
    crw-rw-rw- 1 root root 195, 255 Nov 19 13:32 /dev/nvidiactl
    
    ***** it should be rw-rw-r-- and the group should be video video
      # nvidia's devices permission the right way
      options nvidia NVreg_DeviceFileUID=0
      options nvidia NVreg_DeviceFileGID=91
      options nvidia NVreg_DeviceFileMode=0660 

    Unfortunately, the above "new" old information is more or less what the 50-nvidia.conf file is specifying. Except the 91. In ours it is 33 - which, according to some more "old" information, is what the 'default' video group is for SuSE.
       Video  |  33  |  Members in this group have rights over the video card/device.
    Soooooo, it is correct.?.?      Refer: SuSE Info     and look at the 2nd table!!

     Note:  Using the command:
      cat /etc/group
    we find:  

    video:x:33:ctaylor
    _____ _  _  _____
    |     |  |    |
    |     |  |    |
    1     2  3    4
    1. group_name: It is the name of group. If you run ls -l command, you will see this name printed in the group field.
    2. Password: Generally password is not used, hence it is empty/blank. It can store encrypted password. This is useful to implement privileged groups.
    3. Group ID (GID): Each user must be assigned a group ID. You can see this number in your /etc/passwd file.
    4. Group List: It is a list of user names of users who are members of the group. The user names, must be separated by commas.
    This shows that the 'video' group is '33' and that we are members of that group.

    -BUT-, because we deleted the 50-nvidia.conf file, the two files of concern are owned by root, which has FULL 'rw' permissions. -WHICH- possibly indicates some kind of conflict over the 'video' information. 'Why?' Because right now we are NOT experiencing any FREEZES. -BUT- we are only in "Day 1" of our trial.
    November 19th, 2012 / 10:57am (approx time we deleted the file.?.?)
    And right now(November 20th, 3:03am) we have a heck of a lot of 'stuff' going on.

    • 2 Dolphins
    • 2 Firefox's - each with multiple Tabs open
    • 1 nEdit
    • 1 VMware with Win2k with Homesite - Editing this file. And we have a WinExplr inside Win2k showing the files on the Laptop.
    • 2 XTerms
    • -and- we are networked to our Laptop - Editing the above mentioned WebPages from the Desktop.
    • Annnnddd... we are leaving 'both' systems running... 24 x 7... cause that is part of the test. Our last couple of Freezes were when we were using these systems for these extended amounts of days/time. During this 'uptime' the amount we have going will vary along with some extended periods of 'idle' time. We are NOT on them 24x7. But as you can see by the times, sometimes it gets close. what?

     November 20th, 2012 / 6:31am  Ok now, we didn't have a "Freeze" -but- we did have a lock-up inside Firefox. It died!! Don't know why but right now the dog wants to go for her walk. So we are gona take a break.

     November 24th, 2012 / 11:07am  Once again we did not have a Freeze -but- we shutdown all the Apps that we had going to see IF the system would speed up and NOT be so sluggish. The 'App shutdown' was for about 7 minutes. Then we started VMware back up so we could get into Homesite and make these notes. It may be a little faster -but- still NOT fast enough... NOT like it used to be. So we are gona try the acid test, a FULL Power Off shutdown and then see how fast it is.

     November 24th, 2012 / 1:14pm  At 11:14am we shutdown 'both' computers and took a break. Now, at this time, we have fired 'both' back up and have them Networked together. This verbiage is being entered into the WebPage files on the Laptop 'from' the Desktop from within VMware which is running Win2K and we are using the Homesite editor. -And- it is fast!! We'll see how long it takes it to get slower. It 'appears' to get slower 'AFTER' long periods of idleness with many 'Apps' open.

    From user 'finders' on the: Forum Conversation concerning this problem:
    You might want to run "cat /proc/interrupts" had a similar thing recently with nvidia sharing IRQ with something else. If that's the case, you could add "NVreg_EnableMSI=1" into /etc/modprobe.d/50-nvidia.conf this fixed it for me. Could also check if vga bios is up to date, flash a new one or add "NVreg_UseVBios=0" into
    /etc/modprobe.d/50-nvidia.conf Maybe it's a powermizer issue, in which case the card will sometimes freeze due to adaptive powersaving. I always use AC so I've disabled it via /etc/X11/xorg.conf.d/50-device.conf

    Code:

    Option  "RegistryDwords" "PowerMizerEnable=0x0"
    Using: sudo /sbin/lspci -v we get:

    01:00.0 VGA compatible controller: NVIDIA Corporation G72 
               [GeForce 7300 LE] (rev a1) (prog-if 00 [VGA controller])
            Subsystem: ASUSTeK Computer Inc. Device 0346
            Flags: bus master, fast devsel, latency 0, IRQ 16
            Memory at fa000000 (32-bit, non-prefetchable) [size=16M]
            Memory at e0000000 (64-bit, prefetchable) [size=256M]
            Memory at fb000000 (64-bit, non-prefetchable) [size=16M]
            [virtual] Expansion ROM at fcfe0000 [disabled] [size=128K]
            Capabilities: [60] Power Management version 2
            Capabilities: [68] MSI: Enable- Count=1/1 Maskable- 64bit+
            Capabilities: [78] Express Endpoint, MSI 00
            Capabilities: [100] Virtual Channel
            Capabilities: [128] Power Budgeting <?>
            Kernel driver in use: nvidia
    

    The above info (You get a lot more -but- we only copied the Video Card portion.) is presented cause we wanted to make sure that our Video Card had the capabilities of using MSI -before- we went any further. We believe that the "experiment" with permissions change has shown that there is a problem somewhere in the permissions... and "root" is King. We haven't had any Freeze Ups for the last 4 5 days.

    Message Signaled Interrupts, in PCI 2.2 and later in PCI Express, are an alternative way of generating an interrupt. Traditionally, a device has an interrupt pin which it asserts when it wants to interrupt the host CPU. While PCI Express does not have separate interrupt pins, it has special messages to allow it to emulate a pin assertion or deassertion. Message Signaled Interrupts allow the device to write a small amount of data to a special address in memory space. The chipset will deliver the corresponding interrupt to a CPU.
    Refer: Wikipedia

    So now we are going to put all we have learned into effect. What's that???

    • Change it back to using the /etc/modprobe.d/50-nvidia.conf file.
    • Add NVreg_EnableMSI=1 to the 50-nvidia.conf file.
    • Holding off on the PowerMizerEnable. Need to know which one fixes it.
    -rw-r--r-- 1 root root 104 Nov 25 07:46 /etc/modprobe.d/50-nvidia.conf

     November 25th, 2012 / 7:53am  At this time, or close to it, we have made all the changes and are going to Re-Start the system. The conditions -BEFORE- the Re-Start were:

    1. 3 Dolphins - 1 displaying Laptop directory.
    2. 2 Firefox's - 1 with 3 Tabs other with 1
    3. 1 user Xterm
    4. 1 root Xterm
    5. Networked to the Laptop.
    6. 1 VMware with 1 Win Explr and editing this file via Homesite
    7. The Group was:(by -default-)
      video:x:33:ctaylor
    8. Operations are fairly fast.
    -Without- 50-nvidia.conf the permissions by default are:
    crw-rw-rw- 1 root root 195,   0 Nov 24 13:09 /dev/nvidia0
    crw-rw-rw- 1 root root 195, 255 Nov 24 13:09 /dev/nvidiactl
    

     November 25th, 2012 / 8:39am || AFTER the Re-Start  We immediately started up VMware and got to editing this file in Homesite via Win2K.

     # cat /etc/modprobe.d/50-nvidia.conf
    options nvidia NVreg_DeviceFileUID=0 NVreg_DeviceFileGID=33 NVreg_DeviceFileMode=0660 NVreg_EnableMSI=1
    
    -With- 50-nvidia.conf the permissions are:
     # ls -l /dev/nvidia*
    crw-rw---- 1 root video 195,   0 Nov 25 08:33 /dev/nvidia0
    crw-rw---- 1 root video 195, 255 Nov 25 08:33 /dev/nvidiactl
    
    The Group stayed the same:
       video:x:33:ctaylor
    Operations here initially are fast... with the following in execution:
    1. Networked to the Laptop.
    2. 1 VMware with 1 Win Explr and editing this file via Homesite
    3. 1 user Xterm
    4. 1 root Xterm
    5. 8:49am - NO Firefox's ... yet.
    6. 8:58am - Opened one Firefox and went to the openSuSE Forums.
    7. 9:00am - Opened another Firefox and started Googling for Smartphone Info.
    8. 11:26am - Opened another Firefox to check out some eBooks.

     November 29th, 2012 / 12:25am  Suffice it to say we have had the same operations going as above -plus-. However, just recently we came in to our "Systems" and the Desktop was in "Hyper" Mode. This is when its fan kicks in to Hi-Speed. It is sitting idle yet going strong. Last time we had a situation like this, it was because of PowerMizer. So we are gona use that fix that was mentioned above. Has nothing to do with our Display -but- just with our Power.


      X11 Section and PowerMizer

    We are creating our own X11 section. Appears that we need to get into its operation more. We did somewhat in the early days -but- haven't for quite a while cause... well cause things were working. Now they are not. What?? Two items in particular:

    • .xinitrc
    • Random Screen/System Freezes
    Refer: xinitrc and xsession and xinitrc play together

     .xinitrc - October 20th, 2012 / 2:35pm   In our home dir we have .xinitrc -or- IF we don't, create one by copying the .xinitrc-template into .xinitrc or copy /etc/X11/xinit/xinitrc to .xinitrc in your home dir.

    set -e tells bash, in a script, to exit whenever anything returns a non-zero return value.
    Set Builtin Shopt Builtin

    What does >/dev/null 2>&1 mean?

    Refer: xinitrc


      System Rescue

    Well, here we are, ladies and gentlemen... a crashed system that we did ourselves. As mentioned elsewhere in this document, this version is having a "Freeze Up" problem. The screen freezes and the only way out is a power off reset. Well, we were working on it -and- it appeared to be froze. We had two Firefox windows open, two Dolphoins and Win2K inside of VMware 8. We are not going to go thru all the dtails... just suffice it to say that we made some wrong conclusions -and- decisions. It turned out that our mouse batteries were dead!!

    Now then, somehow in all this screw up we screwed up our system!! We can not boot into Linux -but- we can get into Windows. Right now we are trying to use the "Rescue Portion" of the Install DVD. So far not much. We tried two of the "fixes" that we found on the Web. Well, one was our own devise. we moved .kde4 to .kde4.save and .xinitrc to .xinitrc.save and no effect. It is hanging in the new fancy Plymouth Animation SignOn. Using the ESC key we see the text scrolling by and find that the NetworkManager -and- LSB are failing to start. As it turns out the NetworkManager never does start in our system cause we do not use wireless on our Desktop.

    1. At boot-up use 'e' key to edit Grub2 current selection. Move down to the Linux line and add 'nomodeset' to the parameters.
    2. Above appeared to help -but- no fix. Still hangs at Plymouth end.
    3. Edited Grub2 again. This time added 'nomodeset 3'.
    4. Am now in command mode and signed on as root. Let's look at some log files in /var/log. (set_tr works so it is reading files correctly.) The ones of particular interest would be dated Oct 18th and 19th.
    5. We are finally gona use the multiple virtual console capabilities of this system. Under Alt + F1 to Alt + F3, the rescue system provides at least three virtual consoles.
    6. Alllllrighty now. We are out of ideas at the moment and we are just going to perform a 'zypper up' update to see what that does. Beats reloading the whole system.
      • Retrieved and built Packman Repo.
      • Retrieved and built openSuSE-12.2-Update Repo.
      • Listed a bunch of updates that will NOT be installed.
      • Listed 3 updates that WILL BE installed. libopus0, libvpx1 and libx264-128.
      • Listed and even greater number of packages that WILL BE upgraded.
      • The following package is going to change architecture:
        plymouth-scripts noarch -> x86_64
      • 166 packages to upgrade, 3 new, 1 to changearch... do it.
      • Finished. Got a warning that "Some running programs use files deleted by recent upgrade." Soooooo, we are going to do the FULL "System Restart".
            # shutdown -r now
      • Nope!! Didn't fix it. We are gona have to do our Re-Install. The one where we don't reformat... the Home Page. -But- .... hmmmmmm ... that may be where the problems are. Oh darn... oh darn...
      • SuperGrub2 ... Ah!! There is a SuperGrub2. SuperGrub has saved us before... perhaps this new one will.
      • Nope!! ... IF only we knew more. We will learn but for now we are just gona Re-Load.


      FireFox and Thunderbird

    You can change this preference manually until someone figures out where it has moved in the UI.

    (1) In a new tab, type or paste about:config in the address bar and press Enter. Click the button promising to be careful.

    (2) In the filter box, type or paste tabs and pause while the list is filtered

    (3) Double-click browser.tabs.onTop to switch it from true to false to move the tabs below the toolbars.

     July 6th, 2015/10:00am  Seems that Flash Player is no longer supported by Adobe on Linux. Test and check version:  Flash Player Help    Old and Outdated  

     August 17th, 2015/7:22am  We also have a problem with Gmail. Seems that stems from "gstreamer" and the fix, be it temp or perm, is to disable gstreamer. This can be verified at:   Mozilla Firefox  

    Credit;  I_A on openSuSE  -  AFAIK Firefox uses gstreamer as a backend for decoding mp4 files, to get it working properly you need to use gstreamer from packman as the one from the oss repo is crippled, there is an option to use ffmpeg instead for mp4 decoding in about:config see the preference media.fragmented-mp4.ffmpeg.enabled
     http://www.linuxveda.com/2015/04/02/...firefox-linux/  
    still you'd need ffmpeg from packman

    Ok, further on this...  from I_A on openSuSE   August 20th, 2015/3:28am

    > zypper lr -d  used to find out that Packman is 4
    
    # zypper dup --from 4  dup to packman
    
    
    16 packages to upgrade, 1 to downgrade, 4 new, 17  to change vendor.
    
    The following 4 NEW packages are going to be installed:
      libfaac0 libmad0 libsoxr0 libwx_gtk2u_qa-2_8-0-stl 
    
    The following 16 packages are going to be upgraded:
      amarok audacity fdupes libbluray1 libdvdnav4 libdvdread4 libgstinterfaces-0_10-0
      libmjpegutils-2_0-0 libortp9 libquicktime0 libsox2 
      libstreamanalyzer0 libwebp5 mjpegtools sox xine-ui 
    
    The following package is going to be downgraded:
      libmad-devel 
    
    The following 17 packages are going to change vendor:
      amarok                   openSUSE -> http://packman.links2linux.de                         
      audacity                 openSUSE -> http://packman.links2linux.de                         
      fdupes                   openSUSE -> http://packman.links2linux.de                         
      libbluray1               openSUSE -> http://packman.links2linux.de                         
      libdvdnav4               openSUSE -> http://packman.links2linux.de                         
      libdvdread4              openSUSE -> http://packman.links2linux.de                         
      libgstinterfaces-0_10-0  openSUSE -> http://packman.links2linux.de                         
      libmad-devel             obs://build.opensuse.org/KDE:KDE3 -> http://packman.links2linux.de
      libmjpegutils-2_0-0      openSUSE -> http://packman.links2linux.de                         
      libortp9                 openSUSE -> http://packman.links2linux.de                         
      libquicktime0            openSUSE -> http://packman.links2linux.de                         
      libsox2                  openSUSE -> http://packman.links2linux.de                         
      libstreamanalyzer0       openSUSE -> http://packman.links2linux.de                         
      libwebp5                 openSUSE -> http://packman.links2linux.de                         
      mjpegtools               openSUSE -> http://packman.links2linux.de                         
      sox                      openSUSE -> http://packman.links2linux.de                         
      xine-ui                  openSUSE -> http://packman.links2linux.de                         
    
    The above finally fixed my Gmail problem.

     August 25th, 2015 Flash And then we have the problems with Flash. No longer supported on Linux by Adobe. So the following is an alternative for it... sorta. Gnash... and Klash.
    However, my SWF file on my main home WebPage did NOT display corretly. The words in my Flash were missing certain letters; Capital 'A', 'R' ;Lowercase 'b', 'd', 'e', 'g', 'i', 'o', 'p'. There may be others but for my simple Flash those are the ones.
    Well, all this concerning gnash is for furture reference. It didn't work with my flash stuff so I reinstalled Flash. At this time, August 27th, 2015, I am trying to get my Android Phone Camera code to work properly.

    Installation Successfully Finished

    Packages

    • Installed Packages: 9
      audacity-lang, gnash, gnash-browser-plugin, gnash-gtk, gstreamer-lang, libagg2, libgnash, libgtkglext-x11-1_0-0, libjemalloc1
    • Removed Packages: 2
      flash-player, flash-player-kde4

    Statistics

    • Elapsed Time: 00:41
    • Total Installed Size: 17.51 MiB
    • Total Downloaded Size: 3.62 MiB

    Packages

    • Installed Packages: 2
      gnash-klash4, gnash-qt4


      The Printer for vers 12.2 & 12.3 & possibly for 13.1

    Equipment:  An HP Color Inkjet cp1700 Printer and a NetGear PS110 Printer Server
         /usr/share/hplip
         /etc/hp
         ~/.hplip

    Accessing your Printer via CUPS: http://localhost:631
      sudo lsof -i :631
      lpstat -r
      ps auxwww | grep cupsd

      sudo kill -9 PID
      sudo /etc/init.d/cups start
      sudo tail -n l /var/log/cups/error_log

    Some of the above was used in trouble shooting this setup/connection. IF you have a Dual Boot machine we highly recommend that you get your Windows side setup and working first -and- then try this. Just a thought...


    Because of our experiences in openSuSE 12.1 we are taking a little different approach this time. First we are going to check IF hplip is already installed -or- not. This is done by:
         rpm -qa hplip
    and we get:
         hplip-3.12.4-3.1.2.x86_64
    which indicates hplip is already installed on our system. (-And- we should have stopped here!!)


        ... Special here to say -STOP- and jump down to: Driver Installed ...
    These instructions are used to install the printer for both   12.2   and   12.3...     and probably for 13.1 -IF- we ever decide to install it. Cause of this you may see some differences in the names. Interpolate and continue. The stuff in between here and there is kept ... just because.     Really, for some reason we have 'always' had a hard time setting up our Printer... -and- we forget!! Also - Mainly cause it is different. -But- it is a fabulous printer and that is why we are sticking with it.

    However, we need/want to check IF we must install a newer version -or- not. Maybe. The current version of HPLIP, according to hplipopensource.com, is 3.12.6. We will download it from the site. The command to install it is:
         sh hplip-3.12.6.run
    Additional instructions on using the installer are available on the Installer Walkthrough page.

    A few items to note about what the Automatic Installation process provides:

    • Automatic compilation and installaton of the HPLIP package (to the /usr/share directory)
    • Installation of all options EXCEPT parallel support
    • Removal of previous installations of HPLIP and HPOJ packages
    • Assumes that all optional dependencies will be downloaded and installed
    • Provides installation of required dependencies
    • Asks to confirm Linux distribution
    • Automatically runs the hp-setup tool to finish installation and configure your printer

     Warning /Aug 17, 2012/10:58pm At this time the file is supposed to be for version 12.1. And on our first attempt it failed. We got: Permission denied. -And- we were root!! Well, that may have been the problem. We looked in the install files and there were the words "Do not install as root." Nope. That was not the problem. Got the same response when we tried it as our normal user.

    Ok, we found a dir named Installer and in it was a file named distros.dat. In there we found the SuSE restrictions to versions 11.4 and 12.1. We added 12.2... which was not enough. Turns out there is a whole section for 12.1. So, we copied it and changed the 12.1 to 12.2... and running it again. Nope. BIG MISTAKE. Should have left it alone!!!!! We don't know enough -and- they already had something installed that we hadn't even tried yet. Next time we will try what is installed first -and- only get the "newer" version IF we need it.

     Remove & Re-Install  Removed/cleaned out the newest attempt and then re-installed the previous one via YaST2. So, we will be working with hplip-3.12.4-3.1.2.x86_64.

    Driver Installed

    Ok, since the Printer Driver is already installed, we should be able to use YaST2 to install our Printer. Of course we are 'assumming' that you have installed the hplip Printer Driver via YaST2.

    The setup in YaST2 consisted of getting into YaST2, moving to the hardware selection, then clicking on printer.

    You are now presented with a "Printer Configurations" screen. Local and Remote are both selected. At this time we don't think that it makes any difference. (Read: YaST2 Printer) So for now we will leave them alone.

    Next we need to click on the  Add   button down at the bottom. This will do some searching for your printer and then present another screen. IF you have a Printer Server, as we do, it will probably NOT find it. So we:

    1. First click on  Run hp-setup . Even though we "installed" hplip it doesn't see it unless you do this. Now this turned out to be one of the more difficult to understand ... and we still don't. Anyway you select or try ... doesn't. We end up clicking OK and then starting over and not selecting this again -but- just go to the next step... the Connection Wizard. ... and it all goes smooth.
    2. Next Click on  Connection Wizard 
    3. From the connection selections (in our case) we selected:
      Access Network Printer or Printsever Box via
         TCP Port (AppSocket/JetDirect)
    4. This presented us with some Connection Settings that we had to fill in.
      • IP Address or Host Name: PSD55465 (192.168.0.150)
      • TCP Port Number: 4010
      • Optional - optional parameters (usually empty)
      • Test Connection - Now the test usually fails -but- IF you click on the Details button it will show that the connection is possible -but- it is not accepting data. This is probably OK. IF you get No connection possible - then it is NOT ok.
      • Select the Printer Manufacturer HP
      • IF all looks good, click on  OK   at the bottom.
    5. After clicking OK, we are returned to the Printer Configuration screen. Only this time our connection is specified at the top. And HP printers are listed at the bottom. As we scroll down the list we find 6 entries for our cp1700 Printer. We selected:
      HP Color Inkjet Printer cp1700 hpijs, 3.12.4 [manufacturer-PPDs/hplip/hp-color_inkjet_printer_cp1700-hpijs.ppd.gz]
    6. After the above selection we modified the Arbitrary Name from hp to hp_cp1700 and clicked on the select as default... and selected Letter as default Paper size. Then clicked  OK   at the bottom. It then created a new Printer Setup.
    7. Finally finished as we printed a Test Page. IF it lops off the bottom, then A4 was probably selected for the default paper size. Switch it to Letter and it should print OK. Yeah. We did it wrong the first time.
    Allllllright now... we have printing capabilities again.

    Printer Configuration
    HP Color Inkjet Printer CP1700 / printer
    Connected As socket://PSD55465:4010
    With Spool printer

    Queue Name and Spooler Settings
    Name for Printing: printer or hp_cp1700
    Printer Description: HP cp1700 InkJet
    Printer Location: Family Room
    Printer Model
    Manufacturer: HP
    Model: Inkjet Printer CP1700
    PPD Files
    1. HP Color Inkjet Printer CP1700 Foomatic/hpijs (recommended)(manufacturer-PPDs/hplip/HP-Color_Inkjet_Printer_CP1700-gimp-print.ppd.gz)   This was really selected in the previous version but I had to re-select it here.
    2. HP Color Inkjet Printer CP1700 Foomatic/gimp-print (recommended)(HP/Color_Inkjet_Printer_CP1700-gimp-print.ppd.gz)
    Connection - Direct TCP Port Printer
    Hostname of Print Server: PSD55465 (Netgear PS110)
    TCP Port Number: 4010
    Filter Settings - Configuration Options
    These are to numerous to list here and are just the settings that you like on your printer. I'm sure that most, if not all, will be able to figure this out by themselves.
    Restriction Settings
    In here you can set Users that may or may not use this printer or class.
    State and Banner Settings
    State(2): 1. Idle or printing    2. Accepting Jobs
    Banner Start: clasified, confidential, none, secret, standard, top secret, unclassified
    Banner End: clasified, confidential, none, secret, standard, top secret, unclassified


     Troubles  Ok. We are having trouble getting something to the Printer. The lights are a flashing on the Printer Server -but- nothing on the Printer. Sooooo... we will jump over to our Windows Media Center and check it there.

    Ooooops!! Can not believe it! We still have not reset up our Printer on the Windows side since our BIG crash either. Ok. We are not gona list all the steps and trials and tribulations for our setup on the Windows side. Suffice it to say, it was also a challenge. The NetGear PS110 is out of date and NOT supported anymore. Matter of fact, neither is our Printer!! Anyway, finally got a Test Page printout on the Windows side. So, we know the connections are working.

     ALLRIGHTY NOW!!  We successfully printed out a Test Page on the Linux side! So the above steps are correct. Just had to get the Equipment to co-operate.


      Applications

    This section will contain some info about some, not all, of the Applications that we have installed on this latest System. Since we decided to go the 64-bit route we have had to get new copies -or- versions of some of our favorite programs.


     Geany  Geany is a text editor using the GTK2 toolkit with basic features of an integrated development environment. It was developed to provide a small and fast IDE, which has only a few dependencies from other packages. It supports many filetypes and has some nice features.
       Our favorite, nedit, which was retired by others, is now being retired by us. It does not work in the 64-bit environment and we just don't feel like finding the source and recompiling it. Leastwise, not at this time. That may change... depends on how this Geany works out.
    This is Geany 0.21 installed via YaST2.
    ** Refer: Geany Home
    Found this later: Nedit


     Nedit  Well, the last item mentioned above was a good find -except- it wouldn't compile. It was missing Xm/Xm.h. So we looked for a version that was compiled for a 64-bit Linux. We found one at: RPMpbone.net which contained:

       nedit-5.5-31.1                     Thu 01 Nov 2012 05:57:44 AM MST
       openmotif-libs-2.3.3-2.1.9         Thu 01 Nov 2012 05:57:42 AM MST
    
    This was nedit-5.5-31.1.x86_64.rpm
    NEdit is a GUI style plain text editor for workstations with the X Window System and Motif. NEdit provides all of the standard menu, dialog, editing, mouse support, macro extension language, syntax highlighting, and a lot other nice features (and extensions for programmers).
    It looks like we are gona have to find the missing files so that we can compile it ourselves. OK. We did. They are in the openMotif-devel libraries and we were gona install them -but- they would drag in or include a whole bunch of other stuff. At this time we are not going to accept this. We found a working version so we are just gona wait.


     QPS  Qps is a visual process manager, an X11 version of "top" or "ps" that displays processes in a window and lets you sort and manipulate them. It displays some general system information, and many details about current processes.
    RPMpbone.net which contained:

       qps-1.10.16-5.6                    Thu 01 Nov 2012 09:11:34 AM MST
    
    This was qps-1.10.16-5.6.x86_64.rpm
    RPM found in directory: /mirror/ftp.opensuse.org/factory-tested/repo/oss/suse/x86_64

      Qps can:
    • Change nice value of a process.
    • Alter the scheduling policy and soft realtime priority of a process.
    • Display the TCP/UDP sockets used by a process, and names of the connected hosts (Linux only).
    • Display the memory mappings of the process (which files and shared libraries are loaded where).
    • Display the open files of a process, and the state of unix domain sockets.
    • Kill or send any other signal to selected processes.
    • Display the load average as a graph, and use this as its icon when iconified.
    • Show (as graph or numbers) current CPU, memory and swap usage.
    • Sort the process table on any attribute (size, cpu usage, owner etc).
    • On SMP systems running Linux 2.6 or later (or Solaris), display cpu usage for each processor, and which CPU a process is running on.
    • Display the environment variables of any process.
    • Show the process table in tree form, showing the parent-child relationship.
    • Execute user-defined commands on selected processes.


      System Updates

    Should have put this in sooner -cause- we already allowed 6 updates... which really became more, but that is another story. Anywho, we believe that they were accepted and installed 3 days ago. We were hoping for a time fix -but- it did not. Turned out to be an install problem and the fix was correcting a file, /etc/adjtime. Please see: System Time

     July 26th, 2012  Today we have some more updates... 31 to be exact. (This is according to the little notifier down in the TaskBar.) Of these, 11 appear to be critical. Most of the non-criticalones appear to be for the "Entertainment" side of the System. So we will try to accept and install them via the little guy at the bottem... which did NOT work the last time. We had to do an Online-Update. Nope. It did not work again. So we will go to the Online-Update again. Had some trouble with gtk3. Ignored it!!

    Finished the Update and Re-Booted. System came up to our Desktop -and- with the correct date and time.

     August 31st, 2012  Today we specified the current 12.2 repos:

    #  | Alias                     | Name                               | Enabled | Refresh
    ---+---------------------------+------------------------------------+---------+--------
     1 | repo-non-oss              | openSUSE-12.2-Non-Oss              | Yes     | Yes    
     2 | repo-oss                  | openSUSE-12.2-Oss                  | Yes     | Yes    
     3 | repo-source               | openSUSE-12.2-Source               | No      | Yes    
     4 | repo-update               | openSUSE-12.2-Update               | Yes     | Yes    
     5 | repo-update-non-oss       | openSUSE-12.2-Update-Non-Oss       | Yes     | Yes    
    
    Performed a 'zypper up' and got a functioning system with the wrong time. Kind of expected this cause we were not asked which BIOS time that we wanted. We want LOCAL and it changed our adjtime file to have UTC. Edited the file and changed it to LOCAL and the time is correct again.

     January 13th, 2013  Performed an Online Update today. Got approximately 65 updates. Xorg was not in the list.


      Bug fixes

     Bug 757370   - Firefox and Dolphin launchers cannot be removed from taskbar.

    Just go to the folder .kde4/share/config/ and open the file:-
    
    plasma-desktop-appletsrc
    
    Look for the entry as shown below and delete or comment it out:-
    
    [Containments][1][Applets][5][Configuration][Launchers]
    Items=
    browser=preferred://browser, , ,\s
    filemanager=preferred://filemanager, , ,\s
    

      Features of 12.2

    Hilights that we are interested in. For further info please consult the Reference.
       KDE 4.8.4 "release 2"
       GNOME 3.4
       Xfce 4.10
       KDE 3
       systemd
       Grub2
       Plymouth
       Kernel 3.4.6
       GCC 4.7.x
       glibc 2.15
       Qt 4.8.1
       Firefox
       LibreOffice
       Faster and prettier Dolphin
       In Gwenview navigation got easier


    Refer: Sneak Peak


      James from Austin Scripts

    James from Austin Goodies

     grub2cmd  GNU Grub2 Command Help/Config Editor - Version: 1.94
    Refer: Grub2Cmd

     nsf  N.S.F. - New Script File, Bash Script File Header Creator - Version 2.81
    Refer: NSF

     sysedit  SYSEdit - System File Editor - Version 1.00
    Refer: SYSEdit

     fastboot  FastBoot for Grub 2 or Grub Legacy Menu using Kexec - Version 2.13
    Refer: FASTBoot

     swat  Samba Web Administration Tool - Setup & Creation Script - 1.04
    Refer: SWAT


      Blend Info

    Blend is a free, fully standards-compliant CSS template designed by Free CSS Templates. This free template is released under a Creative Commons Attributions 2.5 license, so you're pretty much free to do whatever you want with it (even use it commercially) provided you keep the links in the footer intact. Have fun with it :)

    This template is also available as a WordPress theme at Free WordPress Themes.

    Yep! This is a copy of the Template. Nope! We haven't deleted, or edited, all of the "Example Sections"... yet. -And- we get quite verbose in some of our topics too, sooo... you might want to pay attention to the "In Page Jump List" over on the Left. Now then, this is supposed to be about openSuSE 12.2 -but- we have just encountered Windows 7 via our New Laptop -and- we are using it more and more. Not only that, the Networking of BOTH Systems is so good that we are able to link these two together as one. Haven't been able to do that for a long, long time. Course, in reallity we didn't have two powerful machines avaliable either. Only got to collaborate with my wife's machine very little. Now we have two available FULL time!! So, the Laptop and Windows 7 will be a bigger part of this than usual... -or- not.

    Now then, as stated above, we haven't removed all of the "example" sections... yet. One of them is this Comments section. We believe that this had something to do with possibly adding a "blog" so that visitors could leave their comments. We, however, are NOT ready to deal with that aspect. We at one time had a section to leave comments and it got thoroughly abused!! So, the Comments section will just be for us... for now. These will be the sporadic comments added at later times.
    Refer: What is a Blog?

    An H3 Followed by a Blockquote:

    “Donec leo, vivamus nibh in augue at urna congue rutrum. Quisque dictum integer nisl risus, sagittis convallis, rutrum id, congue, and nibh.”

    Bulleted List:

    • Lorem ipsum dolor sit amet, consectetuer adipiscing elit.
    • Phasellus nec erat sit amet nibh pellentesque congue.
    • Cras vitae metus aliquam risus pellentesque pharetra.

    Numbered List:

    1. Lorem ipsum dolor sit amet, consectetuer adipiscing elit.
    2. Phasellus nec erat sit amet nibh pellentesque congue.
    3. Cras vitae metus aliquam risus pellentesque pharetra.